Part I: Building a Homesite
TOOLS
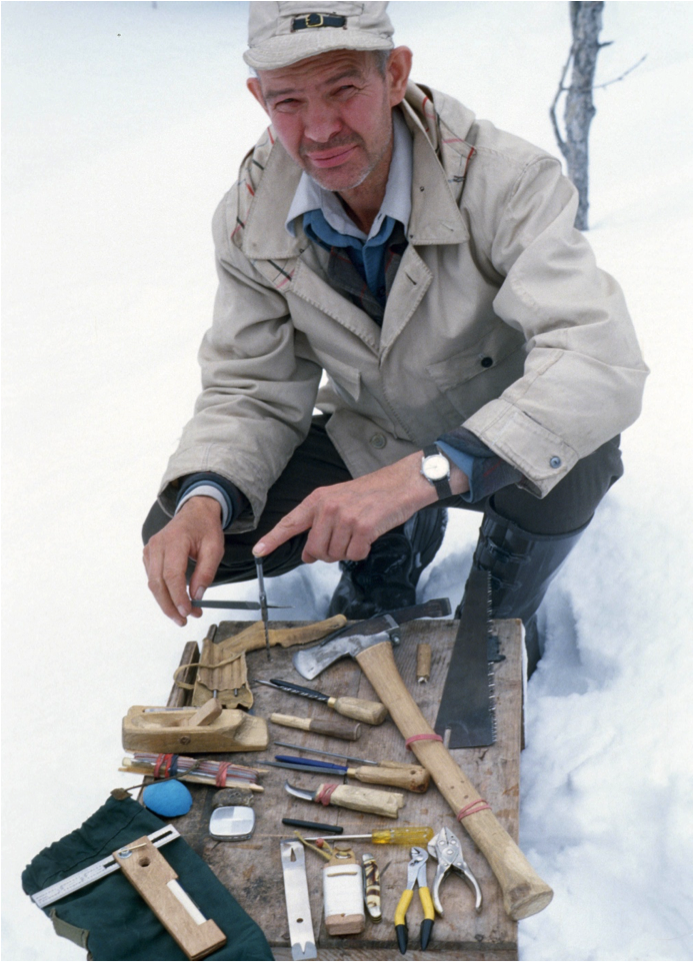
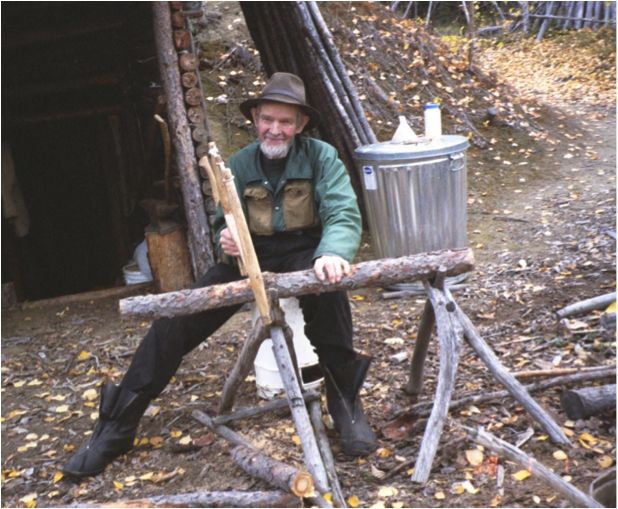
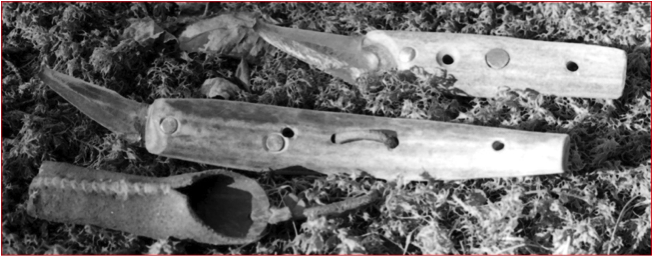
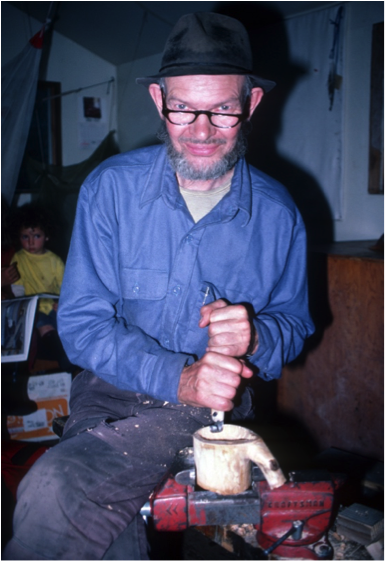
Oliver with some of his handmade tools. Image by Dorene Cameron Schiro
Oliver was resourceful in making his own tools from salvaged goods and from the natural materials he found in the woods, each constructed or modified to efficiently accomplish the immediate purpose for that tool. In the following essays, Oliver discusses many of his most-used tools.
MINIATURIZED DRILL SET
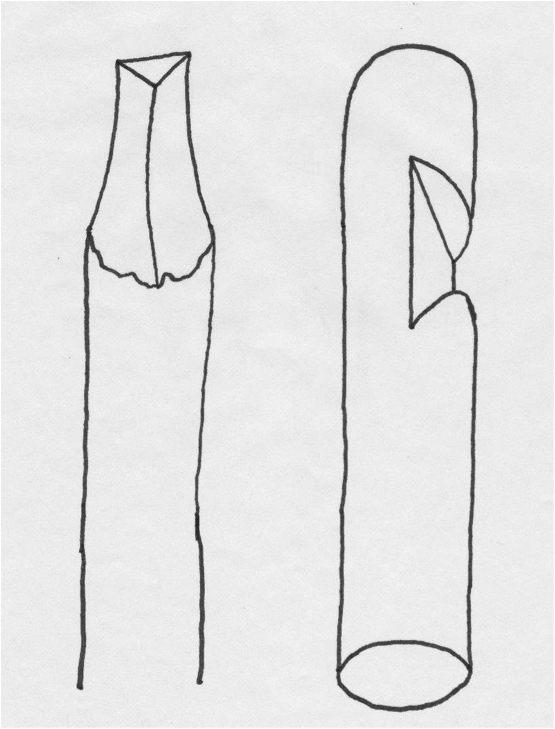
This is a picture of little drill set and tool kit that I designed:
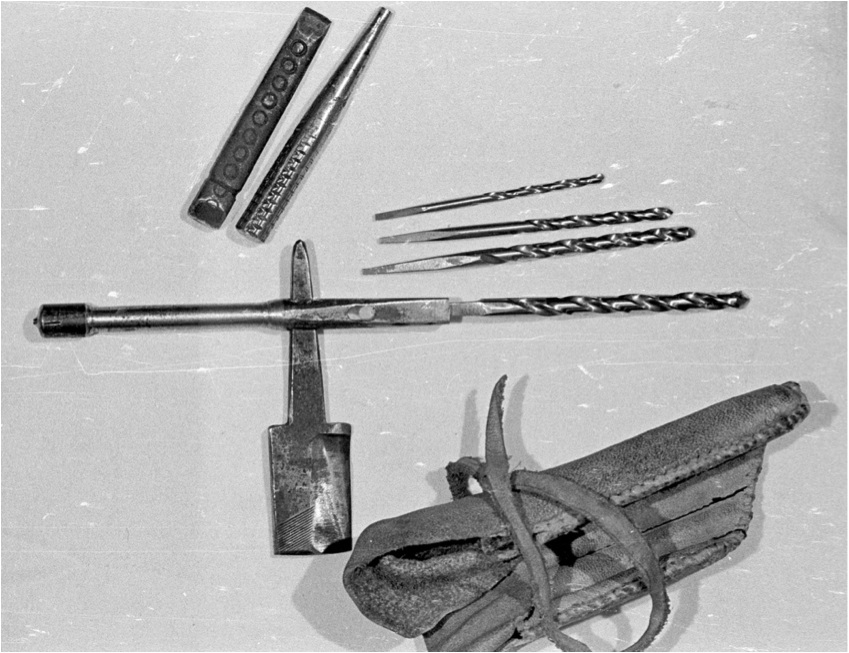
The mini drill set parts, from top left moving clockwise: cold chisel, center punch, three drill bits, brace/handle with drill bit inserted, combination tool inserted into the drill shaft, leather holster bag.
Image by Curt Madison
As you can see in the picture, several items fit into the leather holster bag. In the image, the broad, flat tool beside the left edge of the holster bag is a combination tool I made out of a file. The pointed end is a center punch. The image shows my other standard center punch, too. It is the tapering tool directly above the combination tool. (A center punch is a tool with a sharp point used to create an indentation that marks the center of a hole to be drilled. The hole steadies a bit when drilling.)
The wide part on that combination tool is a miniature side-cutting cold chisel. [A cold chisel is a tool made of tempered steel used for cutting cold, unheated metals.] A side-cutting cold chisel has one sharp edge. The back edge is for striking with a hammer. The cold chisel shown has been sharpened and hardened a number of times. [See the chapter on “Blacksmithing”] The cutting edge is sharpened from both sides, like an ordinary cold chisel. I use a pair of vise-grip pliers as a handle for this side-cutting cold chisel, which allows me to cut metal in a variety of situations, including opening cans.
One time some friends of mine went up the Ambler River with me. The friends set up camp but didn’t have a suitable stovepipe—the one they’d brought was the wrong size. I used that little combination tool to open up a metal 5-gallon gas can lengthwise to make a joint of pipe that would connect the pipe that they had to their stove.
* * *
The long tool that crosses the combination tool in the image is a holder or brace to receive drill bits. On its right side, a drill bit is inserted into it.
The long tool that crosses the combination tool in the image is a holder or brace to receive drill bits. On its right side, a drill bit is inserted into it.
This brace was made from the shank of a large screwdriver that I cut off and annealed. I drilled an inlet into one end of the shank. Bits can be inserted into this inlet just like the bits for a multi-head screwdriver.
To shape the inlet, I forced the tang of a square file into it as far as he could, then heated it red hot. I clouted that tang further into the hole and pounded on the file shank. That process resulted in a square, tapered inlet that acts as a chuck [specialized holder for a drill bit].
In the picture above, a drill bit is inserted into the brace. Three other drill bits sit above it.
When drilling, the strong downward pressure caused the bits to be wedged into the brace so tightly that it became difficult to pull them back out. I solved this by drilling a separate ejection hole right through the chuck end of the brace [The visible hole near the center of the brace in the picture is the ejection hole.] A center punch could be inserted there to force the bit loose. It then could be easily pulled out.
Another hole in the brace handle, farther up from the ejection hole, near where the shaft changes size is for inserting the combination tool to serve as the drill handle. Other items can be inserted as a handle instead, such as an ordinary file.

Oliver demonstrates the mini drill with a file tang inserted to give him purchase to twist the drill.
Image by Dorene Cameron Schiro
At times, I’ve used a cartridge case from a .38 pistol bullet to cover the head of the drill to protect my hand when turning the brace. The cartridge case fit snugly over the upper end of the brace and provided a smooth surface for me to grip. This is not shown in the image above.
* * *
The tool at the top left in the image, with the little circles, is an ordinary cold chisel. I made it from the handle of a pair of broken pliers. The little circles were part of the original pliers.
I cut off that section of the pliers’ handle, pounded it flat, filed the end, and then hardened it. [For information about hardening steel, see Oliver’s essay on “Blacksmithing”.] The tool is about 3/8 inch across at the cutting edge. One end is sharpened for cutting, the other end is flattened for pounding on.
Commercial cold chisels vary a great deal. Some of them can be sharpened with a file, but some are so hard that they can only be filed with a sharp new file, which will wear very quickly. The only way to sharpen that little chisel of mine is with a hone because it is so hard.
I’ve used that little cold chisel to open cans and to cut metal. When I’ve had a nut that was frozen onto a bolt or the end was riveted over so it wouldn’t come loose, I’d take that cold chisel, cut the side of the nut, take the nut off, and get the bolt out.
* * *
The holster is made from a piece of commercially tanned leather. I used a piece that was left over from making moccasins. With the tools inside the holster, each in its own pocket, I can fold a flap over the tool tops and then roll them up into a small bundle. I designed the kit so it would not be too bulky.
My little tool kit came in handy often!
FROES
A froe is basically a side-cutting chisel with a handle. It is used to cleave wood by splitting it along the grain. The sharpened edge is away from the handle, and you strike the upper edge of the blade with a club or mallet.
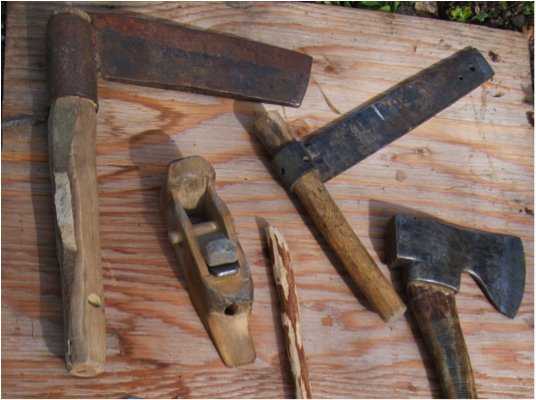
Two of Oliver’s froes (along with an axe and a hand plane). The froes are the tools shaped like right angles. Image by Molly Rettig
Suppose you are making wood shingles; a froe would be the right tool to use.
Starting with a block of wood 20 inches long, you set your froe on top of the block of wood, with the handle vertical and the blade back maybe 3/4 inch from the edge. Using a wooden club, you drive the blade down into the block to start your split, similar to using a chisel. Then you pull on the handle to widen the gap and split that piece off. The handle is maybe 18 inches long, so you have good leverage.
The thin boards that you split off of the block tend to be tapered, and they’re rough on the lower end, so you usually turn the block over and split the next shake starting from the other end. These rudimentary shingles are called shakes or shooks.
Once you have a pile of shakes cut, you can take your drawknife [a hand tool used to shape wood by removing shavings] and true them up into nice shingles if need be.
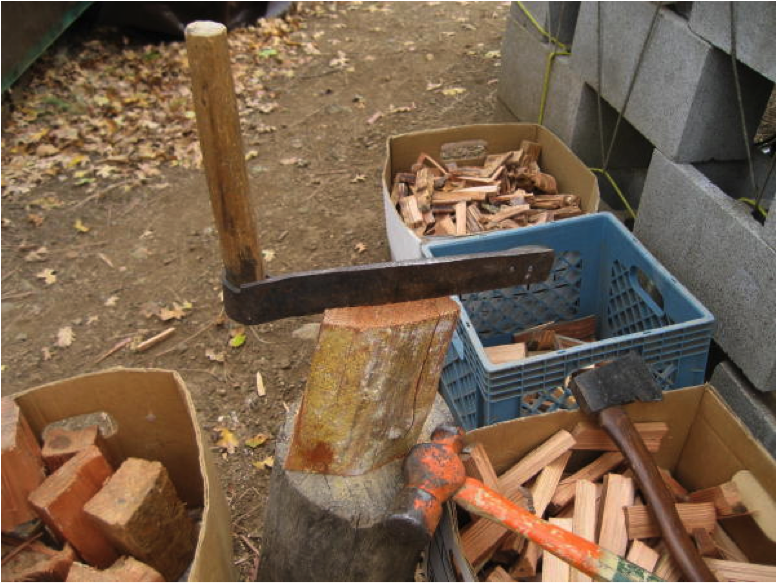
Froe in action, making slabs for chopping kindling.
Froe by Oliver Cameron, image by Ole Wik
To hold the shakes in place while you’re working on them, you can make a shaving horse. You put the end of the shake under the crosspiece and push the crosspiece with a foot lever to clamp it down.
You can use the froe in a similar manner to cut kindling or other kinds of slabs.
Shaving horse, as used by some artisans in Cantabria (Spain). The user pushes the pedals forward to clamp the work in place. (Image credit 8)
I also use my froe for splitting a pole. I drive the blade into the end, with the handle parallel to the pole. As I pull on that handle, the blade pries the two halves apart. The cutting edge is against one side, and the heel is prying against the other.
You don’t want to try to split the pole by just driving the froe down through it. That would cause the split to run off center because the blade is only sharpened on one side. Instead, you just split it ahead a little ways, slide the froe a little farther down into the split, and do it again.
For splitting poles, the handle has to be long enough for leverage. If the blade is 3 inches and your froe handle is 15 inches long, you’ll have leverage against the stick you’re trying to split.
To split a small willow, you don’t need leverage—you can just pull it apart with your hands. In some circumstances, I just use a knife. The grain in the willow will want to start twisting, so I’ll use the knife to keep it splitting more or less down the center of the stick.
I have a hunting knife with a sturdy handle and a blade that’s about 1-1/4 inches deep. I can drive on the back of the blade to use it as a froe.
My actual froe is a little wider than most froes. That extra width allows me to drive it farther down into the pole. It’s one thing when you are using cedar that splits easily, but when you’re trying to split poplar or spruce, you want some heft to assist you.
I built a frame for splitting larger poles. It looks like a short ladder but with only two crosspieces nailed to the uprights, toward the top. The uprights are each about 5 feet long, parallel to each other, 2 feet apart. The first crosspiece is down a bit from the ends of the poles with the second crosspiece further down another 3 inches from the first one.
The frame is standing when I use it, leaning at a 45-degree angle against two trees standing near each other. The uprights fit outside the two trees so it can’t tip over to the side.The top crosspiece supports the frame, resting on the trees.
To use the frame, I poke the end of the pole I want to split through the gap between those two crosspieces, more or less parallel to the ground. I pound the froe into the near end, pull on the handle, and tip it to start my split. As the split proceeds, I pull the pole out of the frame, bit by bit.
I push down on one side a little more than the other side, which is more or less free. Sometimes the split is kind of long, and I’ll have the top half of the pole on my shoulder and push on the lower one alongside of me.
If the split starts to run off center, it can be corrected by bending one side more than the other. Using the frame, the only way I can do that is to bend it down toward the uprights. If need be, I flip the work and push the other side down.
A tree grows both up and out. New shoots grow upward, while new sapwood grows just under the bark, making the tree wider. That sapwood eventually becomes heartwood. This upward and outward growth adds taper to the tree.
You should start splitting from the butt [wide] end. From there, the grains from both sides will be feeding toward the center, so the split won’t tend to run off center as much.
Some pieces of wood are quite free-splitting. But the same type of wood, grown under different situations, can be very difficult to split.
The indigenous people here were well aware of that. They didn’t used to have buck saws or rip saws, so they searched for wood that would split true and easy.
There is a place that is named because the wood there is easy to split. It is a stream called Quapsissut. [Quapsissut enters the Kobuk River about four miles downriver from Oliver’s place in Ambler. The place name means “they split easily” and the cottonwoods there split like a dream.]
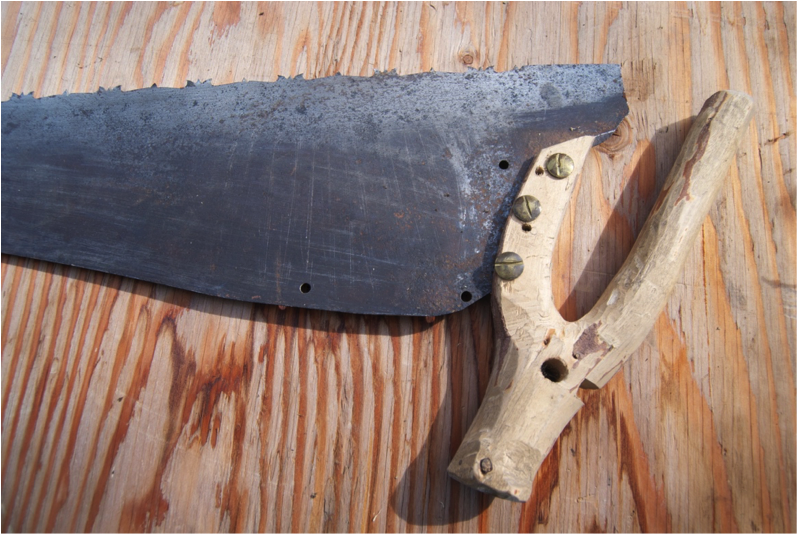
LOG ROLLING TOOLS
Logs and timber need to be turned, lifted, and pried in various circumstances. The original traditional tool for this purpose was called a ring dog or a cant hook. [A cant is a partially sawn log with at least one flat side.] In the mid-19th Century, peaveys emerged specifically for river drives, to move logs more effectively in the water.
Both cant hooks and peaveys consist of a handle with a swing hook. The differences between the two are the end of the handle and the way the tools grip a log. A cant hook has a small toe hook on the end, which provides a second biting edge. A peavey has a point on the end, which is used to separate logs.

Cant hook (top) and peavey (bottom). Today these tools are used interchangeably and are capable of doing the same jobs, so it comes down to personal preference when choosing between the two.
Drawing by Brady Wedman
Some cant hooks and peaveys have a funnel-shaped pocket where the wooden handle fits [see funnel-shaped end in image below]. Others have a strap to hold the tool to the handle. The strap is rather wide, so that it has quite a bit of surface against the wood. The ends are made in such a way that the strap can be bolted onto the handle.

Lumberman rolling logs in the water. (Image credit 9)
A ring dog is the early form of the cant hook. It is essentially a swivel hook on a pole with nothing to hold it in position.
A ring dog on a pole. Drawing by Brady Wedman
I made my own ring dog[also called a log wrench]. You can see my version in the photograph below, between the wood plane and the ulu [semi-circular Inupiaq knife].

Oliver’s handmade ring dog.
Image by Sasha Wik
My ring dog is designed to be used with a birch pole that you stick through the ring shown in the image. I have a fairly thick walking stick that’s maybe 2 inches in diameter. I slide it into the ring of the ring dog and in effect I have a portable cant hook. It’s a real handy thing when I’m out working a log that isn’t very big, and yet I need to pry it to roll it over.
I made the ring dog from 1/4-inch rebar. I use rebar for making various items. It’s fairly easy to file the corrugations off to make it smooth.
One of the requirements of rebar is that it be soft enough that you can bend it into a fairly short curve without breaking it. Yet the steel has quite a bit of carbon in it, which makes it stiff. You want that stiffness when its being used to reinforce concrete. I had to anneal the rebar in order to bend it. [To anneal is to heat and cool metal slowly, as described in the essay “Blacksmithing.”].
The hooked end that’s in the corner of the picture is what digs into the log. The hook is maybe 1 inch long and is at roughly right angles to the body of the blade. The hook was round to start with, but I flattened it so it could bear more pressure.
The whole tool, from the ring to the end, is 10 inches long. The length of the hook shaft has quite a bit of curve to it. If it’s too straight, the hook won’t bite into the log.
Where the shaft meets the ring, I flattened the rebar rod and drilled a hole through it. The hole is filed oblong to allow the hook to swing. You can also get a hold of the hook and keep it close to the handle, if you want.
I’ve never seen another ring dog made like mine. I have a couple of large peaveys and a cant hook, too. My ring dog was an obvious adaptation, made from the resources I had at hand. It’s more portable. I can drop it in a sled bag and go, and if I need it, I’ve got it. It’s easy to carry.
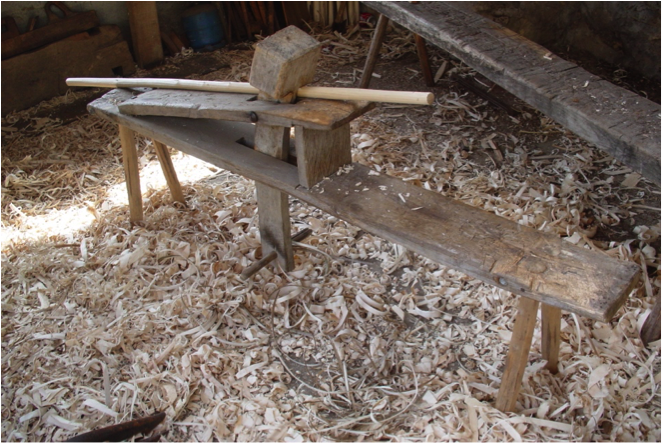
SAWHORSES
A sawhorse is a support used beneath a plank or pole to support at a working height and to hold it in place while one is sawing.
I make my sawhorses so that they stand alone and can be moved independently. My sawhorses consist of two parts: a one-piece, upside-down crotch of a tree to make two of the legs and a single stick to make the third leg. Since my horses are three-legged, rather than the more common four-legged variety, I don’t have to worry about an absolutely level spot on which to set them.
Two of Oliver’s sawhorses supporting a pole.
Image by Curt Madison
Big cottonwood trees have desirably shaped branches for the crotch. For the first piece of a sawhorse, I cut off a cottonwood 6-8 inches below such a crotch, trim the two limbs, and turn it upside down. That puts the trunk part at the top, so that I have a larger piece of wood to work with where the third leg joins it.
There are two ways to attach the single leg so that it sticks out to make a tripod. Sometimes I drill a hole through the crotch where the two branches meet and put the third leg through as in the photo below.
One of Oliver’s three-legged sawhorses. Image by Tonya Schlentner
My other way of attaching, is a dovetail notch which is cut into the side of the wood, as shown in the drawing below and in the first photo above.
The two legs that come together for the dovetail don’t meet at right angles—that would put the legs too far apart. Instead, I lay the third leg alongside the forked piece to get some idea of the best angle and then cut the notch for that angle.
5 inches is an ideal diameter for the base piece of the crotch where I cut the dovetail notch. To visualize the dovetail notch, imagine a drawer with walls that slant inward, where the top of the drawer is narrower than the bottom. Imagine also that the drawer gets narrower toward the back end. You could push the drawer in only so far until it would jam. At that point, you wouldn’t be able to lift it, either.
In this analogy, the drawer represents the third leg of my sawhorse. You can see that I have to make my saw cuts for the notch in such a way that they are converging toward the top of the sawhorse, with the walls of the notch slanted inward. I make those cuts about 1-1/2 inches deep.
Next, I whittle the end of the third leg until it is shaped to fit into the dovetail. Like the drawer in our example, this leg gets gradually wider so that it wedges tight. This third leg takes a lot of beating and rocking with use. It will slide in a little more over time as the wood dries and shrinks, with the result that the top of the horse gradually leans toward that leg. I allow a little extra length at the beginning for that, and when the sawhorse leans too much, I simply make a new leg. This third leg also needs plenty of length above the notch to create one side of the “V” where the work rests.
As a final touch, after I insert the third leg, I use my folding saw, with a narrow blade, to shape the upper protruding part of both legs so that there is a shallow groove for the firewood logs to sit in while I cut them.
.
Dovetail notch. Third leg piece is shaped to fit into the notch. Drawing by Jeremy Jensen
Detail of dovetail joint attaching crotch to pole. Drawing by Jeremy Jensen
If I have a long stick to cut for firewood, I set the horses farther apart. As the stick gets shorter, I move one horse toward the other. Since I set the horses up with the single legs on opposite sides, the two of them will fit close together.
Sawhorses with the single legs on opposite sides.
Image by Tonya Schlentner
When I am down to the final cut on the stick, there’s no projecting end, so I’ll have to make the cut between both of the support points. When I’ve sawed almost all the way through, the wood will start to sag and pinch the blade. I turn the piece over, saw most of the way through the other side, and then hit it with an axe to break it in two.
Often when I finish cutting firewood, I’ll spread the horses apart again and lay the next day’s stick of firewood in them. Then I have something to go out and sit on while I’m chewing on a toothpick.
I have learned one additional handy use for my sawhorses. When I build a cache out of poles or small logs, very few of them are really straight. When I lay a green log across two sawhorses, it naturally sags in the middle. Then I remove the bark on the upper side and leave it on the underside. The bark side goes on the outside of the cache.
As the logs dry out, the remaining bark clings tightly to the logs, so they looked natural. The bark takes the place of paint and makes the cache fit in more with its surroundings. That way it doesn’t look like a naked building.
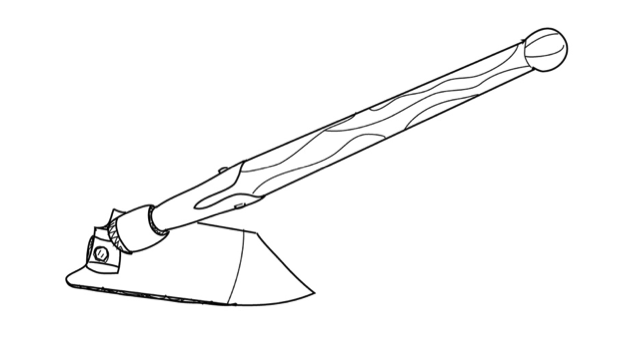
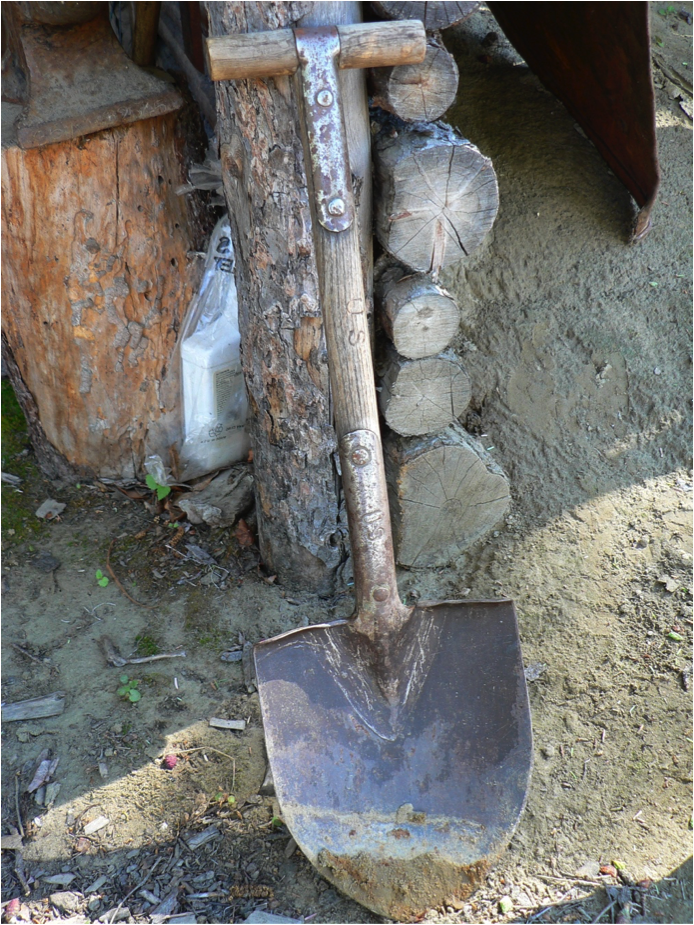
SHOVELS
Shovels are very useful tools. I have several that I’ve modified for various uses.
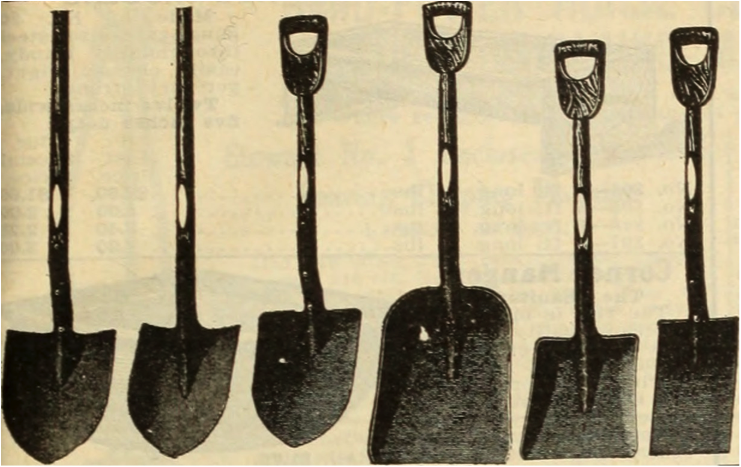
A variety of shovels. The round point shovels Oliver describes are shaped like the three on the left. The tool on the far right is a spade, with less curvature than a shovel, useful for cutting blocks of moss for a sod house. (Image credit 12)
I’m always conscious of weight when I’m bringing things out to my homesite and tools can be heavy. I have a lightweight No. 2 round-point shovel. It has a turned-up lip on each side of the handle, where I can push down with my foot. This allows me to use it as a spade for cutting through moss or roots.
Shovels come with different degrees of pitch to the blade. I like to have quite a bit of pitch.
For total length of the shovel, I like to have the handle reach as high as my hip. That way, when digging, it’s easier to pull up the dirt.
My shovel is sharpened like a blade on one side, from the point right up to the lip, but not corrugated like an army shovel. I file the inside edge of the shovel to sharpen the blade. A shovel with a sharp edge can also serve as a scythe.
Another shovel I have is a round-point shovel half the size of a regular one. When I make holes in ice to dip water or to check the ice’s thickness, I use the smaller shovel.
I also have an army surplus trenching tool which I modified into a useful and unique shovel. I fastened the blade of the trenching tool to the root of young birch tree. The trenching tool had a U-shaped fastener with a hole through it. I fitted the root tight in that hole and put a bolt through it.
The root that I chose had just the right angle to create a shovel similar to a hoe or an elbow adze, with a 3-foot-long handle. The shovel blade will cut deeper into the soil than either a hoe or an adze. I use this tool for cutting sod, along with an axe. I cut in from two sides and start lifting the sod block. If it hangs up, I reach under there with my axe and cut it loose.
Trenching tool. Oliver used the blade part from an army surplus version to make his tool. Drawing by Brady Wedman
I also have a WWI trenching tool that has a T-handle. It doesn’t fold. I use it for taking ashes out of the stove. The blade has been quite hot a few times, but it still works.
Oliver’s World War I trenching tool. Image from the Dammann collection
The smallest shovel I have is a hand trowel. It fits in my hip pocket, and I carry it with me. Where there are trees leaning over a trail, I’ll use the trowel to dig around the roots so I can cut the tree off below ground level. That way the stump doesn’t remain to snag my sled. I also use it to bury dog leavings.
SAWS
Sat Sarbat Khalsa with bow saw. Image by Devta Khalsa
Oliver was an expert in tuning his saws to suit his needs. In the next essays, he shares some of his knowledge about how to make and alter saws for best use.
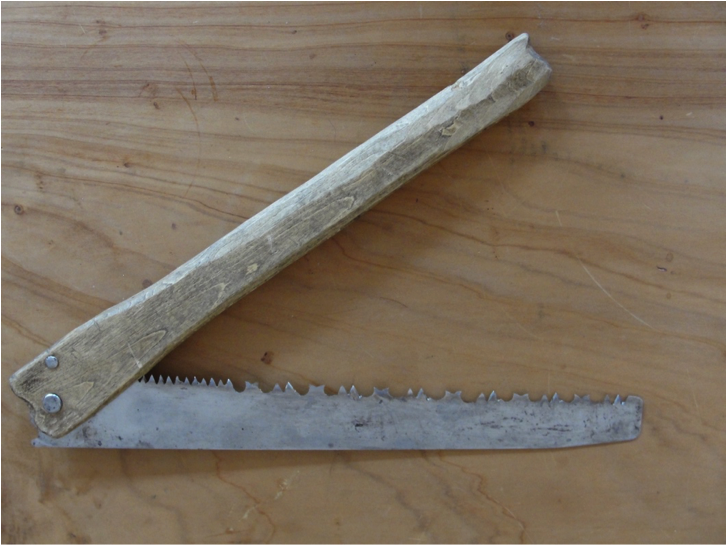
BUCK SAWS
I never carry a bow saw. Instead, I make an old-fashioned buck saw on the fly, so that when I’m out and traveling light, all I have to carry is a blade. [A buck saw is a hand-powered frame saw often used with sawhorses to make cross-grain cuts on wood.] I get some 30- or 36-inch blades and coil them in a cake tin, along with a few other small tools. Then when I’m out traveling and camping in the woods, I make a buck saw frame.
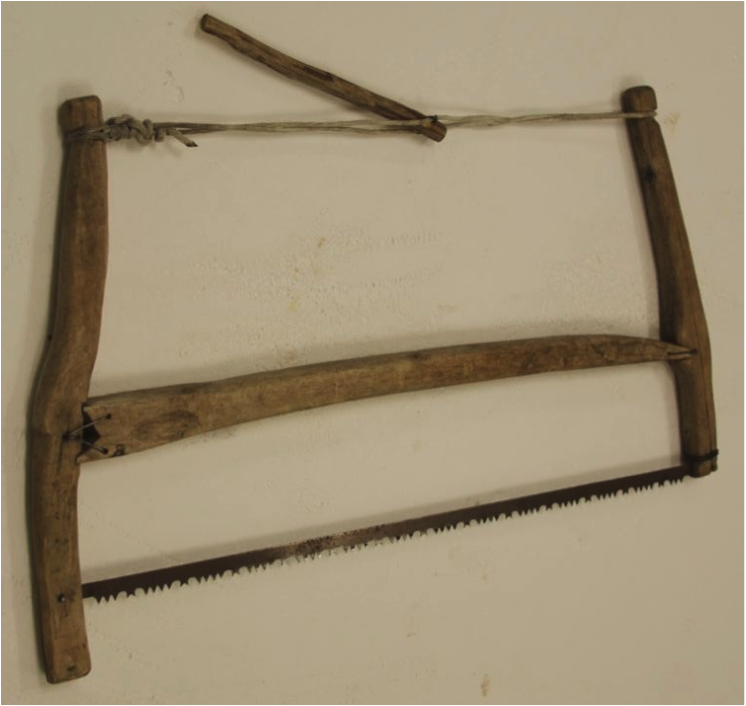
Oliver’s Buck Saw
Image by Molly Rettig
To make my frame, I find two slightly curved sticks for the uprights, at least 2 feet long and a little bigger than what I want for the finished job. When you are actually using a buck saw, it’s a bit advantage if one handle, or upright, extends down below the blade. Finding two sticks of different length but with similar curves is ideal. I whittle them down, starting from the middle and working toward each end, leaving the middles a bit fatter so that I can cut notches there without weakening the uprights.
I lay the uprights apart the distance of my saw blade’s length, with the insides of the curves facing each other. Thus, for a 30-inch blade, I lay them 30 inches apart. I put my saw blade across the lower ends of the uprights to gauge their exact placement in relation to each other. Then I adjust them to measure for the length of the crosspiece that goes between them.
The crosspiece is shaped kind of like an arrow, with a pointed end and a nock end [the butt end where the arrow fits into the string]. The pointed end doesn’t come to a sharp peak, but rather is rounded a little bit to match a hollow notch in the upright. That way the crosspiece can teeter in the notch when I change the tension on the bow that secures the top pieces of the saw.

Close-up of pointed end of crosspiece and its notch on upright.
Image by Anore Jones
The V-shaped nock end of the crosspiece has two rounded prongs that fit into a pair of notches similar to the pointed end. This end has to be rigid, however. It stiffens the whole frame, preventing collapse.
You have to keep the various parts of the frame in proportion. If one of the uprights is longer than the other, such as when allowing for handle extension below the blade, position both ends of the crosspiece to be parallel to the blade at the bottom of the saw and the tensioning rope at the top. Otherwise the whole thing will collapse when you put tension on it. The nock with its two prongs is like a triangular base that adds stability. Once the crosspiece is in place, I temporarily secure the two lower ends of the uprights together with a loop of wire. It serves instead of the saw blade while I get everything shaped up.
Next, I whittle a notch or drill a small hole at the top of the uprights. I tie one end of a skookum rope to the upper end of one of the sticks, embedding it in the new notch or lacing it through the hole. Then go around the top of the other stick, come back around the first stick, and make a couple of loops. I like to use several strands of parachute cord, #12 net twine, or 1/4-rope. That gives you the makings for a Spanish windlass [a device for twisting and tightening a rope]. Put the end of a stick in between the strands of the rope and twist it to tighten the rope. You have to tip your stick a bit while tightening to fit it past the crosspiece, but when the rope is fully tightened, you straighten the stick so it will rest against the crosspiece.
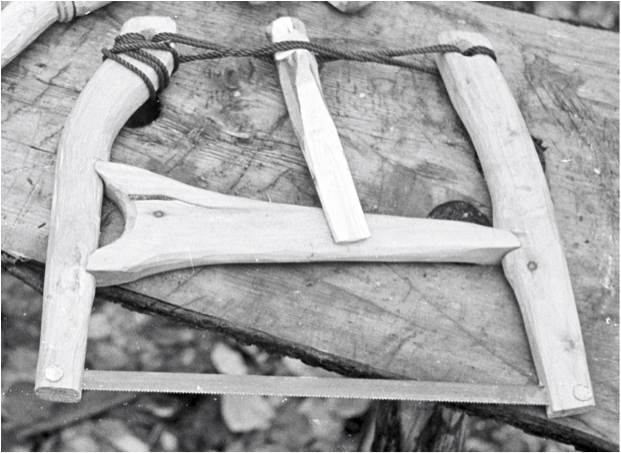
Another one of Oliver’s buck saws. Here you can see the detail of how the windlass works. You can also see the large V-shaped nock end of the crosspiece. Image by Curt Madison
The neat thing about this design is that the frame is self-aligning. When you start to tighten the rope, the stress makes the pieces twist and find the way they want to lie. When you twist the windlass end or the saw blade end, one has to get longer, and they’ll align themselves.
Next, I stand the entire buck saw frame up on the ground, blade side up. I cut with my pocket saw a slot in the lower end of each upright. [This slot should be exactly parallel to the saw frame so that the slots line up for insertion of the blade.]
Next, I loosen the windlass, take the wire off the bottom of the uprights, put in the actual saw blade, securing it with a nail through both ends of the upright and the inserted blade. Then I can tighten up the windlass and go cut wood.
After using the saw, remember to back off a turn on the windlass in order to relax the system and prevent the wood from taking a set and then cracking.
When using the buck saw, you have a push stroke when you saw away from you, and a pull stroke as you pull the saw back towards you. When you’re pushing away, you bear down on the upper end of the upright/handle that you’re holding, and that makes the saw cut well on the forward stroke. If there is a bit of extra upright/handle below the blade, as I advised earlier, you can pull the blade into the wood on the backstroke, too, without putting any extra pressure on it. That makes it cut better on the backstroke.
If you lightly raise the handle during the push stroke, so that you’re cutting on the far side of the log, you will push the sawdust and the dirt in the bark away from your cut. Likewise, if you tip the saw the other way so that the handle end is a little low when you are sawing a backstroke, it does the same thing on the near side. If you don’t do it that way, grit will abrade your blade faster, dulling it.
This rocking motion as you saw puts the pressure on fewer teeth. That makes the saw cut faster, and the saw teeth are all getting equal use.
You see articles in some sporting magazines that tell you to make a bow saw by taking a branch off a tree, bending it, and attaching a saw blade. I have not been able to make that work successfully. The way I make my saw works, and it isn’t a whole lot more trouble.
A regular buck saw frame is made with an entirely different principle, with dovetails and precise fittings. My instructions are a way to make one on the fly in a camp or out in the woods.
| 10/16/91 | I made a 30” bucksaw frame using birch I have had dry and seasoning here in the house. The 36” frame is too large & top heavy to use easily with one hand and too big to ride well in a sled. Last winter I used a hand saw, but now it is dull so it was either sharpen it or make up a smaller buck saw frame. |
HAND SAWS AND BLADE MAINTENANCE
There are three hand saws that I use a lot. I modify each to suite their specific uses and I have made many variations of each over time. These are a crosscut saw, a folding saw and a rip saw.
I start with a normal saw blade, usually one that someone has thrown out because they don’t know they can sharpen it. Then I modify it to the size and shape that I like.
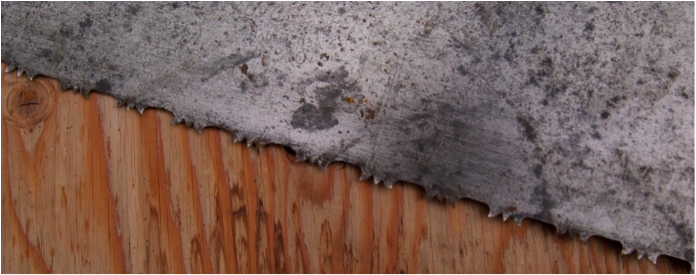
My Modified Crosscut Saw: I have modified a crosscut saw for cutting the smaller trees here in the artic.
When felling a tree, I first notch the tree and then start sawing it off at the notch. The crosscut saw becomes embedded in the tree as I saw. At this point I need to push a wedge in to take the pressure off the saw so that I can continue cutting. A wedge prevents the saw blade from getting pinched or caught when making the felling cut, and it also helps control the direction the tree falls.
When cutting a comparatively small tree, 5 inches or so, a standard crosscut saw is too wide and doesn’t leave any room to put the wedge in behind it. I like a narrower saw blade and so cut the blade in half lengthwise.
I also modify the handle to make it comfortable to my hand. And I make a holster to protect the saw blade.
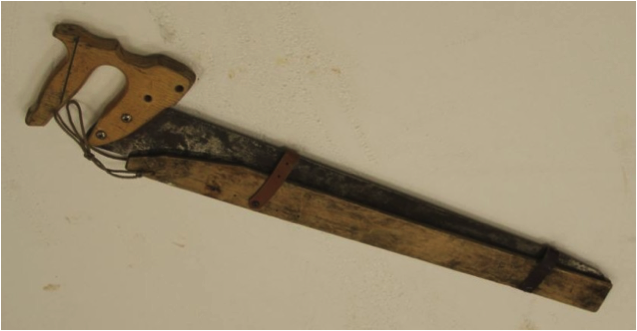
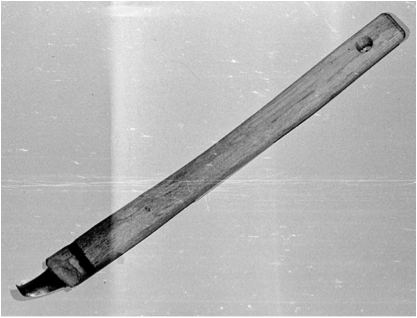
Oliver’s cut-down Crosscut Saw in wooden holster. This saw has the original handle, modified to remove excess wood and to make it easier to grip.
Image by Molly Rettig
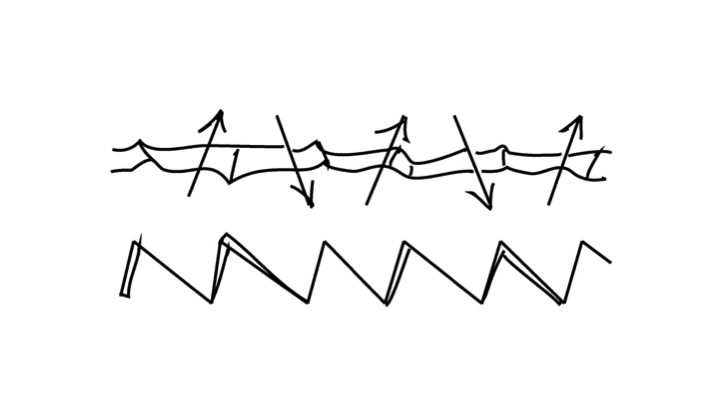
The shape and spacing of the saw teeth is important for the how well the saw cuts.
How a Saw Cuts
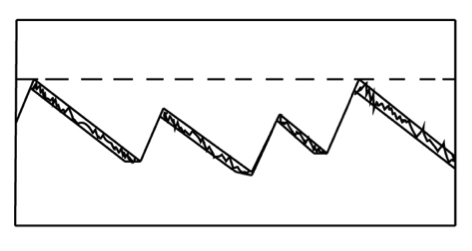
The teeth of a saw function like a series of knives, making progressive simultaneous parallel cuts and releasing the wood between them (figure 8). These teeth perform three functions. They:
- Cut the wood fibers
- Break the cut fibers loose
- Remove the fibers from the kerf
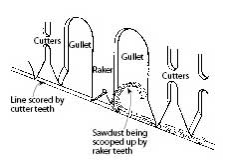
Figure 8-The way that the teeth of a crosscut saw work.—Saws and Sawmills
for Planters and Growers, with permission of John M. Morris
Cutter Teeth
All saws, regardless of the tooth pattern, are made up of two rows of cutting edges. The saw releases wood fibers on each side of the kerf as it passes through a log. Cutters (figure 9) work best in brittle, seasoned wood. The weakened fiber is easily removed.
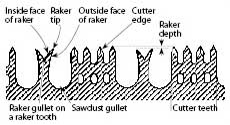
Figure 9—The configuration of the teeth of a
crosscut saw. This is the perforated lance tooth pattern.
Wet or green wood is hard to remove from the kerf because it is resilient. Even when the fiber is dislodged, it clogs a saw’s cutter teeth.
A special kind of tooth, the raker, allows the cutter teeth to work more effectively with less effort. I prefer saws with rakers for general work in the woods.
Even though the rakers don’t sever fiber, they perform the other two functions of saw teeth: breaking loose the cut fiber and removing it from the log. Rakers remove material whether the saw is being pushed or pulled.
When rakers are shaped properly and their depth has been set accurately, they pull out long shavings of wood rather than sawdust (figure 10).
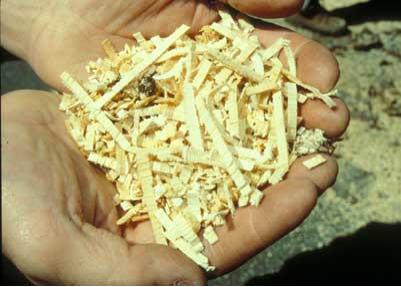
Figure 10-Long, clean shavings like these indicate a well–sharpened saw.
In some parts of the country these shavings are called noodles.
Teeth That Both Cut and Rake
Some saws have teeth that both cut and rake. These teeth are asymmetrical (not uniform). One face is bevel filed to be the cutter while another face is filed almost flat to be the raker. The M tooth and Great American patterns are examples (figure 11). Teeth that are filed to both cut and rake are an improvement over the plain tooth in severing and removing wood fiber. However, these combination cutter–raker teeth are a compromise. Without a raker to determine how far the tooth may penetrate, M tooth saws can cut very deeply and require a lot of strength to operate. While such an aggressive cutting action is appropriate for competition sawing, using such saws all day long for trail work is very fatiguing.
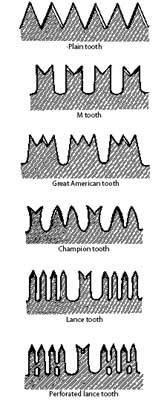
Figure 11—Common crosscut saw tooth patterns.
Gullets
Wood fiber that has been severed must be stored within the saw while the fiber is moved through the kerf. This storage area (the largest space between groups of cutters, or cutters and rakers) is called a gullet.
Gullets have a rounded shape so shavings will bend rather than break (figure 8). The gullet must be large enough to store all the shavings until the gullet clears the log and the shavings fall free. Saws that become worn out after repeated filings reduce the amount of shavings the gullet can hold.
The gullets determine the length of saw to use for a given application. For example, a gullet in the middle of a log 3 feet in diameter must travel 1½ feet to allow its shavings to clear the log. At least a 6½– or 7–foot saw would be needed to allow the shavings to clear a log 3 feet in diameter if the saw is being used by two persons. A shorter saw can be used by a single sawyer.
Tooth Spacing
The teeth of most crosscut saws lie on an arc of a circle (figure 3). This is sometimes called the circle of the saw, or the arc of the saw. This arc makes cutting faster, easier, and smoother. Especially on larger trees, when more teeth are being used, the arc causes the teeth to share the workload progressively instead of all at once. The circle of the saw works in conjunction with the arc of the sawyer’s arm to effectively deliver power to the saw teeth as the saw feeds itself into the log.
The spacing of the saw’s teeth ranks in importance with tooth pattern. Saw designers had to consider questions such as:
- Is the tooth strong enough for the intended work?
- Are the gullets far enough apart to effectively pick up all the fibers severed by the cutters?
- Is there enough room for the teeth and rakers to be sharpened and maintained?
- What’s the best way to reduce vibration and chatter so the saw cuts smoothly
The answer to these questions centers on tooth spacing. Generally, the longer the saw, the larger the teeth and the wider the space between teeth. Knowing tooth spacing helps the sawyer select the proper length of saw. Larger crosscut saws, with more space between the teeth, work poorly on small branches. Likewise, a small saw with small, closely spaced teeth doesn’t work well on large trees or logs.
Tooth Patterns
For centuries, only the plain tooth (or peg tooth) pattern was used. Modifications to the plain tooth pattern were developed to make the saw easier to use. We will discuss six patterns: the plain tooth, the M tooth, the Great American tooth, the champion tooth, the perforated lance tooth, and the lance tooth.
Plain Tooth (Peg Tooth) Pattern
This pattern just includes cutter teeth. It is best used for cutting dry, very hard, or brittle small–diameter wood. Examples include many bow saws and pruning saws. These saws do not have special large gullets for sawdust. The sawdust is carried out in the small spaces between the teeth. Wet or resinous sawdust can bind up this tooth pattern.
M Tooth Pattern
The M tooth, still manufactured today in a modified form for competition saws, dates back to the 1400s in southern Germany. This tooth is designed to cut the fiber, break the severed fiber, and clean out the shavings. The tooth pattern consists of pairs of teeth set alternately and separated by a gullet. The outer edges of the teeth (the legs of the M) are vertical and act like rakers. The inside edges of the M are filed to a bevel, making a point. This tooth pattern is best suited for cutting dry, medium–to–hard woods.
Great American Tooth Pattern
This pattern consists of a group of three teeth, each set alternately, separated by a gullet. It is sometimes called a crown tooth because of its shape. The Great American tooth pattern is designed to cut dry, medium–to–hard woods. A special file is used for these saws. The file can be purchased today and is called a crosscut file or a Great American file. The file is shaped somewhat like a teardrop. The thicker rounded edge is for filing out the gullets. The sides of the file are used to file the rakers and cutters. This file also can be used to sharpen other tooth patterns.
Champion Tooth Pattern
This pattern is especially popular in the hardwood regions of North America. It consists of two cutter teeth set alternately and an unset raker with a gullet between them. The cutters are wider and more massive than the lance tooth pattern, allowing heavy sawing in extra hard, dry, or frozen wood. The larger teeth are sharpened in more of an almond shape rather than in the pointed shape of a lance tooth.
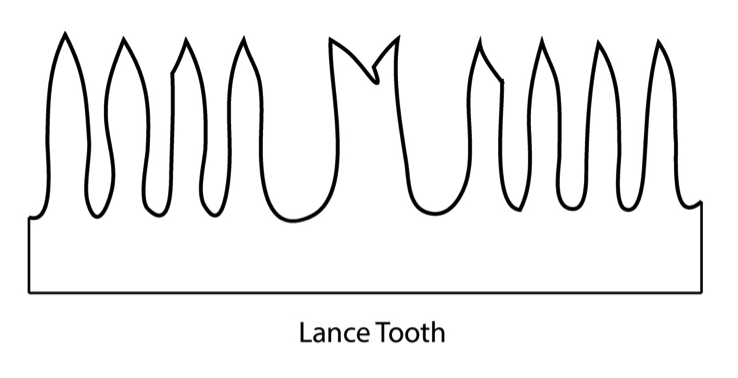
Lance Tooth Pattern
The lance tooth pattern also may be called the racer or four–tooth pattern. For many years the lance tooth pattern was the standard for felling and bucking timber in the American West. It consists of groups of four cutters set alternately, separated by an unset raker with gullets on each side. The lance tooth pattern is best suited for cutting soft green timber, especially fir, spruce, and redwood.
Perforated–Lance Tooth Pattern
This tooth pattern is considered a general utility pattern that can cut all but hard and frozen wood. It consists of groups of four cutters set alternately separated by an unset raker with gullets on each side. The “bridges” between the teeth form the perforations that give the pattern its name. These bridges strengthen the teeth and reduce chatter when the saw is used to cut harder wood. The perforated lance tooth pattern is sometimes called the racer pattern and old–timers called it the four–tooth pattern. It was popular historically in the pine country of the American West, and is still popular there.
To get a saw that will cut faster and more efficiently I modify the cutting teeth. I’ve learned a lot over the years about filing new teeth, jointing, setting and sharpening the teeth to make saws that are worth working with.
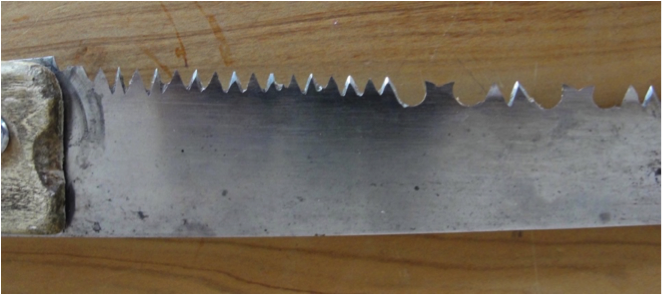
Champion teeth cut faster than I file the original teeth off and filed in champion teeth. You seldom find a champion tooth saw. Most commercial blades have repeating sets of four cutting teeth with a raker tooth, [specialized saw tooth designed to clear out the cut shavings of wood from the cut]. With four teeth they won’t wear down as fast and don’t need to be sharpened as often. The manufacturers don’t count on people actually filing their saws teeth. But blades with only two teeth cut much faster. I just file them often to keep them sharp.
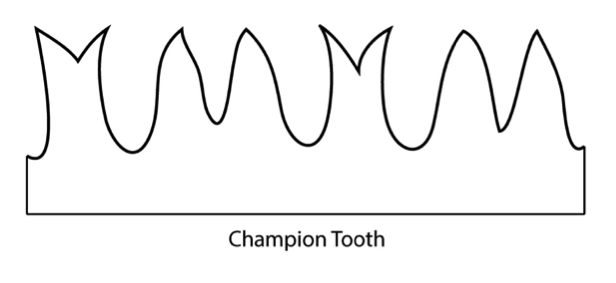
Champion saw tooth pattern with two cutting teeth to each raker [rakers have two-points]. Drawing by Brady Wedman
I also put a bow in the cutting surface of the blade. The middle section of the blade is slightly protruding further than both ends. That achieved the same thing as the rocking motion I advised for more efficient sawing in the “Buck Saw” essay. If you have a blade that is completely straight along the cutting surface, there will be too many teeth engaged in any one place, requiring more pressure.
The more bow there is in a blade, the faster it cuts. I usually put about a 7/16 inches bow over the length of a blade 26 inches long.
The teeth have enough set in them to make a good kerf [the width of the saw’s cut]. The kerf is important because the distance between divergent saw teeth determines the width of the saw’s cut. The kerf needs to be wide enough so that the saw won’t bind with each stroke.
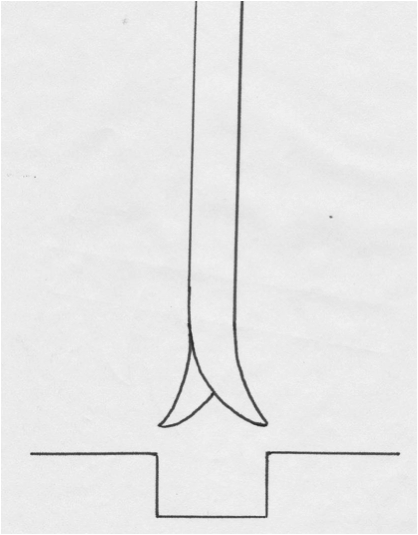
Kerf refers both to the width of the saw teeth sticking out to the sides on the blade, as well as the width of the incision the blade makes in the wood. Drawing by Jeremy Jensen
As you use your saw, the tips of the teeth wear down and the cutting edges on both sides wear off. After a while, they’re too short compared to the raker teeth. These shortened teeth cannot cut a very deep bite in the kerf, so they cut slowly. is not taking out a very deep bite in the kerf, so it cuts slowly. Shorter teeth also cut out only a narrower kerf. As the kerfgets narrower the two sides of the cut grab onto the blade and cause the saw to bind.
The saw now needs to have the teeth cut deeper and the rakers filed down to the right height for the cutting teeth. Then it will cut well once again.
Filing New Teeth
I have an assortment of three-cornered files, mill bastard files and so forth.
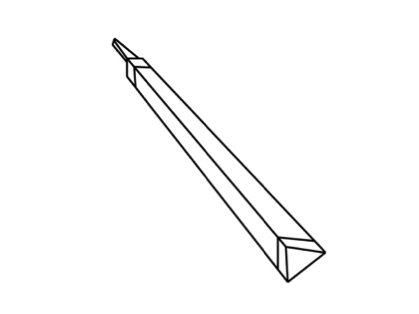
Three-cornered file. Drawing by Brady Wedman
When I file a champion-tooth saw, I file a notch using a three-cornered file. The angles of the three-cornered file are very useful for maintaining the same angles for each set of teeth I cut. Placing one side of the file vertical to the edge of the blade that I am filing creates the angle I want for one side of a raker tooth. The adjacent angled side provides the correct angle for a cutting tooth. I file those into the blade.
Next, I take a round file and undercut the front and back sides of the raker to create a slight curve at the base of the raker tooth. See the photo of a filed blade below.
Then cut a notch in the top of the raker tooth with the three-corner file. In effect, the points are little chisels that will grab wood going either way.
Then I move the file over an inch or so and repeat the process for the beginning of another set of raker and cutting teeth.
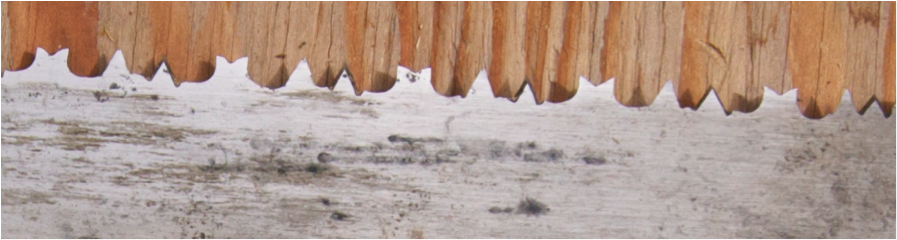
If you’ve got quite a bit of belly and your rakers are too long, your cutting teeth won’t cut deep enough and your rakers will try to pull out a shaving that is tearing the sides a bit. If you look at the shavings, the individual shavings will have whiskers on the side of them. That means you have to shorten up your rakers.
“Whiskers” on sawdust. Drawing by Brady Wedman
Usually in the spring, when the wood is thawed out, you make the rakers shorter. As the summer goes by, the cutters will be wearing down, and in the winter it will still bite well, though not as fast, of course.
I space the rakers at about 1 inch, center to center. They are about the same width as the teeth are apart, so if you have a file that is fairly large, say 7 inches, those files are narrower and wider. I take a wide one, make a notch, roll it over the width of the file, and make another notch. That width is the raker. I roll it again and make another notch, and that will be cutout to make one side of a cutting tooth. I roll it over and make another notch, and that is the spacing of the two cutting teeth. Finally, I roll it over a notch, and that brings me up to the next raking tooth.
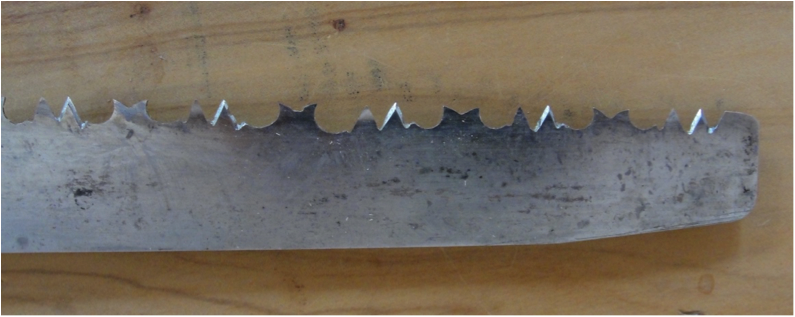
Oliver’s crosscut saw tooth pattern
Image from the Dammann collection
Then I go back and use whatever file will cut fast, like the edge of a 12-inch mill bastard file. Instead of cutting straight across, I lower the handle of the file and can take a lot of metal out of there in a hurry with that big file. Then I will use the three-cornered file to file out the center between the two gouge points on the rakers.
On a regular crosscut saw, a two-man big one, you don’t cut your rakers down as far as you would on these smaller blades. Instead of cutting the sides so that they have a curved surface, the sides are straight and the rakers are longer. You peen [shape or bend] over the end of the rakers so that it will pick up the shaving and take it out.
Lance tooth pattern. Drawing by Brady Wedman
But for a thin blade saw or a hand saw that I make like this, I don’t count on peening the rakers. I just curve the sides of the raker teeth in order to get that bit of hook.
When I cut out the gap between the raker and the first tooth, I usually use a round file. After I get that out, I’ll cut the other side, the cutting teeth, with a three cornered file.
Closeup of Champion teeth pattern on Oliver’s Saw
Image from the Dammann collection
I’ll file one cutting tooth from one side, the other from the other side. If my file is too broad, I’ll lower the handle and cut up against the blade at a considerable angle. In effect, that gives you a file with a narrower angle, more of a knife edge.
If you take a file and lay it down on the top of a blade so that it is horizontal and then place it vertical, it’s going to take out a notch the same shape as the file. But if you lower the file, then you’re exposing the blade of the file to the metal at a much longer line, and you can file one tooth without damaging the other side of the next tooth.
You still have to cut the rakers down. If you put a straight edge from one set of cutters to the next and look at the top of the rakers, at first the rakers are the same length. You have to file each side of the inner notch of the raker until you get the raker a little shorter. A postcard might be a good gauge, if you could slide that in there. You can tell that by trying the saw and studying the sawdust for whiskers, as indicated above.
They make a tool that you set on top of the [raker] teeth. It’s got an angle or a channel and rests on two sets of teeth, and has a cutout in between, and you file it off with that tool.
Raker filing tool. (Image credit 13)
Then of course you have to file away the resulting flat spots on the raker. I haven’t used one of those tools for a long time. I usually just give each tooth a lick with a file, and if one lick will do it, I give them all the same.
Jointing
Jointing is the process of filing all of the saw teeth to uniform length before sharpening. If you joint the blade, your cutters will have a little tip cut off in the jointing process; you can do your rakers then, with this good platform. Then be careful not to over-sharpen the cutters, since the rakers would then be too long, relatively speaking.
Jointing is the process of filing all of the teeth to uniform length before sharpening. Drawing by Brady Wedman
Setting
Setting is the process bending all of the teeth left or right alternately so that the kerf is sufficiently wide that the blade won’t stick in the cut.
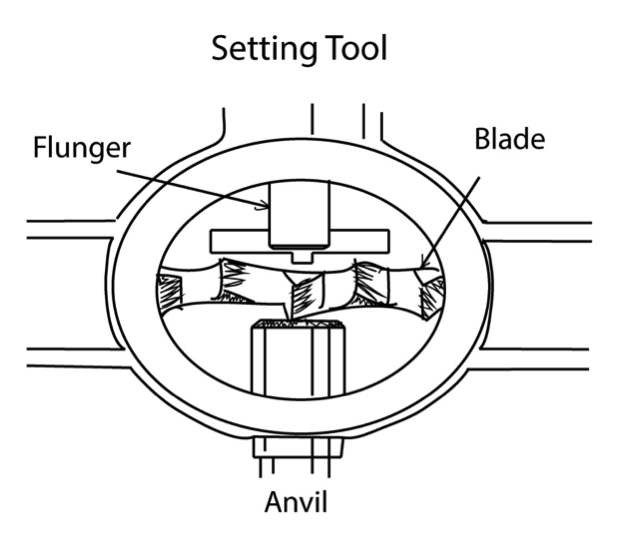
Setting tool. Drawing by Brady Wedman
You can use a pair of pliers for adjusting the set of the teeth as you wish. Hold the same angle for all of the teeth, on both sides. That raker gauge tool quite often has a slot cut in the side of it. You fit that over your tooth and bend it over until it’s horizontal and it will put the same set in all of your teeth. Then you reverse it on the other side. That tool would be made for a specific blade. You can’t take it to any old blade.
You don’t want excess set. A narrow blade doesn’t require much set. On a hand saw with a wide blade, you need more set. With that little tool, you can determine how much set you are putting in by how far you bend it down each time.
Without a setting tool, I use a pair of channel-lock pliers for gripping the teeth. I try to grab each tooth at the same depth and pull it out, alternately on both sides.
If you take an eight-point crosscut blade and try to set it too deep, you will break the teeth off. You have to stay out close to the cutting edge of the tooth. That goes for any of blade. You don’t bend the whole tooth—just the outer tip.
On each side of the raker, the metal is cut away deeper to give quite a gullet. [The gullet is the space within the curved area between two saw blade teeth.]
On a long cut in a fairly thick piece of wood, you can pick up a lot of sawdust. The Japanese saws cut fast because there’s quite a bit of room between the teeth. The other teeth, the cutting teeth, they don’t have to be real deep.
Sharpening Hardened Teeth
To sharpen a saw blade with hardened teeth, I leave the blade in the frame [if it has one]. I use a board the length of the exposed part of the blade. I lay the blade on that; the frame is supported by another board alongside it. I take a carpenter’s stone [a whetstone made from aluminum oxide], or piece of concrete. Concrete is usually made with sharp grit sand; it makes a pretty good stone if you don’t have another. But I have a carpenter’s stone that’s 2 inches wide and about 1 inch thick by 8 inches long. I lay that flat on the blade and work it back and forth, using the finer side of the whetstone. I don’t press down very hard, because you soon wear a ridge in your stone, which is not good.
You can angle your stone so that the blade is working diagonally across it, so you can use the major part of the surface of the stone [to avoid cutting grooves].
If you look at the points on the blade, on the end, you’ll see that they’re worn off on both sides. They’re set to stick out a bit past the main body of the blade. When you run the hone back and forth, you’re just honing one side: the teeth that are set toward that side. That leaves the inside, which will be rounded off, too. You can’t help that. The main thing is to get that rounded, worn edge off the outside. Otherwise the tooth will spring into the center, and it will bind, and it won’t cut fast.
After doing one side, do the same on the other side, using the same number of strokes. Then try the saw. If it cuts in a circle, that means that one side has been honed too much, and it needs to be evened so the two sides are the same length. It doesn’t take much. Just hone the narrow tips a little. On the long side, just rub the hone on it once or twice; pretty quick, it’ll cut straight. If the saw turns left, hone the side toward the right.
I can usually get three or four sharpenings on a blade. I use the same blade all winter for cutting my supply of wood. Some folks turn the blade around and use it facing the other way eventually, but I don’t. I usually use the heavy end of the saw away from me.
When you’re pushing the saw away from you, if you lift up your end slightly, then you are cutting on the far side of the cut, taking the sawdust out of the cut, and also any dirt in the bark or on the surface, raking it away. When you bring the saw back, you lower the end you are holding so that you are cutting on the near side of the log. That’s the sawing method I prefer.
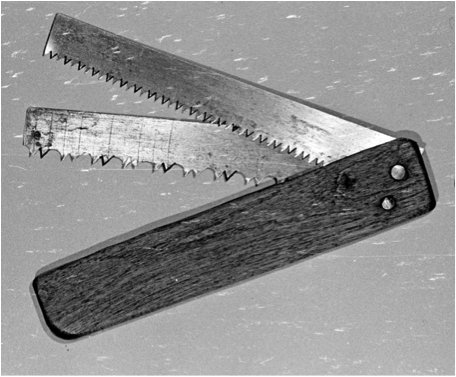
FOLDING SAW
I always carry an axe and a handmade folding saw.
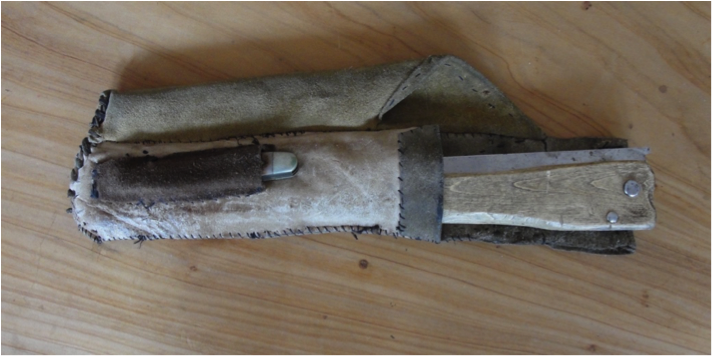
Top: Folding saw in holster, with small folding knife. Bottom: Folding saw. Images by Emily June Street
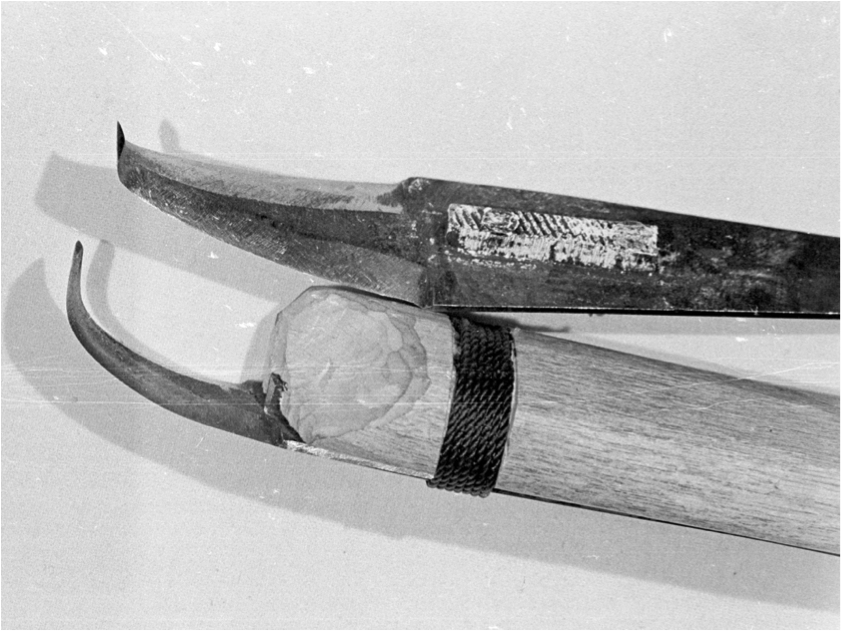
The blade is 10-1/2 inches in length, including the part that goes into the handle. The width of the blade tapers slightly. Where it attaches to the handle it’s about 1-1/2 inches wide, whereas at small end of the blade, it’s 1 inch.
The champion teeth of the folding saw, with the unsharpened first tooth. Image by Emily June Street
In the picture above you can see I have a champion tooth pattern for the front portion of the saw blade [see Oliver’s essay “Crosscut Saws and Blade Maintenance” for details on champion tooth pattern]. Yo can see that the first tooth at the end of the blade isn’t sharpened at all. It’s just rounded a little on the front. It’s the same depth as the rakers, and serves as a depth gauge so that the teeth at the tip won’t bite in too deep—just enough to take out a little thin shaving. That prevents the saw from catching or binding.
Many cutting teeth close together, without rakers until champion pattern begins. Image by Emily June Street
Here near the handle you can see I put quite a few cutting teeth close together, but without any rakers. A big, two-man crosscut saw is filed in the same way, with quite a few cutting teeth before the first raker tooth. Those cutters prevent sticking when you’re starting your cut. This makes for more productive sawing.
I can fell even a good-sized tree with my little folding saw, and I don’t need to carry a large felling axe when I’m out.
My second folding saw is also a very useful tool. I made it out of a large Japanese pole saw that had rip teeth on one side and crosscut teeth on the other side. The blade was about 10 inches long.
Japanese pole saw with double-sided blade, normally used for pruning hard to reach tree limbs. (Image credit 14)
Japanese pole saws have a fan-shaped blade that is narrower at the handle and wider at the far end. Having a blade narrower at the handle end allows the saw to cut on the pull stroke.
To make my folding saw, I laid a straight-edge on top of the Japanese blade and used a file to score a groove down the length of the blade. When I got the groove through about half of the blade’s thickness, I was able to break the blade along the groove, removing the half of the blade with crosscut teeth. That left me with a thin rip saw on the original handle, which I set aside and saved.
I used the crosscut blade I’d snapped off for my folding saw blade.
I found a suitable piece of wood for the handle, and used a rip saw to cut a groove in it. I wanted that saw blade to be completely embedded in the handle when it was folded up, so I made the groove in the handle long enough and deep enough to take the blade. I whittled of the top edge of the groove and handle to allow me to hook my thumb underneath the notch and pull the blade open, one the saw was assembled.
Next I fitted the cut-off blade into the groove, with the wide end at the handle attachment, opposite the design of the Japanese saw. Having the wide end at the handle was important. The Japanese blade was very thin and limber, but I needed to be able to keep a fair amount of pressure on it without it catching and buckling. If it was wider at the far end and it caught out there during sawing, it would be apt to bend and kink the blade. With the blade tapered to a narrow tip at the far end, it’s less likely to catch.
The most complicated aspect of the saw is the hinge. If I just put a pin through the end of the blade, the blade would be flopping around in the groove loosely. I put a washer on each side of the blade where the pin goes through it. Both washers were bent slightly to create a little friction on the blade and hold it in place. The pin should go through the blade somewhat lower than center, closer to the cutting edge than to the back of the saw. I riveted the pin to complete the hinge.
I inserted another pin, below the hinge pin, carefully placed to act as a stop when the blade opens against it. Unfolded, the blade forms a straight line with the handle. However, the stopper pin prevented the blade from closing all the way, so I cut a notch in the blade so that it could close.
I was then ready to file the blade. I filed a champion tooth pattern to replace the original basic crosscut teeth.
The tip of the saw blade is rounded. I filed a notch, leaving about 1/16 ” of the blade sticking out. The notch is rounded, coming down to the last tooth.
For a holster, I use a soft leather case that I can hang on my belt. That keeps the saw from accidental damage.
This saw is very nice to use, very sensitive, but I’m the only one who gets to use it. It was too hard to make, and those large Japanese pole saws are quite expensive. The saw requires a special touch. Most people aren’t accustomed to using something that you have to baby, and it takes just one mis-stroke to spoil that blade.
This little two-blade saw was made from a crosscut saw in a similar manner to the one described by Oliver with the Japanese saw. Image by Curt Madison
| 09/23/91 | “I have a 8” single blade folding saw I made for Tonya….So today I broke the teeth of and started cutting teeth suitable for cutting antler and bone. It weighs practically nothing and takes up very little room in a pack. A bone saw sure simplifies and makes butchering a lot easier when one has to make it into small pieces.” |
| 09/27/91 | “First thing yesterday morning I finished up the folding bone saw as it was at the stage that good light and good vision were needed.” |
RIP SAWS
Crosscut saws and rip saws achieve two different kinds of cuts. Crosscut saw teeth are designed for cutting across the wood’s grain. Rip saw teeth are designed for cutting with the grain.
Oliver’s rip saw. Image from the Dammann collection
A crosscut makes a comparatively short cut. Since you’re rocking the saw, the contact area will be about half the width of what you’re cutting, or a little more. With a rip saw, you have a much longer cut that the teeth are working in, and so the rip saw blade itself is longer, 30 inches at least.
Standard crosscut saw teeth cut two little grooves across the grain, forming the kerf [the incision in the wood]. Each individual tooth is angled out to the side, with alternate teeth set to opposite sides. The teeth angled out to one side cut the first groove of the kerf, while the teeth angled the other way cut the second groove of the kerf. Then, because of the shape and angle of the teeth, the part of the wood that’s between those grooves crumbles away. With a champion-cut blade, the additional rakers actually lift the wood out from between the grooves.
Crosscut teeth are filed at an angle of 70° across the blade. The top line here shows the view of the teeth on the blade from above. The bottom line shows the teeth on the blade from the side.
With a rip saw, however, the two grooves of the kerf are cut with the grain. Rip saw teeth are like chisels. As with the crosscut, rip saws have alternating teeth angling out to opposing sides.
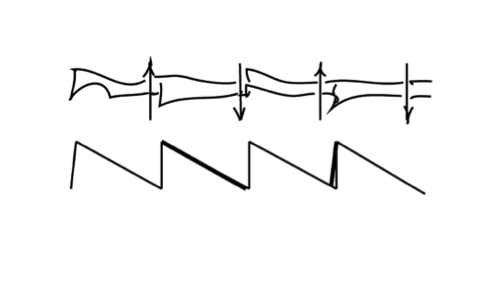
Rip teeth are filed at right angles across the blade. Top line shoes the rip teeth from above, bottom line shows them from the side. Drawings by Brady Wedman
A rip saw works best in wood that has a perfectly straight grain, but it’s very rare that you find trees with grain that runs completely true without twisting and rolling around a bit.
When grain is not straight, the saw teeth have to tear the tough grain loose from the sides. That leaves a rough surface on each side of the kerf, and depending on the way the grain is going in relation with where your kerf is coming, it crowds your saw blade. Essentially, the wood’s grain pushes your saw around in an undesirable way.
In order to counteract the grain’s influence, I started shaping my rip teeth to make three grooves into the kerf.
I used to shape the teeth to make two grooves like any other rip saw, but after some time and experience, I realized the three grooves have advantages. With teeth filed to cut only two grooves, you’re invariably tearing loose one side of the kerf on the grain, changing the course of the saw in the log. With my three-groove system that tendency for the grain to push the saw around is diminished.
With a regular rip saw, you cut on the push stroke and lift the blade on the pull stroke. Each tooth only bites off a very thin shaving of wood. That’s necessary to prevent the tearing out of the grain, but it means that you have to make a lot more strokes than you would if you could take off a thicker shaving.
With my three-groove system, the saw cuts on both the push stroke and the pull stroke. All of the teeth are always working, and none of them interfere with their neighbors. It’s almost as if you were using two saws side by side.
To make my specialized rip saw, I started with an old, rusty rip saw, and scoured off the rust. That left a pitted blade, so I filed it down to get rid of those pits.
Then I filed my pattern: a group of three teeth, a single tooth, another group of three, etc.
The tooth pattern for Oliver’s rip saw. Image from the Dammann collection
First there’s one isolated tooth, which is a center scribe tooth. Its purpose is to cut a groove right down the center of the kerf. It leans neither left nor right, and is filed from both sides so that it sticks up like a knife blade. It’s not especially long, maybe 1/4 inch, and stands on a stiff base. You don’t want it influenced by the grain you’re cutting.
About 3/4 inch behind that there’s a group of three teeth that are all set to the right:
• The first is a rip tooth, with a hook in it to lift out a shaving on the forward stroke.
• In the middle is a pointed, crosscut-type tooth. It’s a little steeper on both the front and back than an ordinary crosscut tooth. It cuts in both directions, and is responsible for making the second groove, on the right side of the kerf.
• Behind that comes another rip tooth. Its hook cuts on the reverse stroke.
Following that group of three teeth there’s another center scribe tooth, and behind that there’s a 3/4-inch space that gradually gets deeper as it goes toward another group of three teeth. That next group of three is set to the left, so it works on the opposite side of the kerf from the previous group. Its central tooth is responsible for making the third groove, on the left side of the kerf.
So, you have one set of rip teeth that chisels out the wood between the grooves on one side, and another independent set of teeth that chisels out the wood between the grooves on the other side. There’s no overlapping, and thus, no tearing.
The rip tooth at the back of each group of three becomes the lead tooth when you’re going the other direction, and works the same way. This design gives me advantages:
• Each stroke takes off a shaving that’s much thicker than a conventional rip saw does, without much more force.
• I can make as much headway down the marked line with one stroke as I would with maybe four or five strokes with an ordinary saw.
• Since I’m not using more energy than I would with a regular rip saw, I can cut much faster.
• Even if I tear some wood loose along the sides on the push stroke, the pull stroke compensates for the grain pressures that want to turn my saw aside.
• I’m not wasting motion by lifting that saw each time I move it, without accomplishing anything.
These groups of teeth are set far apart on a deep belly on the saw. The singleton scribe teeth are ahead of the chisel teeth behind. That gives you the necessary clearance.
The rip teeth in each group of three are filed like the rakers on a crosscut. Each has a hook to it, so it bites in and pulls the saw into the wood. The face of the tooth is gradually curved so that when you cut a shaving loose, it’s not running up against an abrupt change in the curvature in the face of the tooth. That would crumble it excessively.
The cutting edges are 1 or 1-1/2 inches apart, so there’s a large gullet ahead of each tooth. If you’re using this saw to cut a log or a cant that’s 8 inches wide and you’re holding the saw at a 45-degree angle or flatter, you are making a long cut. You need a deep gullet ahead of your chisel tooth to hold all of that wood until you can dump it out.
Filing the teeth
I have a large round file, like a chain saw file except that it’s for an old-fashioned chain saw with a larger diameter. The modern smaller chain saws use a smaller file, maybe 5/32 inch, but the ones that I use would be 3/8 inch in diameter. Those are the largest chain saw files I could find. They cut pretty fast.
For my rip saw system, I start filing a little behind the single center scribe tooth and work back, going deeper as I go. I don’t go all the way against the rip tooth. That would make too much hook on it. Instead, I lift the file up a bit to make the cutting edge. Then I can bear down and cut out the gullet.
Once I have formed all of the teeth on the blade, I start sharpening by jointing [the process of filing all of the teeth to uniform length before sharpening, see Oliver’s Essay “Crosscut Saws and Blade Maintenance”]. The central tooth of each set of three needs to be the same height as the rip teeth on each side.
I sharpen these saws quite frequently; I’m pretty lazy when it comes to using a dull saw. To sharpen, I just file all of the flat spots on the jointed teeth to the same height. That works well enough.
With this saw especially, it’s important to have a lot of crown [central projection in an edge, or belly], because that determines the depth of your cut on each stroke. If there’s no crown in the blade, one tooth keeps the others from cutting.
When filing, I put quite a bit of hook in all of the rip teeth, but a little more in those teeth that are going to be cutting on the pull stroke. On the pull stroke, the relationship of the tooth to the grain of the wood is different. That shaving doesn’t necessarily want to split out ahead of you. If it wants to split ahead at all, it’s splitting into the log instead.
Handle
The handle of a conventional rip saw is above the teeth, so that on the push stroke you’re not only pushing ahead—you’re bearing down on the teeth to force them into the wood at the same time. You’re chipping off a shaving that wants to split out ahead of you. Then you lift the blade a bit and pull it back for the next push stroke, without cutting.
I don’t use a conventional handle. I make one that extends below the blade as well as above it, so that I can use two hands. That gives me leverage. On the pull stroke, I’m pulling the teeth into the cut, and on the push stroke I’m pushing the teeth into the cut.
Oliver’s handle. Image by Molly Rettig
Whenever I take down a birch tree or a poplar tree out in the bush, I’m on the lookout for natural wood angles that might make a handle or be useful. I usually have a collection of wood around that I’ve peeled, drying up for things like that. I prefer birch, but I have used other woods that are handy when I need them.
The handle for this saw came from a tree that had a fork in it. I cut one prong of the fork short, cut a slot in it, and slid it onto the back of the saw blade. It was long enough so I could put a couple of screws through it.
The other fork is sloping. It sits back from the saw blade, so that there’s room for the hand that’s pulling it back. It’s longer so I can get hold of it low enough to have two or three fingers below the cutting teeth. It has to extend down far enough so that on the return stroke I can pull the teeth into the wood.
The upper part sticks up above the blade. I can press down on it and hook my thumb around it, or just grip it along with part of the blade. In general, a handle’s size depends on the blade.
I rock this saw when I push and pull it. I can tell when it’s cutting optimally, without taking excessive pressure. The backstroke feels like it has a different type of resistance, but it cuts just about the same, pushing or pulling.
Addressing side pull
The saw always tends to pull to one side a bit. You could try to keep an eye on your kerf to tell whether you’re running off, but that’s not practical, so I have a level bubble of the kind that you can buy for replacement in a regular hand level.
I fasten it crossways in the handle of the saw where it won’t interfere with my grip. I can keep an eye on that bubble; I can see it from above all the time. It tells me that I’m maintaining my saw plumb with each stroke.
Of course the work has to be lined up so that the line of your cuts will be vertical. A couple of my sawhorses have log dogs fastened into their legs. They hook into the log I’m cutting so it doesn’t roll around.
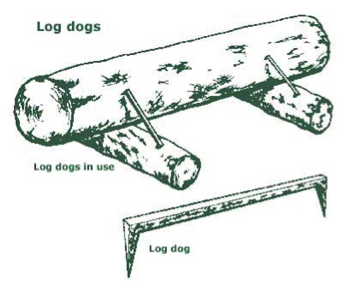
Log dogs. (Image credit 15)
Using the rip saw
I most often use my rip saw to cut spruce. I pick the best spruce that I can, and usually cut it green because it cuts more easily than when it’s dry.
It’s a lot of work when I’m cutting maybe four or five boards out of a large log, so I want to take off a fairly thick shaving with each stroke.
I peel the log, put it on set of sawhorses, and then mark my cuts side by side. Then I’ll make one cut for about a foot, and then go to the next one beside it, and cut the log up into boards as I go. I cut at a fairly flat angle and I keep my saw at a bevel such that when a shaving comes out, it’s quite long on each stroke, either way.
I start my cuts while the end of the log is free, projecting beyond the sawhorse. When I get into the log a couple of feet, I shift the log so that the end with the loose boards is resting in the horse. The loose boards of the end of the log might want to spring out a bit, and at the same time the V-shaped top of the sawhorse tends to push them together.
To keep my cuts uniform and prevent binding, I have some shims that are made the same thickness as the kerfs between my boards. I put one in each kerf and then tie a rope a few times around the end so I have something solid to support the log. Then I can cut a long ways in a long log before I have to monkey with it.
Right at the end, I’ll have the log sitting on the very edge of a sawhorse, with a little corner of uncut wood on the underside. Usually I just pull the boards off and let them split out any way they want to. Then I cut that couple of inches off the end of the boards.
| 01/12/89 | “But first I had to make a rip saw. Have tried many designs over the years and now I think I’ve finally got a saw that works as well as I cam make. It is almost a pleasure to cut boards with it. Hope to cut out lumber for a boat so wanted to get it done for that reason too.” |
KNIVES
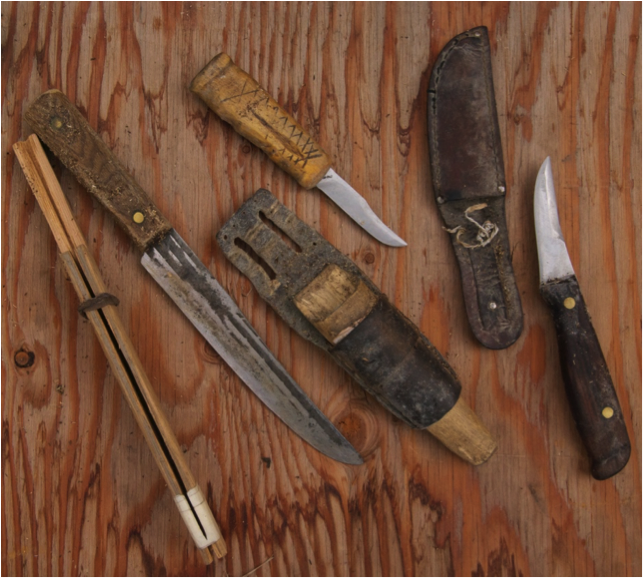
A selection of Oliver’s knives with holsters. Image from the Dammann collection
In the next two essays, Oliver describes how to make two traditional knives used by the Inuit people around the area where he lived: mitliks and ulus.
MAKING CURVED KNIVES
I use a tool called a snowshoe knife for hollowing out wood to make bowls. The Inupiaq word for it is mitlik, and they use them for any whittling that involves curved surfaces.
There are as many ways of making mitliks as there are people to use them. Some people like a fairly long blade with an abrupt turn on the end, like a horse hoof knife. In fact a hoof knife does a pretty good job for most projects where we use the mitlik.
Making a curved knife out of a file
The Inupiaqs have two different kinds of knives like this, one for whittling snowshoe frames and longer items, and one for making bowls. The one I am describing is a combination knife that can be used either way.
I took an 8-inch file, broke it in two, and used about 3 inches of the end with the tang to make a blade. I tapered the blade so that it was narrower at the tip.
Two of Oliver’s mitliks and a tethered leather sheath.
The longer handle was made out of caribou antler.
Image by Sasha Wik
I annealed the piece of file and bent the tip of the tang to a right angle. Then I forged out the rest and filed off the teeth. I inserted the bent tang end into the side of the wood that I used for a handle so that it couldn’t twist around or move forward or backward.

Drawing showing how a tang can be bent at a right angle
and inserted into a handle to enhance stability. Drawing by Brady Wedman
I made the handle about 12 inches long, enough to get a good grip with both hands and still have space between them. That way I’d have room to dig into a deep bowl.
Another mitlik by Oliver. This one shows a long handle as described. Image by Curt Madison
I like to have a bit of bend in the blade all the way through it. Then close to the handle there will be a section of the blade, maybe 2 inches long, that has even more curve to it.
Then for the next inch or so I make a radical curve, bending the very tip up so that it is at more than a right angle to the handle.
When I bend the tip up, the blade will be hollowed out underneath. I don’t want that, so I file the outside part after I bend it.
Most of the bevel is on the inside, but I want a little bit of bevel on the outside, too. [Bevel refers to the degree of angle used when sharpening the blade to an edge.] I sharpen both sides of the blade so that I can push it away from me or pull it toward me.
Two of Oliver’s mitlik blades. The upper blade shows how he beveled and sharpened both edges.
Image by Curt Madison
The blade is nearly flat on the bottom side. You can use it as a plane, since the handle is up a little bit. It’s handy for smoothing the middle of a board. If you’re using it with the work held down or fastened to a bench, you can get a hold of the handle with both hands and remove a lot of wood quickly.
If you’re going to be using it for carving out curlicues and small bowls, you’ll want even more bevel on the outside. On a snowshoe knife, not so much. The bevel itself will tend to put a little bit of a curve into the blade.
If you’re making a spoon or a small bowl, you need an end that allows you to hollow out a smaller space. In order to curve the blade into that shape, you have to do some blacksmithing. [It requires annealing the steel to soften it and shape it, as mentioned above, and also hardening the finished blade so that it holds an edge. See Oliver’s essay “Blacksmithing Techniques.”]
Making a crooked knife out of an ordinary knife
You can also make a mitlik from a paring knife. Hold the end of the blade with a pair of pliers and bend it. The tip will snap off, leaving a bent curve in the remaining part of the blade still attached to the handle. That remaining metal already has the proper temper. [Temper is the hardness of the blade. See Oliver’s essay “Blacksmithing Techniques.”]
You can do a lot with a knife that’s been modified in that way. The handle is short, but you can get a good grip on it with one hand. It doesn’t necessarily have to be a paring knife, although that’s what I have used. It could be a larger knife. A small butcher knife would work.
The blades on older silverware knives, the ordinary knives from a place setting, are much better for this purpose than the stainless steel tableware that’s for sale these days. When you snap off one of those new ones, it may break without leaving any hook. To get the necessary bend and hook, you may have to heat it up and draw some hardness out of it, and then bend it until it breaks.
I’ve done a lot of work with improvised knives at times when I didn’t have my ordinary tool kit, but such knives won’t take the place of a blade designed to fasten onto a longer wood or antler handle.
Working with mitliks
When working with a mitlik, it’s nice to be able to get the work [a bowl, for instance] in your hand. The grain of the work will be in various directions, of course, so if you want to make a shallow bowl that is longer than it is wide, you’ll be pulling the blade toward you to carve one end, but pushing it away from you on the other end. If there’s a hump in the middle, you just shave it down.
In some cases it’s handy to have a handle on the knife that’s long enough so you can rest the end of it against your shoulder. Then, holding your work on your lap with one hand, you can use the knife in your other hand to remove a lot of wood. Some folks tie a rope to the handle of a mitlik to form a fulcrum for added leverage. I’ve tried that, but I found it restrictive. I’d rather use a longer handle and rest it against my shoulder with the work in my lap. I pull on the handle with my free hand. The other hand just guides the work and moves it around.
A mitlik with a long handle works well when you’re cutting out a qallutaq to use with a berry basket. [A qallutaq is a large bowl-shaped beater with a handle. Inupiaq berry pickers strike the bushes with their qallutaqs in order to knock the berries into a basket. Later they find a spot in the open, or wait until they’re on the way home in the boat, and pour the berries back and forth from one basket to another to let the breeze remove leaves and bits of chaff.]
A spruce stump with a root bending out will have a good shape for carving a qallutaq. Split it a bit off-center, keeping the root portion for the handle, and then whittle out the bowl from the stump portion. [It is also possible to make a qallutaq by cutting a live root and part of the trunk from a living white spruce. The tree can survive without it.] Spruce works best for this, as it has a good consistency, and it doesn’t crack.

Sasha Wik pours cranberries from her spruce root berry dipper (qallutaq) to a basket in order to winnow out leaves and debris in the breeze.
Qallutaq and image by Ole Wik.
The Inupiaqs also cut live roots to make the curved knees for boat frames. They just dig around individual roots that have approximately the curve that they want. For each rib, the stems overlap in the bottom of the boat and the roots curve up to make the sides of the boat. Sometimes they add another piece to make the sides extend higher.
The front large rib of this boat is made from spruce root joint. Image from the Dammann collection
I prefer a mitlik for a lot of my work because it’s versatile. If you need to, you can get both hands on it and remove a lot of wood in a hurry. You can do fine work too, taking off very thin shavings.
Since my mitliks are more or less flat on one side and beveled on the outside, I use them quite a bit when I’m putting the final shape on an axe handle or any kind of tool handle. I also use them for making bowls, cups, and spoons.
Oliver works on a vessel with his mitlik. Image from the collection of Dorene Cameron Schrio
Snowshoe knives
If you have a blade bent up into a very tight curve at the end, you can cut out a narrow groove. You can use it almost like a rake or a hoe.
When you’re making snowshoes, there are two ways to put the lanyard around the frame. [The lanyard is the rawhide that attaches the netting of the snowshoe to the frame.] One is to make two holes completely through the frame, and lay it in a little groove that runs on the outside, between the holes. Commercial snowshoes slightly offset the two holes so that they don’t both go through the same grain of the wood.
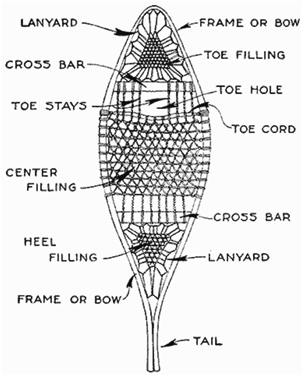
Parts of a snowshoe. (Image credit 16)
The other way to put on the lanyard is to use your knife to make slight grooves on the top and the bottom of the frame’s inside surface, and then drill holes that run in at a slight angle and meet each other. That way you won’t have any rawhide that goes clear through to the outside. It would be hard to start your drill from that angle if you didn’t have that top and bottom grooved area. Native-made snowshoes are quite often made this way.
I’ve had several Inupiaq people see the tool that I made to cut these grooves and ask me to make one for them, too. They’re quick to recognize the advantages that they can get from a tool.
Inupiaqs traditionally have done a lot of handicrafts, and they are quite ingenious at making do with whatever they have.
An Inupiaq fellow once gave me a jade axe. He told me the way to sharpen it was to tie it onto the end of a limber stick, and then jab the stick in the sand of a stream with a strong current. Leave the jade axe blade down in the sand under the water for several months. As the current moves the stick back and forth, the motion rubs the jade in the sand and sharpens the axe.
* * *
HOW TO MAKE AND USE AN ULU
An uluis a traditional multi-purpose knife used by the indigenous people of Alaska. It is a very useful tool. I don’t just use it for gutting fish and or cutting meat. It’s a major tool for almost anything. I’ve seen women using one for a dustpan, for cutting fish or meat, or for removing blubber from sea mammals.
Ulus come in all sizes. Some are quite small, for sewing. Sewing ulus have the typical broad shape, with a handle made of antler. Most have a blade that’s about 3 inches long. If you make them too short, it’s difficult to make the slicing motion that you need for cutting materials. Working with food, leather, and skins often requires a larger ulu. 8-inch and even 12-inch ulus are common.
Many Inupiaq ulus that I have seen are a segment of a circle, with quite a bit of belly in them. [Belly refers to degree of curve in the blade. One with more belly will have a deeper curve, making the blade look more “pot-bellied.”]
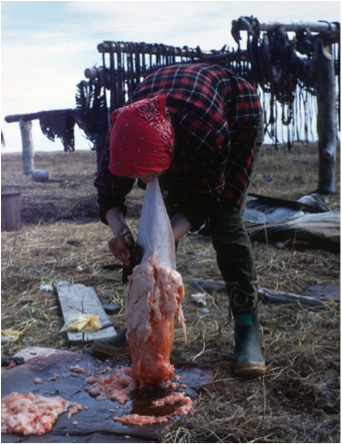
Pam Ross uses an ulu to flense blubber off a seal skin. This ulu was made by Ken Ross under Oliver’s guidance. Image by Bunak (Bunny) Williams from the Ken Ross Collection
Handmade ulus with circular shape. The blades are beveled on one side only.
Image by Sasha Wik
I like an ulu that has quite a bit of belly or curve toward the back, but with a long front section that is almost straight. I make my ulu blades from repurposed handsaw blades.
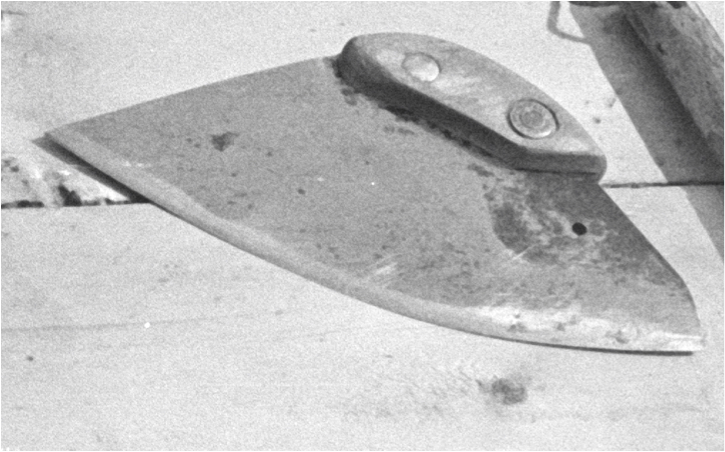
One of Oliver’s ulus. He made both the blade and the handle out of a carpenter’s saw. The dark corrosion marks show the original position of its full handle; the bolts are in their original positions.
Image by Curt Madison
Using ulus
To cut food into small pieces with my ulu, I touch the front tip of the blade to the cutting board or chopping block and rock it down on the food items—similar to a paper cutter. Quite often I’m just chopping food up like that. To cut leather I might bear down on the curved part of the blade toward the back of my ulu.
An ulu is sharpened on one side, although you can’t avoid getting some bevel on the other side.
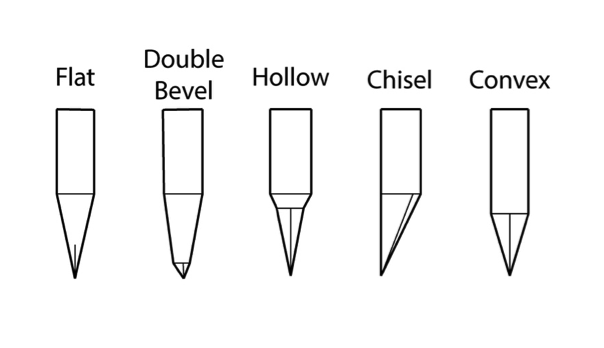
Different types of knife edges. An ulu has a chisel edge. Drawing by Brady Wedman
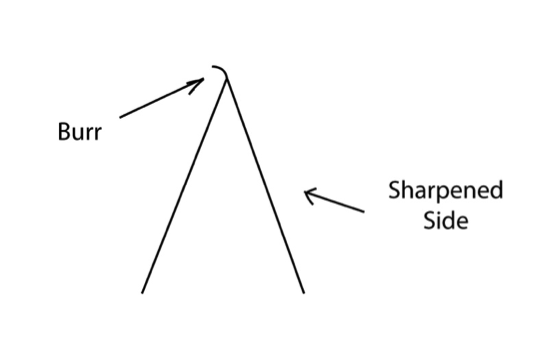
Sharpening can leave a burr [a raised edge or small piece of material remaining attached to a workpiece after the modification process] on the opposite side of the sharpened edge, requiring you to touch up that side as well. Drawing by Brady Wedman
When you’re using an ulu to chop vegetables, you want the bevel of the blade cutting straight down, so you slant the ulu a little to one side. Even with the ulu held at a slant, the bevel on the blade is more or less vertical, and it will cut straight down. For a right hander, the top of the ulu will lean a bit to the right. This also allows you to see where you are cutting.
When you’re filleting a fish for drying, you want to be able to cut into the back, cut through the small side bones, and then go around the rib cage. Having that bevel on one side only makes it easier to guide the ulu around the ribs.
Oliver’s son and daughter cut fish using ulus. Image by Lorene Cameron
Anore Jones, a neighbor along the Kobuk River, documented her decades of catching, preparing, cooking, eating, and preserving many varieties of local fish in her monumental work Iqaluich Niġiñaqtuat, Fish That We Eat. Also see the essay on “How to Dry Fish” for how to prepare fish for drying.
Using an ulu to fillet a piece of salmon.
Ulu and image by Ole Wik
I once made an ulu for a woman out of a big crosscut saw two or three times as thick as a hand saw. The lady really liked that. She wanted an ulu that was sturdy and heavy enough to chop bones. Some of the bones of an ugruk [bearded seal, Erignathus barbatus] or a beluga [white whale, Delphinapterus leucas] aren’t too hard to chop with a heavy ulu, especially those close to the spine. I’ve also seen her breaking up small pieces of wood to make kindling for the fire using that ulu.
The Inupiaqs are clever at making shave or fuzz sticks with ulus. A fuzz stick is a length of wood shaved or cut into a fringe of thin curls. These thin curls light quickly and will even catch fire when the wood is a bit damp.
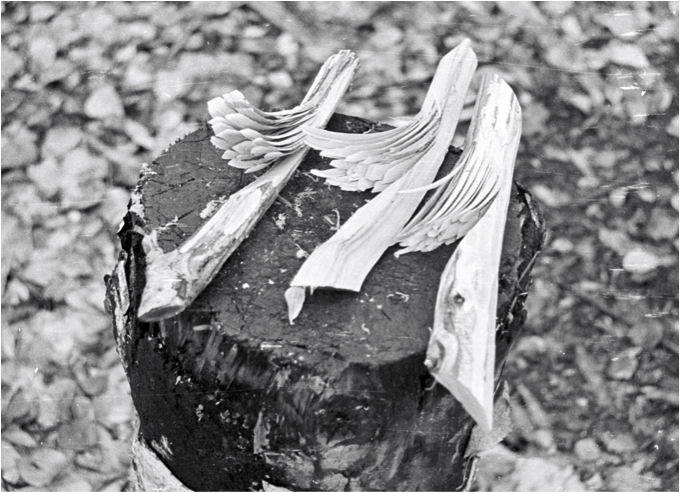
Fuzz stick or feather stick for starting a fire. Image by Curt Madison
Making a wooden handle for an ulu
I like a big handle on an ulu, because you’re bearing down on it a lot and your hands are often slimy, wet, or bloody. You need something you can grip even in those conditions.
I’ve made handles out of wood. I once made an ulu blade out of a broken butcher knife because I didn’t have a piece of saw blade to use. On that ulu, I fastened the handle fore and aft, kind of like a rainbow.
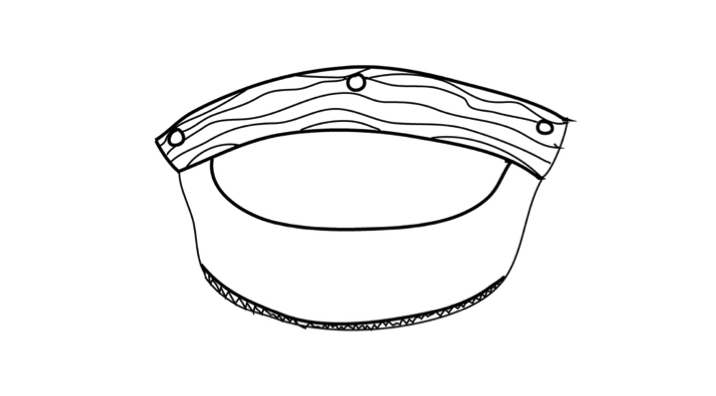
“Rainbow” shaped ulu.
Drawing by Brady Wedman
I often use the original saw handle, because it has holes already that match the holes in the saw blade. Of course the rest of the blade gets cut up into a number of ulus.
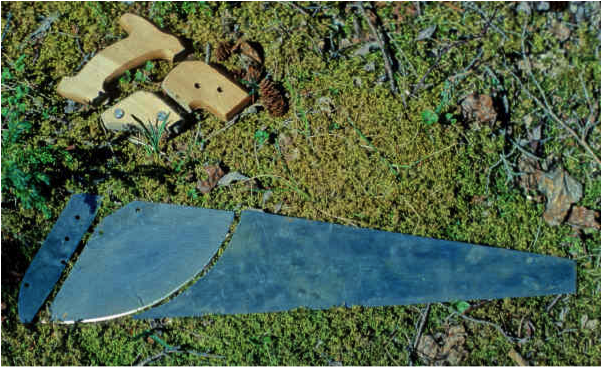
Laying out a new ulu. The part of the original handle with the connecting bolts will be attached to the top of the ulu blade.
Ulu by Ole Wik, image by Sasha Wik
When I’m making a wooden handle, I cut a slot up through the center of a bolt and drill a hole crossways through the slotted part. Then I cut off the bolt head along with the part of the shaft that doesn’t have any threads.
The slot is just long enough to fit down over the ulu blade, maybe half an inch or a little more. I line up the hole in the bolt with a hole I’ve drilled in the blade, put a pin of soft steel through them both, and pound the ends of the pin down to rivet the bolt in place.
Then I drill a hole down through the handle. The top of the hole is large enough to conceal a washer and a nut, and the bottom is just the size of the bolt. I slip the handle over the bolt, put washer and nut in place, and tighten the nut. That pulls the blade up solidly into the handle. The washer and nut are inset into the larger hole in the top of the handle.
I cut the bolt off flush and then fill the whole thing up with glue, usually hot melt. That hot melt is handy stuff. It doesn’t take long for it to set.
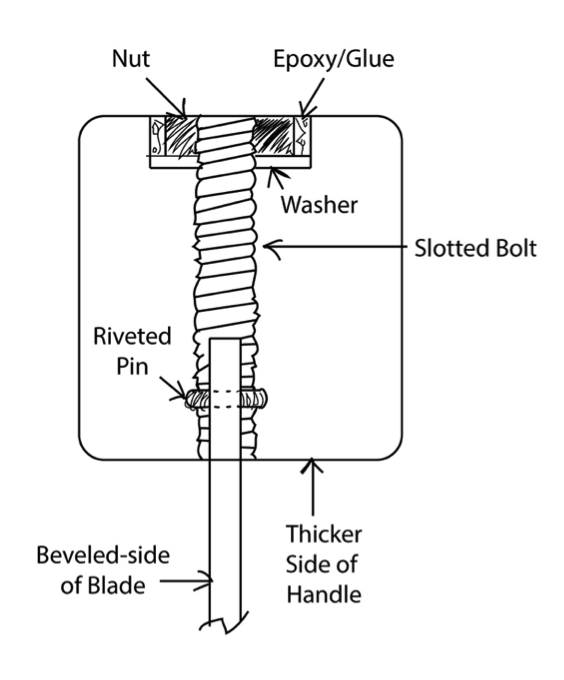
Cross-sectional diagram of ulu handle. (Not to scale)
Drawing by Brady Wedman after Ole Wik
The blade has to be up in the handle enough so that it won’t wobble side to side. With that bolt, it won’t. The riveted slot is quite solid, and there’s not much room for slip there. You can depend on the handle staying where you want it.
The bolt is almost completely up inside the wood on the underside of the handle, but sometimes there will be a little of it showing, which unfortunately leaves a place right near the bottom of the handle that’s hard to clean.
You need a fairly hard piece of wood for a handle. Quite often I have used the hardwood from a leaning spruce tree, or a piece of a spruce branch. When a branch is hanging down or a tree is leaning the wood gets compressed a bit by gravity. The branch wood close to the trunk is quite hard. I make use of that hardwood.
You can offset the wooden handle as you attach it so that you have a place to curl your fingers underneath the overhang on the unbeveled side of the blade.
When I make a hole in a saw blade, I don’t usually drill it—I punch it. I have a small hole in the top of my anvil, and I made a punch that is just slightly smaller. I line the saw blade up on that hole in the anvil right where I want to put the hole in the blade, and then take a fairly heavy hammer and drive the punch in there.
To make sure that the punch is perfectly lined up with the hole in the anvil, I have a flexible piece of tin or steel with a hole in the end. I clamp that onto the top of the anvil so that the hole in it lines up with the hole in the anvil. Then when I slide the blade between the guide steel and the anvil, I know right where the hole is.
One time, before I had the anvil, I made a different kind of guide out of a hoof rasp.
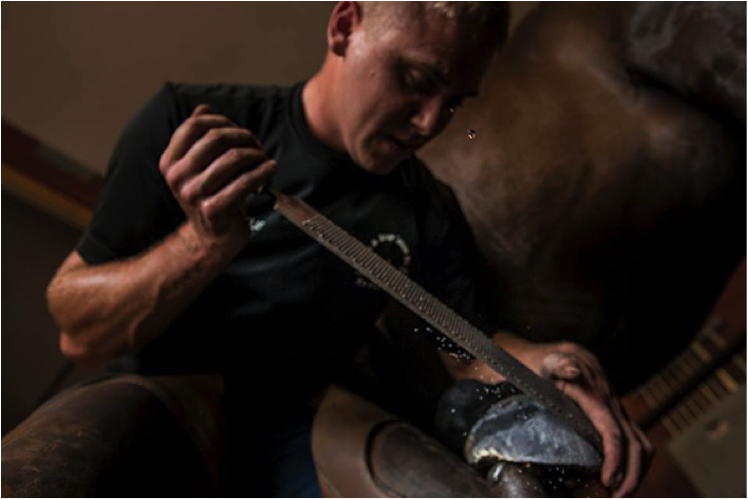
A heavy hoof rasp in use. (Image credit 17)
I took a large, heavy rasp, softened the metal by annealing it, and smoothed off most of the surface. [See Oliver’s essay on “Blacksmithing Techniques” for information on annealing and hardening steel.]
Then I drilled a hole through one end of a piece of sheet steel, and two or three holes for different-sized punches farther along. I bolted the sheet right onto the file and then drilled down through the guide holes using bits of matching sizes. I could slide this guide over the metal into which I wanted to punch a hole.
Making an antler handle for an ulu
I use a piece of antler for the handles of smaller ulus.
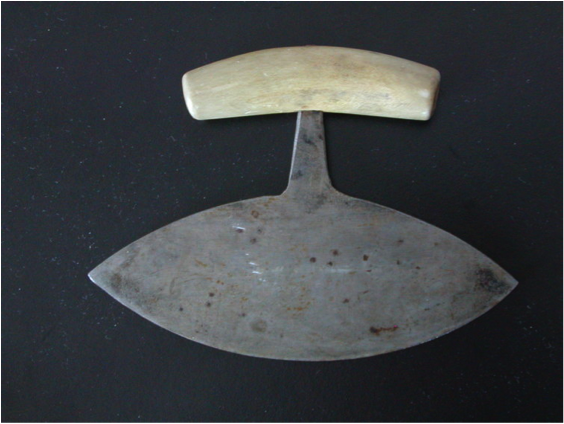
This antler handle is fastened to a long tongue of steel. This is a different style of ulu than those Oliver made. Oliver’s tongues were much shorter, and his handles fit flush against the blade. (Image credit 18)
Usually the top of the blade is flat. I clamp the blade in the vise and take a notch out of the top, on each side of the center. That makes a tongue sticking up in the middle, with a flat on each side. I rough up that tongue a little bit with a file and cut grooves into it.
Then I take a piece of appropriately curved antler and scratch a groove in the concave side to mark my starting point for inserting the blade’s tongue. First I boil the antler handle to soften it. Then I set it on edge, line up the blade and tongue with my starting point, and drive the handle onto the tongue.
Once everything has cooled down, there isn’t any danger of the handle splitting when you press down on it. Antler doesn’t have a lot of grain, the way that wood does, so it doesn’t split easily. The tongue won’t break through and poke you in the hand.
Making a holster
Most of my ulus have holsters. I make them with two pieces of leather sewn together along the edge with a wavy stitch. This wavy stitch creates a pucker in the leather that prevents the sharp ulu from just slicing through the stitching when it is in place in the holster. The front end is sewn together, too. The front end is hooked under, and there is a string on the back on both sides used to tie behind the handle to keep the blade in place. The string is not shown in this photo.
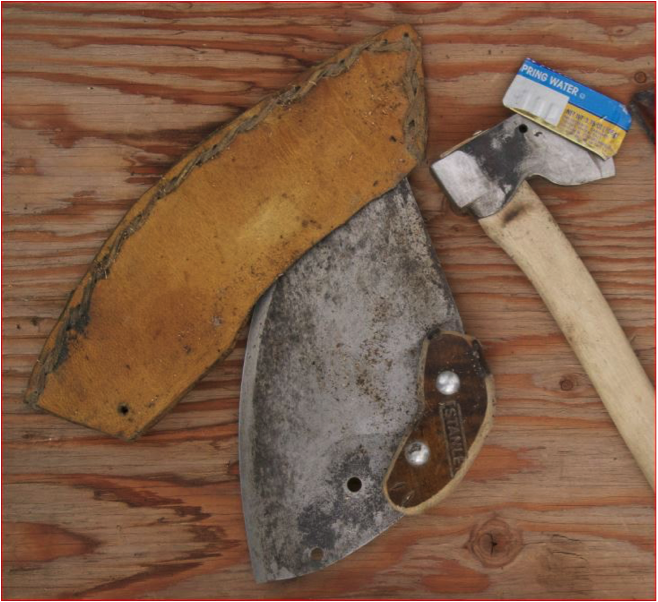
Wavy rawhide stitching on an ulu holster, and a tin can blade guard for a hatchet. [Oliver’s essay “Making an Axe Holster” discusses his technique for making the wavy edge.] Image from the Dammann collection
This holster is not for carrying on your belt. It’s for protecting items in your sled or grub box from getting cut by the blade, and to protect the cutting edge of the ulu.
WOODWORKING TOOLS
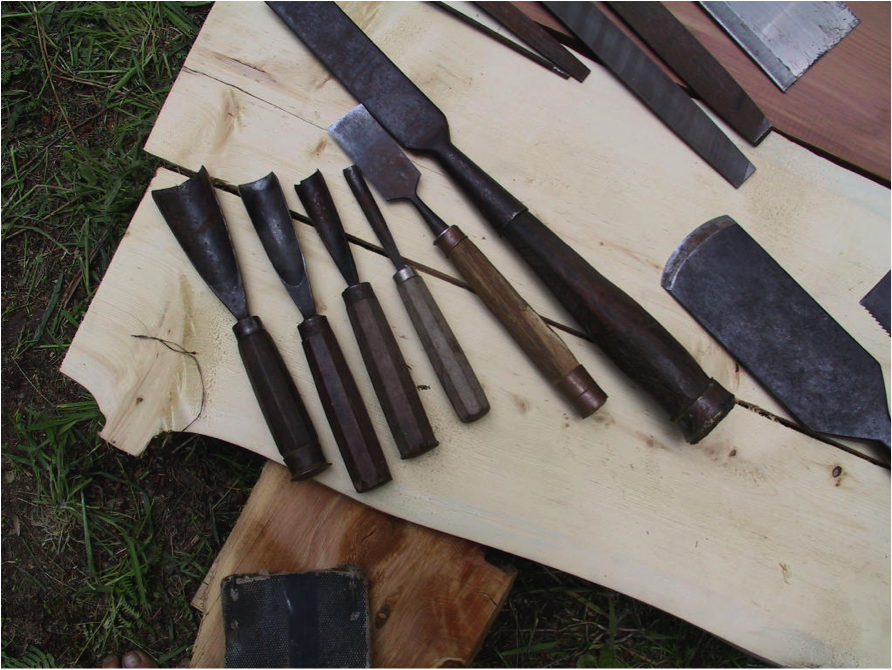
A selection of chisels belonging to Jim Bucknell. Image by Anore Jones
These four essays describe Oliver’s methods for making his own woodworking tools from salvaged, repurposed, or raw materials.
MAKING AN ADZE
An adze is a cutting tool similar to an axe, but an axe is intended primarily for chopping. The adze is made for smoothing or carving. An axe’s blade is set in the same plane as the shaft. In contrast, the adze’s blade is set at right angles to the shaft, like a hoe.
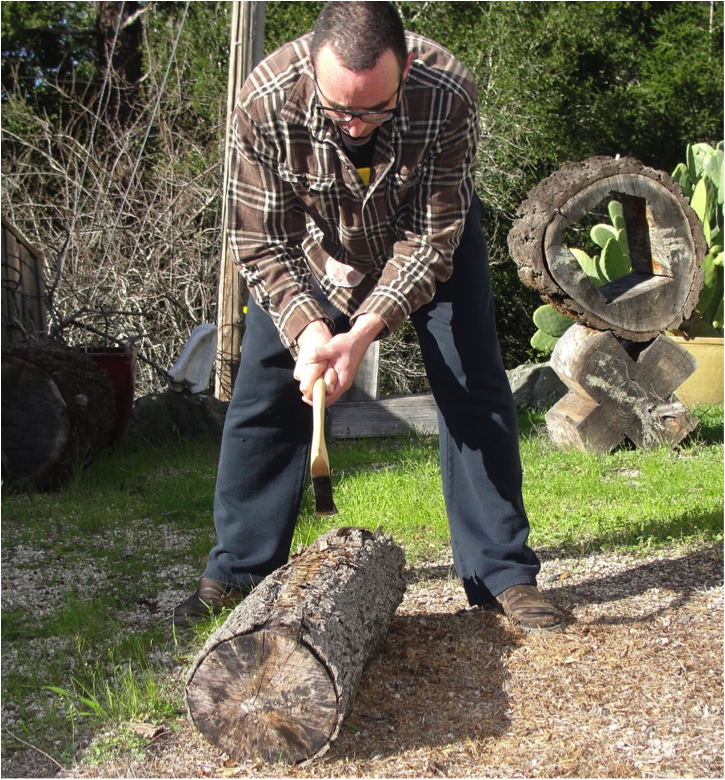
Brady Wedman demonstrates technique for swinging a foot adze [called so because the user swings the adze downwards between his feet in an arc.] The edge of the blade lifts upward, thinning the chip and then cutting it loose. The closer the handle is to vertical, the thinner the chip. Image by Emily June Street
A hand adze has a short handle and is swung with one hand. It is designed for hollowing out bowls.
A hand adze has a shorter handle and curved blade. (Image credit 19)
I have a number of adzes. One is an ordinary American-made foot adze, with a spike on the back of it. You can stick that spike in a log to hold the tool steady out in the field if you need to sharpen the blade.
Various adze blade shapes. The adze Oliver is describing above has a spike on the back, like the two bottom blades in this image. Another purpose for the spike on an adze is for making starter holes for nails and for driving down broken nails. (Image credit 20)
I also have a heavier foot adze. It has a heavy poll on it, and a wide blade. [The poll is the blunt or broad end of a tool head.]
A Pulaski is an axe with an adze bit on the back. It can be used both to dig soil or cut wood, and is popular with firefighters who use it to make firebreaks.
The head of a Pulaski, with axe on one side and adze on the other. (Image credit 21)
A mattock has a long, narrow, blade on the back. That kind of a tool is handy for digging out stumps or digging up sod or moss.

A pick mattock. (Image credit 22)
I had a book about a Viking who was buried with his ship. When the grave was excavated, they found tools. One of them was an adze. A thousand years ago or more, these ship builders had devised a way of making an adze. As soon as I saw an image of that Viking’s adze blade, just the blade without a handle, it was an “Aha!” experience. I recognized the tool and the concept: it was an elbow adze, only missing it’s natural elbow of wood for the handle.
A selection of adzes from various eras and cultures. The first adzes with handles on left and right in top row are elbow adzes. (Image credit 23)
A contemporary high-end fine woodworking adze, with carved wood “elbow.” Image by Emily June Street
Making an in-line adze blade
I decided to make an adze out of a hoof rasp, a type of file. They’re wider than ordinary files. Some of them are coarse on one end and fine on the other. The regular four-in-hand is not very wide, but a bigger hoof rasp is 1-1/4 to 1-1/2 inches.
A general purpose four-in-hand rasp has coarse and very coarse teeth on both the round side and the flat side. (Image credit 24)
There are two ways to mount the handle of an adze. Usually the blade will be perpendicular to the handle, but in this case I left it straight, so that the blade would be in line with the handle.
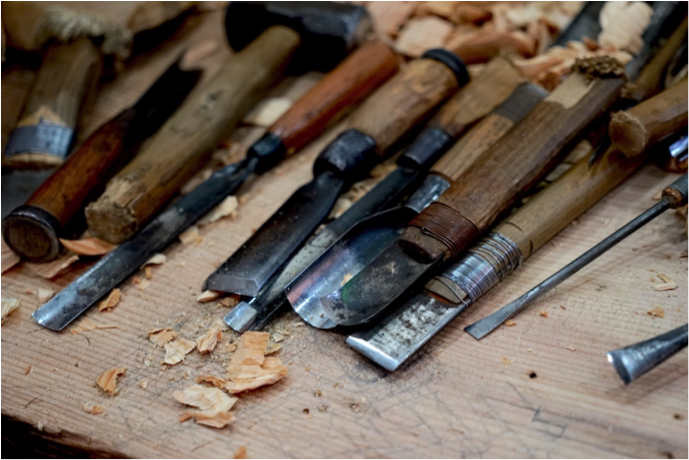
Examples of in-line adzes and chisels. Oliver’s blade was narrow and nearly flat. (Image credit 25)
Forming the handle socket
First I annealed the steel of the file to soften it, and let it cool. Then I reheated it until it was malleable. You can’t shape high carbon steel when it’s cold. You need to get it hot enough that you can bend it without forcing it too much. [ See Oliver’s essay “Blacksmithing Techniques” which also discusses hardening a finished blade.]
I formed the part of the blade that would attach to the handle from about 3 inches of one end of the file. I peened it out so that the edges were thinner than the center—maybe half as thick as the original thickness of the original rasp. That made it wider, too.
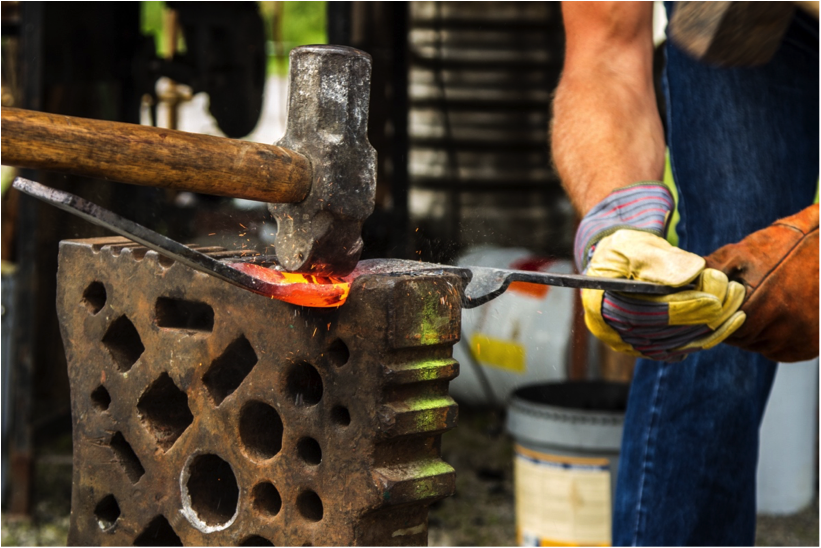
Peening, or hammering metal to bend or shape it. (Image credit 26)
I flattened it out that way so it would curl. When the steel started to bend, it wanted to bend more on the outside edges. It naturally began to form into the socket shape where the handle could insert, though the two sides of the socket weren’t exact mirror images. I needed to do more shaping.
Next I placed the hot rasp where the horn of my anvil wings out from the main block, took a cross peen, and started bending the rasp a little bit. [The rasp was lying parallel to the horn, with the end touching the shoulder at the end of the horn, so that the edges would bend in a downward curve.]
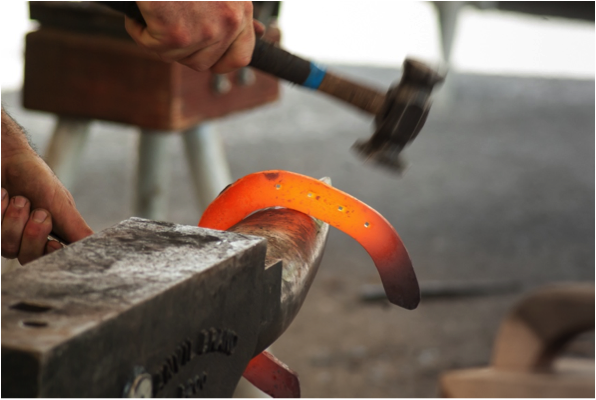
Horseshoe being curved around an anvil’s horn. Oliver placed his rasp steel flat atop the horn while peening it to get it to curve around the horn. (Image credit 27)
Once I got a bend started I could stand it on edge and roll both sides over to where it had almost a socket, with just a little gap.
Shaping the blade
I made the curve on the front of the blade to conform to how I planned to hold and use it. There are various possible shapes to an adze blade.
Adze blades have varying degrees of curvature from side to side, and also from front to back. Some have lips along the sides. Drawing by Brady Wedman
If you put more curve in the blade of a hand adze and sharpen it on the inside, you can cut out a bowl.
If you’re cutting a bigger surface, you may want the front side of the blade a little straighter. Normally, you’d use it with one hand. A straighter blade often gives you more control.
A lip adze, with the strongly upcurved edges, lets you remove larger amounts of wood, faster.
My finished adze blade was only the width of the original file, except that it was just a little bit wider right at the cutting edge where I’d thinned it down and peened it out. The blade had a bit of a waist to it, so that if you laid it on its side on the table, you could see some light under it. The curve from front to back was not very much—that made it cut with more ease. The cutting edge was very nearly straight across, with the bevel mostly on the inside.
I filed a slight relief on each side at the front end, so that there was a gradual curve from side to side, but I didn’t carry that back too far toward the socket. If I set the blade down on a table, I could rock it side to side before the front edges would come down and touch the wood. That made it easier to remove chips. If I pressed lightly, I could get narrower shavings.
The socket end was raised a little bit to give it clearance. I put a straight handle in that socket, about 3 feet long. I used the tool like a slick. [A slick is a large chisel, characterized by a wide, heavy blade and a long, slender, socketed handle.]
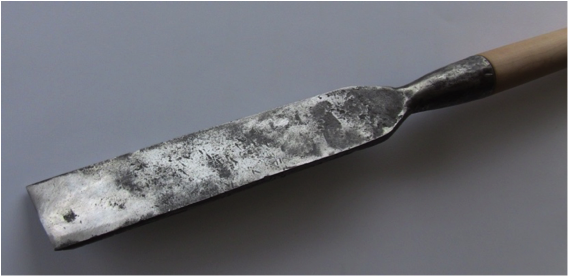
A slick. (Image credit 28)
Hardening the steel
Once I had shaped the blade, I hardened the cutting edge by heating it up past the critical temperature and plunging it. [The critical temperature is the point at which the atoms of the metal and the atoms of carbon mix freely and ultimately bond together. See the introduction to Oliver’s essay on “Blacksmithing Techniques.”]
Since I had made my adze blade from a file, I had to be careful. I couldn’t just heat a high carbon piece of steel to red-hot and quickly plunge it into water. That would cause the outside to cool and to shrink before the inside had time to do so, creating cracks in the edge.
Instead I quenched the steel with oil or salt water that didn’t carry the heat away quite as fast. Another cooling method is to lay paper napkins or toilet paper on top of the quenching fluid and then cut the blade through the paper to plunge it.
Making a right-angle adze blade
I made another adze with a traditional adze shape, rather than in-line. While shaping the steel for that blade, I bent the socket so that the cutting edge was at a right angle to where the handle would be. If you’re familiar with a mattock or grub hoe, they all have that angle to them.
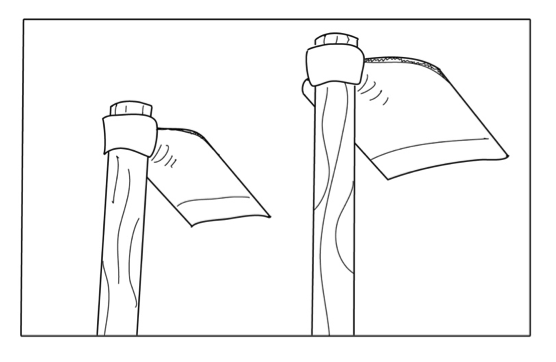
Grub hoes. [These handles are mounted in solid rings of steel. Oliver’s hand-rolled socket did not encircle the handle. Drawing by Brady Wedman
To make the socket for this adze blade, I bent the edges of my steel around and up toward each other. The turned-up edges were about halfway down toward the blade. That made a substantial socket into which the handle could fit.
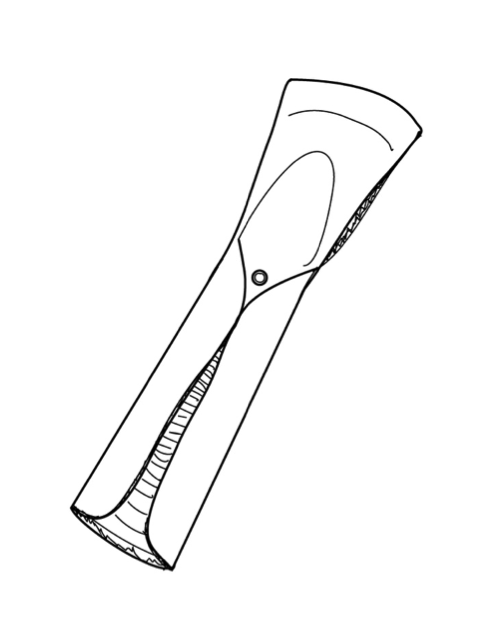
Drawing showing a rolled socket very much like the one Oliver made. Note how much of the steel stock was used to form the handle. Drawing by Brady Wedman
Then I bent the blade at more or less a right angle, with the solid side of the socket facing the cutting edge. I mounted a short handle—about 10 inches. If I had wanted to use it with a long handle, I wouldn’t have bent the blade so much.
The socket was widest at the blade end so that I could slide the handle in from below. I made the handle out of a piece of birch and whittled it down to fit the taper of the socket. I left about 3/4 inch of wood sticking out of the socket so that I could drive the handle into the socket without driving on the metal.
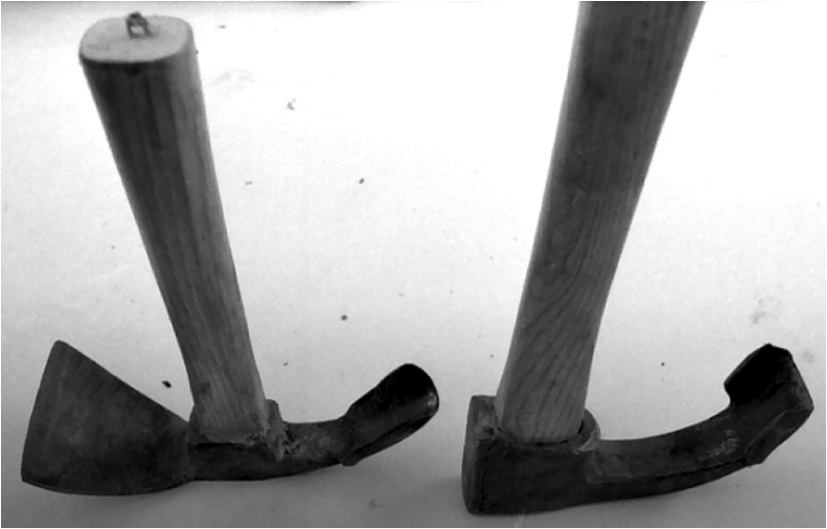
Lip adzes, showing how the handle enters the socket from below. (Image credit 29)
Normally the handle keeps itself wedged in very tightly. But if the head does begin to get loose, you line the eye of the socket with a piece of leather, stick your handle back in, and drive it back down snug.
You swing an adze in a circle, and you want it to bite just enough to take off a chip. If it’s biting too deeply, you need to tip the handle up a bit.
For carving a hollow, as into a bowl, you can flex your wrist at each stroke and make the head travel in a short circle. If you’re working on a straighter surface, keep your wrist stiff and use your whole forearm to come down along the wood to true it.
When you start to use an adze, you’ll soon figure out what you have to do to make a useful tool out of it.
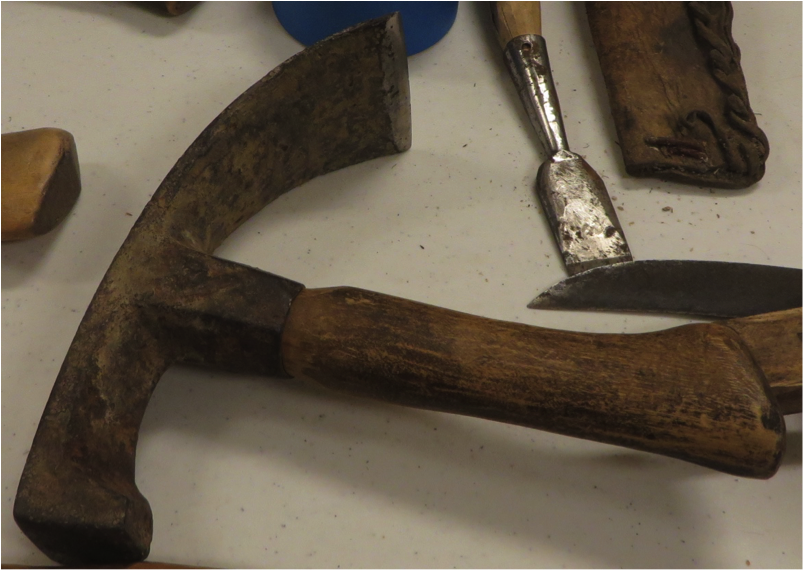
One of Oliver’s adzes. Image by Molly Rettig
MAKING AUGUR BITS
Tools can be heavy. When you want to go to spring camp and take a few light tools, you don’t want to carry an ordinary brace and bit. [A brace is a hand tool which, when fitted with an auger bit, allows you to drill holes.] Instead, pack only your handmade bits [see Oliver’s process to make them, below], and when you get to camp, you can use a stick of wood as the brace [handle].
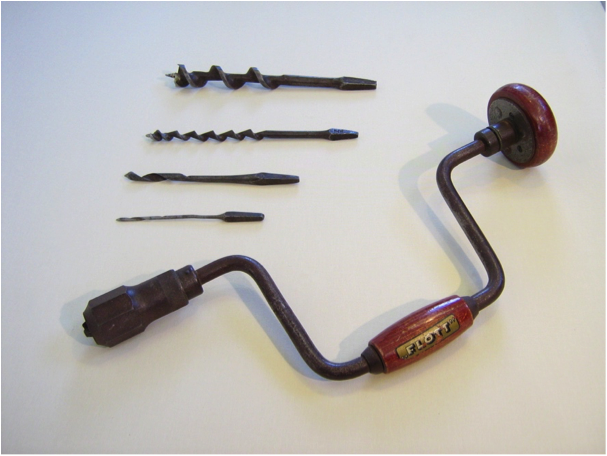
Commercial brace and bits. (Image credit 30)
In times gone by, people would make an auger bit by taking a round or square piece of metal, flattening it out on the end and running an eye in the top for a cross handle. My idea was to adapt that type of bit to a simple wooden handle. I take a flat piece of metal and make a blade/bit that is much lighter than a regular 1-1/2- or 2-inch auger bit.
I use whatever metal I have at hand.A piece of sled runner steel works well. I have used a piece of a hoof rasp, although it’s a bit of a bother to file off both sides. [Oliver would also have to heat the rasp first to remove the hardness, as described in the essay “Blacksmithing.”]
Using a fairly heavy piece of steel, I can make the two arms that attach the bit to the handle longer. With light steel the arms must be shorter because they tend to warp.
These bits are designed to fit into a wooden handle that is a little smaller in diameter than the width of the bit. I make a groove on the handle that corresponds with notches filed on each side of the bit. Once I have embedded the bit into the handle, I wrap wire around it to keep the bit from sliding out of the handle.
Homemade blade showing the two arms, with notches.
Image by Heidi Dammann
Three of Oliver’s handmade auger bits, with handles.
The text below describes the one in the middle.
Image by Curt Madison
At the very center of the working edge of the blade I form a point by making two slanting cuts with a small hacksaw. The point keeps the blade centered to bore down straight. I sharpen this center post and taper the sides into slight cutting edges, but this isn’t a screw like a commercial bit, and those sides don’t do a whole lot of cutting.
Next I make a slanting cut on one edge of the blade to form another point. It is somewhat shorter than the central point. Its function is to cut the wood fibers as it rotates, scribing a circle around the central point that is the size of the hole being drilled.
The remaining flat side is the cutting edge. It follows behind the circle scribing point and lifts out a chip of wood, just as the raker of a saw does. I sharpen the cutting edge on one side, with the bevel bent forward at the edge. That bevel is tilted a little to give the tool enough bite to pick up a shaving as it turns ahead of the main part of the blade.
There isn’t much of a reservoir for the shavings that build up in front of the cutter. To get around that, I cut out a curve below the circle cutter so that some of the shavings can slip into that space, out of the way.
I have tried making bits with cutting edges and circle cutters on both sides, but have never been able to make them work as well.
Since the blade is flat and doesn’t have any screw to bring the shavings up out of the hole, they’ll soon fill up the space from the end of the bit to the handle. You’ll have to pull the auger out of the hole periodically and clean it out. Or, if the work is small enough, you can just turn it over and tap it. Then you stick the bit back in the hole and continue with your drilling.
* * *
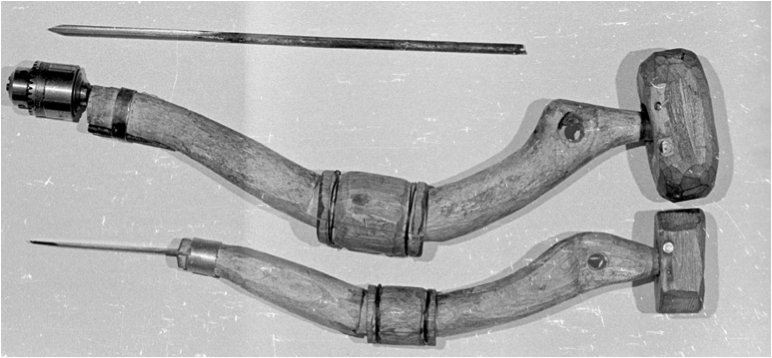
Oliver made these two drills from scratch, except for the chuck in the upper tool that holds the actual bit. Note the two-piece hand grips and top handles, all of which turn. Images by Curt Madison
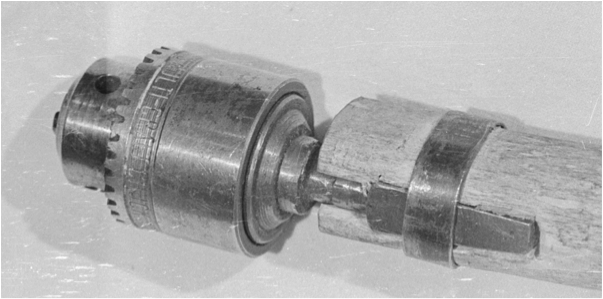
Detail of chuck.
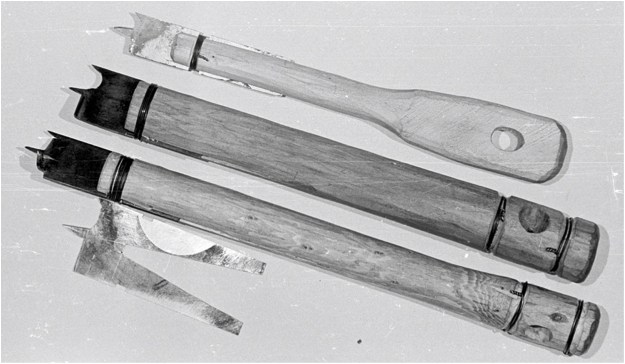
More handmade drills.
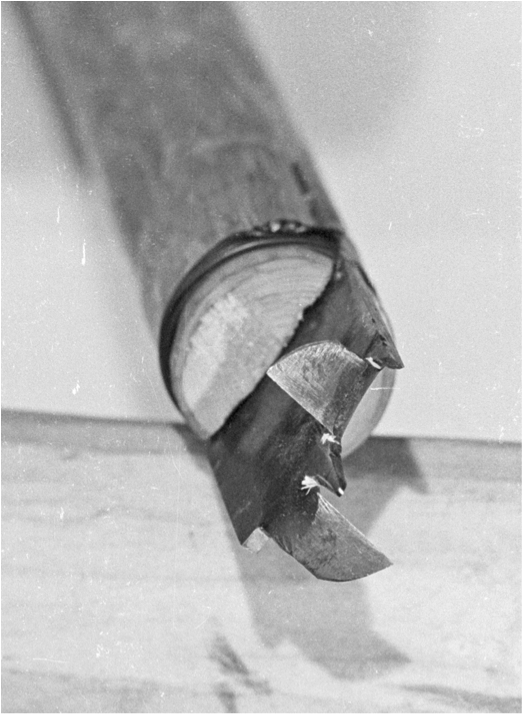
A close-up view of handmade bit.
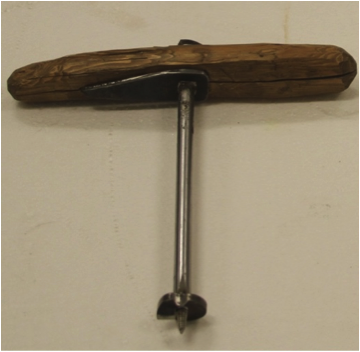
Oliver also fastened this commercial auger bit to a wooden handle. The metal tab on the underside of the handle has a tongue that extends into the wood to keep the handle from spinning. The nut on top holds that metal plate tightly against the handle. Image by Molly Rettig
MAKING A HAND PLANE
A hand plane is a tool used to plane wood, powered by your own muscles. Planing wood is leveling it or smoothing it by removing small, thin pieces from its surface.
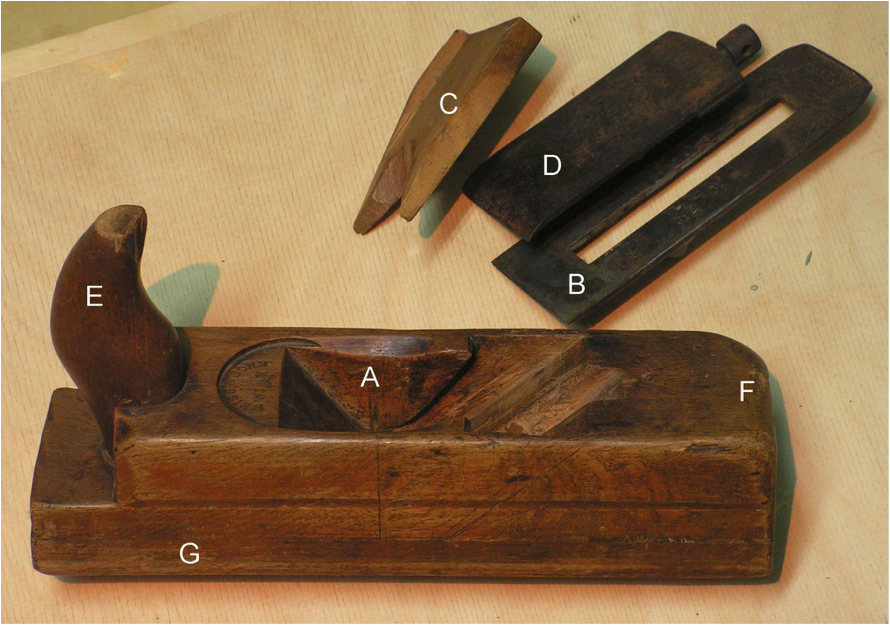
Parts of a basic block hand plane.
A: the throat, the opening where blade goes B: the blade (also called the iron) C: wedge (anchors blade in place) D: chip breaker (prevents splitting of board during planing) E: handle F: buffer/body G: Base (Image credit 31)
The blade of an ordinary block plane has a flat side and a beveled side. Against the flat side rests a cap that acts as a chip breaker. [A chip breaker is a metal plate placed at the front of the blade that bends up the wood chip and prevents the splitting of the board.] Then there’s a cap that fits over a bolt and has a little lever in the end that you can flip over to tighten it up against the bolt. That holds the blade firmly in the body of the plane.
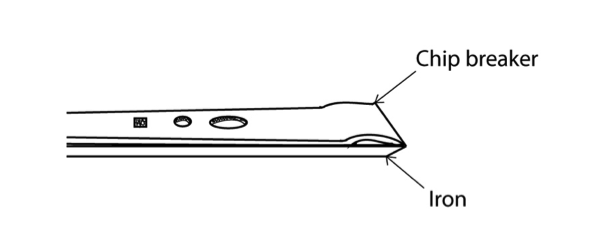
Chip breaker. Drawing by Brady Wedman
For the simple plane shown in the image below, I just shaped the body from a block of seasoned birch, about 7 inches long and 2-1/2 inches thick. I trued up the bottom of the birch block by working it against a piece of sandpaper on a flat board. Then I rounded the top of the block so I could push on it comfortably, and I whittled the front into a shape that gave me something to grip. I cut a hollow about 3/8 inch wide— the throat—where the blade and wedge fit into the plane. [The wedge is a piece of wood that anchors the block blade in place.]

One of Oliver’s bare bones block planes.
Image by Curt Madison
This block plane had a fairly heavy blade made out of a horse hoof file. I filed an extra very narrow, flat surface right behind the cutting edge, like another bevel that was nearly perpendicular. It served as a chip breaker to curl the wood shaving up before it hit the end of the wedge, as this rudimentary plane did not have a standard chip breaker.
There’s a round pin that goes through the hollowed-out throat of the plane. The wedge drives under that pin and anchors the plane blade in place.
Of course the throat is not adjustable, but it’s quite wide so it’s easy to clean out the wood shavings. I just turn the plane over and dump them out.
Since the bevel is on the bottom of the blade, the blade itself has to sit inside the plane at an angle that allows it to bite into the wood. If you make too much or too little of a bevel or if the blade is at the wrong angle, then the shaving wants to split the wood ahead of where you are working, and you don’t want that.
A plane is designed so that it takes off a thin shaving and curls it up. If it doesn’t curl up, your blade is biting too deep. Working with your blade too deep takes more effort on your part. It’s better to have a sharp blade, less bite, and a thinner shaving.
Some block planes are designed with the blade lying down at a pretty flat angle, which is good for planing across the grain at the end of a piece of wood. With a plane like mine, you have to have the blade at a steeper angle so that the blade won’t be kicked out if you hit a knot or something.
To set the depth of the cut, I first drive the wedge in, but not too tight. Then I set the plane on a level surface like a table and slide the blade and the wedge around until the blade is even with the table, with no bite at all. That helps me line it up true with the slot in the bottom of the plane.
Then I take a hammer or mallet and just tap the blade and the wedge to move them to where I have as much cut as I want. The more the blade projects down, the bigger the cut. If I get too much cut and want to back it off just a little bit, I hit the bottom of the back of the plane with the hammer, or bump it on something. It doesn’t take much of a bump to get the blade to move back up.
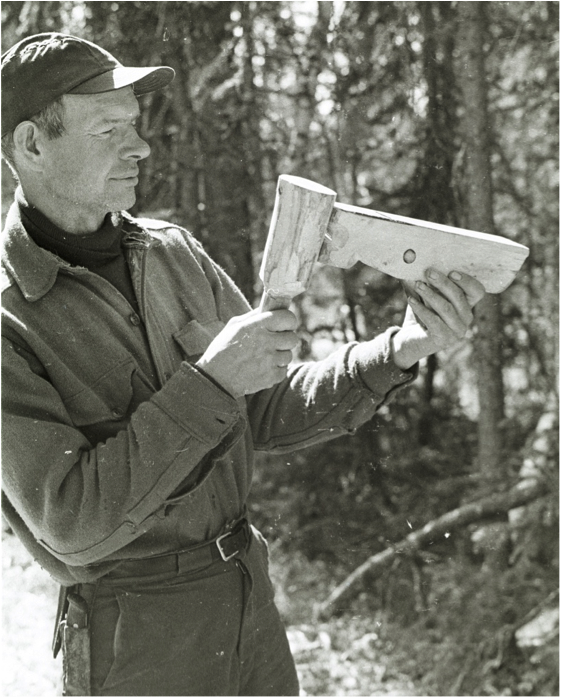
Oliver using an improvised mallet to adjust the blade of a handmade plane at spring camp.
Image by Sasha Wik
* * *
I drilled a hole at the back bottom of this plane so I could hook the plane over a nail in the wall for storage.
I used this tool when I was making skis, snowshoe frames, and furniture.
I sometimes carried a plane when I was out traveling because I occasionally wanted a nice true, square stick. The only way to get that is with a plane. I could have used a mitlik or a knife or an axe, but they don’t do as nice a job of truing up a stick as a plane does.
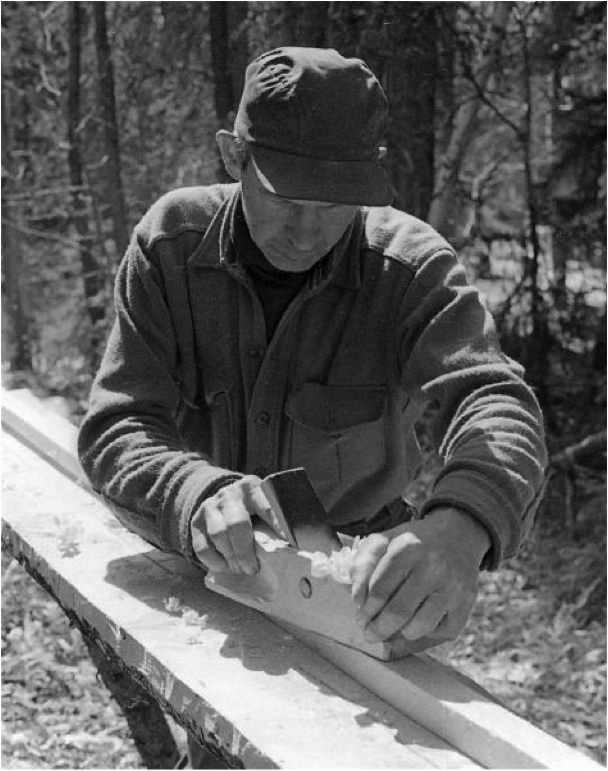
Oliver converting a tree into parts for a kayak.
Image by Sasha Wik
A few of Oliver’s handmade planes:
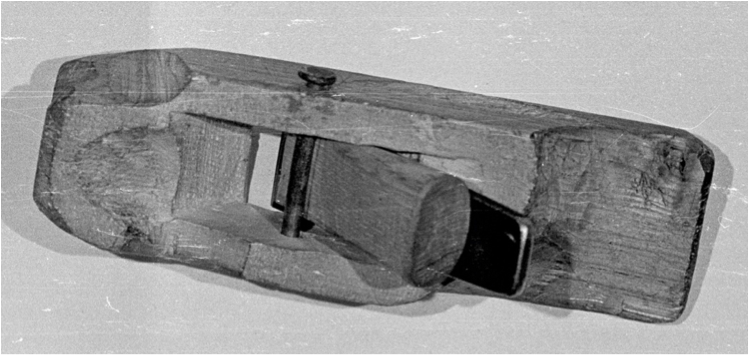
Image by Curt Madison
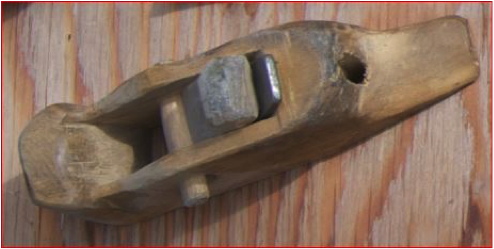
Image by Rein Dammann
MAKING A WOOD SCRAPER
After shaping a work of wood with my adze, I often finish it up with a wood scraper, as the adze does not leave a perfectly smooth surface. My wood scraper has several different curves on it so that I can adapt it to any situation.
Handmade Wood Scraper
Image by Rein Dammann
I made my wood scraper out of an extra hand plane blade. Those blades have a long opening in the middle.
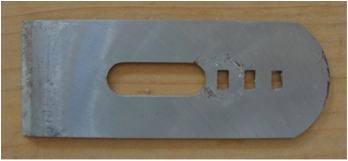
Typical plane blade [bit]. The short slots engage a screw mechanism to advance or retract the blade. Image by Emily June Street
First I cut horizontally through the long opening of the blade. Then I removed a small chunk of the blade beneath that cut, leaving a long leg on top and a shorter one below to make a J-shaped piece. I mounted the long leg into a wooden handle, and the short one extended the flat working surface. I filed the working end of the blade into a curve. The curve is not quite uniform, so I can use it to shape various things.
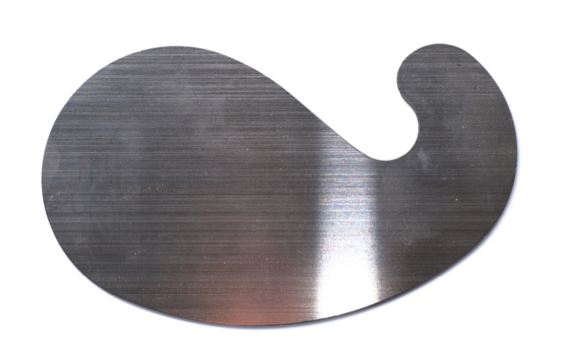
A multi-curve gooseneck scraper of the type
used by fine woodworkers. Oliver’s tool met the same need. (Image credit 32)
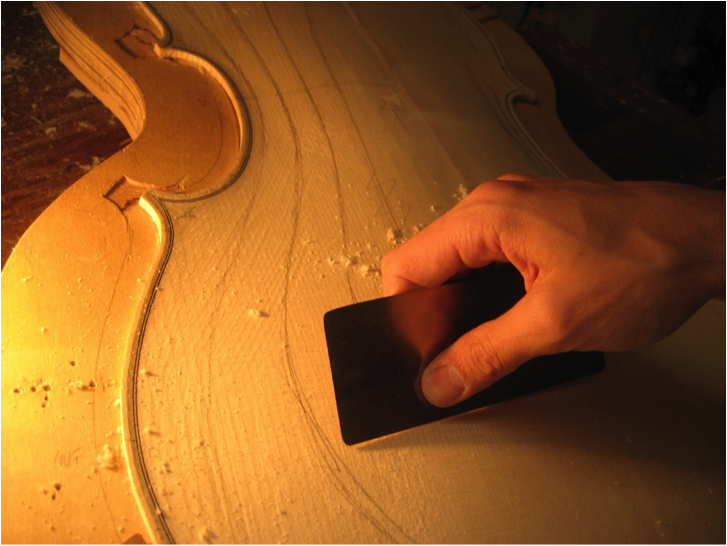
Card scraper used for fine work on violin box. (Image credit 33)
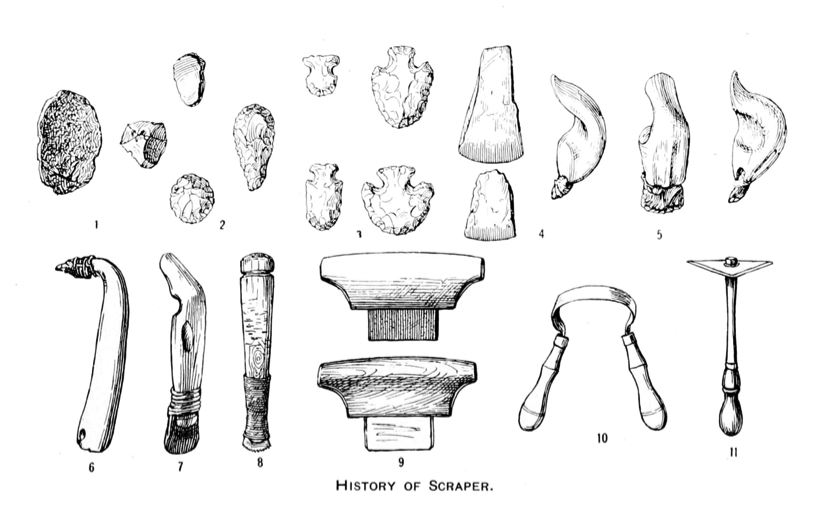
Scrapers from ancient times to modern. Primitive scrapers were shaped from bone or stone. (Image credit 34)
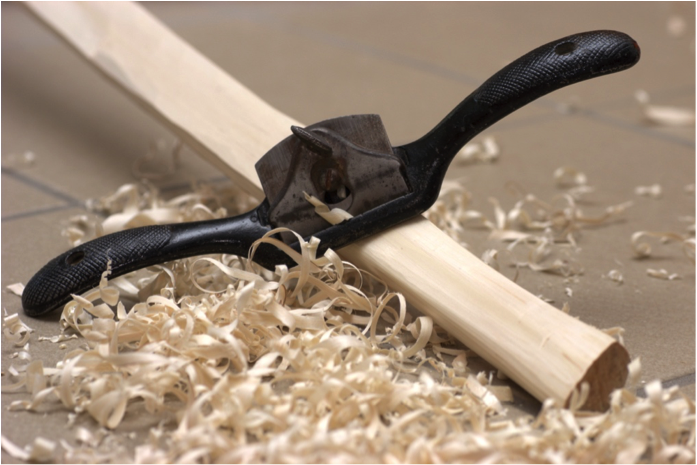
A spokeshave, often used to shape wheel spokes, chair legs, bows, and arrows. (Image credit 35)
FASTENING THINGS
Rope. By Dorene Cameron Schiro
In the next three essays, Oliver discusses some of his practical methods for fastening things together.
RIVETS & TRUNNELS
Rivets
A rivet is a permanent mechanical fastener. Before being installed, a rivet consists of a smooth cylindrical shaft with a head on one end, similar to a nail but not pointed at the end. They are sometimes used with washers. Once installed, the rivet is pounded, and the metal on the end turns or spreads to hold the rivet in place.
Rivets with washers. Image by Emily June Street
I often made my own rivets, especially the ones I used for making stoves. I didn’t have any store-bought stove rivets, so I’d use a 20d nail. [20d is read as a “20-penny nail.” In the United States, the length of a nail is designated by its penny size. A larger number indicates a longer nail. A 2d nail is 1 inch long, and a 20d nail is 4 inches long.]
I’d clamp the nail in my vise and cut off as much as I needed, leaving the end blunt. I’d leave enough nail that I could peen both ends. [In this case, to peen is to pound on the metal to flatten and spread the end so that the rivet can’t pull back out of the hole.]
The steel in imported nails is much softer than those made domestically in the United States. If you don’t know how to cuss, try driving some of those imported nails! But they do make good rivets.
Split rivets, as their name indicates, are split on the end, and each side of the split is tapered. When you drive one against something solid, it spreads out on both sides to fasten it in place.
Types of rivet. A split rivet is shown in the very center of this display. (Image credit 71)
I used copper split rivets to fasten leather together. Some people use them to construct their knife and axe holsters. They’re easy to use, and they don’t get cut as leather babiche would. I also used rivets for fastening on knife handles.

Knife handle with three rivets. (image credit 72)
Trunnels
Trunnel is a contraction of “tree nail.” These are wooden “nails” or pegs used in joinery. You can make them by hand from wood blanks that you shape up with a chisel.
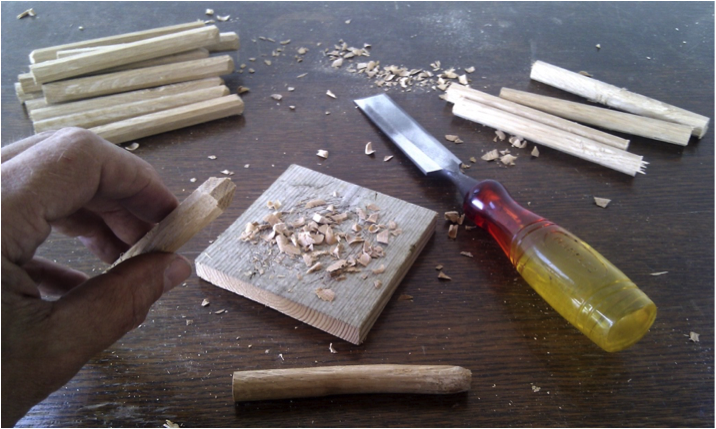
Making trunnels. (Image credit 73)
If you want to put a peg in a wall, make a small cut in the end of a trunnel and put a wedge in the cut. Insert the wedge-end of the trunnel into the hole you’ve drilled in the wall and tap the trunnel into place. As the trunnel comes to the end of the hole and settles onto that wedge, the wedge spreads the end of the trunnel apart, solidifying it. It won’t be able to pull out easily. That is essentially the concept of the trunnel as a fastener.
ROPE
Handling and storing rope
It pays to learn how to use rope. My biggest complaint about the handling of ropes by greenhorns is that when you are not used to handling rope, you wad it up when you’ve finished with it and dump it in a corner, leaving it in a tangle. The when someone needs to use it, he has to spend half a day straightening it out and preparing it for use. But there are ways to prevent that.
I have a forked branch with lengths of rope hanging on it. It is in my shop, and it gives me a convenient place to hang coils of rope. There are several ways to tie off a coil of rope.
Mountaineer’s coil.
Drawing by Brady Wedman
My favorite way is where the two ends overlap after I’ve finished the coil. I fold one end back, wrap the other end around the loop, tuck it through the loop, and pull the loop up tight. Instead of tucking the end through that loop, you can pull a bight through. Either way, when you’re ready to use it, unwind a couple of turns, and you’re ready to go. [Oliver describes the mountaineer’s coil, pictured above.]
There are quicker ways of coiling a rope, but they’re less secure. The reason I like this method is that you can handle that bundle and it stays fastened.
With thin rope, 3/8 or even 1/2 inch, and especially with plastic rope, it’s easier to make a coil around my forearm. I grab one end between the thumb and finger of my left hand. Then I wind the rope around my elbow, come back across my forearm, and bring it back between my thumb and finger. I keep going, moving the rope down and crossing it around my forearm so that each coil is a figure eight.

Figure 8 Coil.
Drawing by Brady Wedman
If the rope is straight when you coil it up that way, it slides pretty well without kinking as you bring it in. You can coil it up quickly and tie it around the middle with a couple of half hitches.
Often when I buy rope, I buy long lengths of it, a whole coil. When I have a long rope that I don’t want to cut, but I do want shorter for storage or other purposes, I shorten it by making loops in it, like a chain stitch. I pull the end through the last loop so that it won’t pull out. The looping makes the rope bulky, but when I need a long length again, I can pull the end back out of the final loop, and the loops will unravel.
Oliver describes the daisy chain or sinnet knot. (image credit 74)
When I want to cut a long coil into shorter lengths, I wrap a piece of tape around the end, pull out an inch of rope, and wrap another inch of tape. Then I cut between them. This prevents fraying of the rope.
That’s a lazy shortcut, but when you’re in a hurry, it gets the job done. The other way to prevent fraying at cut ends is to braid the component rope strands back through, making a back splice— if you have the patience and time to do it. You could also make an eye for the same purpose, if you know you want an eye in the end of your rope.
The back splice starts with a crown knot. Then the ends are tucked under to complete the splice, leave a solid, unfrayed rope end. Drawing by Brady Wedman
Eye splice. If you get this part started correctly, the loose ends weave nicely over and under the coils of the standing part of the rope. Drawing by Brady Wedman
To make an eye, you double back one end and give it an extra twist before splicing the ends onto the rope. That way, when you’ve got them pulled in and rolled, the eye opens out like it should. If you don’t give it that little twist to start with, your eye is twisted, too. You have to pick it open to use it, especially if the eye is a rather big one.
Parachute cord
I use quite a bit of parachute cord. I buy it in half-pound or sometimes one-pound spools. Parachute cord is basically a braided sheath around individual twisted strands of smaller diameter. The more it stretches, the tighter that sheath tugs on those inner strands to pull them together. That makes a cord that doesn’t stretch as much.
If I want a string to carry in my pocket, I often cut a piece of parachute cord, grab one of those strands in the middle, and start pulling on it and working the outer braided part down on the core.
After I pull it down a certain amount, it won’t go farther, so I have to rake it off until it comes all the way down. I work it with my finger and thumb, and move that bunched material ahead of my hand until I get to the end of it. Then I move more along, and eventually I can pull out the individual strands.
Those individual inner strands are hard to break and are useful for sewing. They’re much coarser than thread, but for some things, they’re exactly what you need.
Parachute cord with the inner threads partially extracted. The threads on this particular piece of cord were too fine to be useful for sewing.
Image by Ole Wik
The outside sheath that remains after the inner threads have been removed is braided, and not elastic. It’s very strong and flat, and in a 3-foot length, it doesn’t take up much room in my pocket.
I melt the ends of that outer sheath and usually tie a loop in the end—nothing fancy. Since there’s a little bulb where the end of the sheath is melted, I make an overhand knot. Instead of pulling the end through, I pull the bight through. The overhand knot draws up around the sheath close to where that melted end is, so that it doesn’t pull through.
Oliver’s loop knot in the flat outer sheath of the parachute cord. The little black dot on the right side of the knot is the melted bulb at the end of the sheath.
Image by Ole Wik
I make loops on the ends of the strings that I carried in my pockets because the majority of times when I use them, I want to anchor one end, and the easiest way to do that is to have a noose to fasten over something. Or, if I want to bundle something, I wrap the rope around it a couple of times, put the end through the loop, and draw it up.
I have some of those parachute cords sheaths that are about 10 feet long, too bulky for carrying in my pants pocket. I can carry them in a coat pocket, though, and the extra length can come in handy.
A net twine is a parachute cord that doesn’t have that braided outer sheath. If it’s nylon, it stretches. It can be useful in drawing things together tightly. If it’s a larger piece of twine, you can splice an eye in the end.
Braided vs. twisted rope
I use both braided rope and a regular three-strand laid rope. Laid rope is twisted rather than braided. Braided rope is easier to handle when you don’t want kinks. You can wad it into your pocket without it tangling much.
A lariat rope has four strands, laid so the rope doesn’t have much stretch. Ordinary rope has only three strands. It will have more stretch than lariat rope.
Three- and four-strand rope. Drawing by Brady Wedman
Types of rope and their uses
The main thing about rope is to have plenty of it. It’s size and what it is made from will determine its best use.
Three-lay rope can be made out of nylon, polyethylene, polypropylene, and other materials. Use the appropriate type of rope for the job at hand.
Polyethylene rope does not have much stretch, it’s not affected by moisture, and it doesn’t mildew or rot, but it won’t hold knots well. I use it when I lay out dog harnesses for the tug line—the main line to which all the dogs are roped. Sunlight is bad for this kind of ropes.
There is a kind of hollow poly rope that is a woven sheath only. You can splice it with a fid.
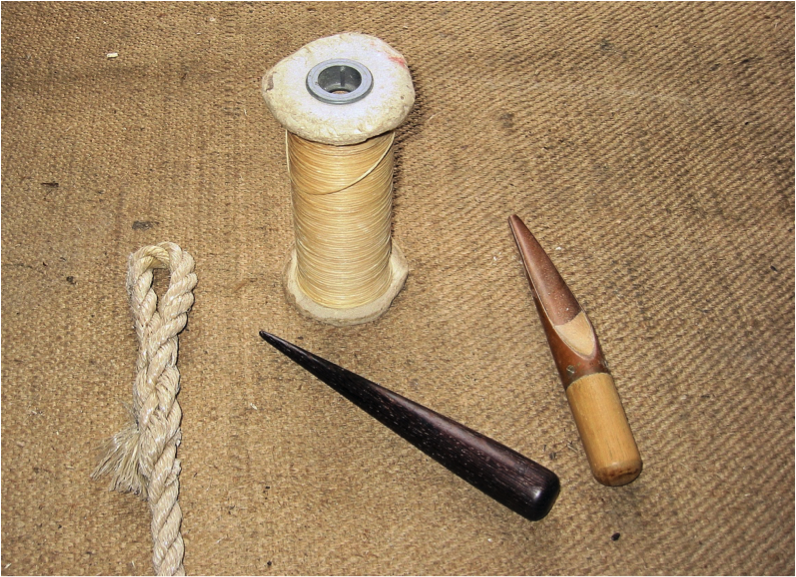
Splicing fids help hold the strands of the rope apart while splicing. (Image credit 75)
I have used this rope spliced with a fid for harnessing dogs. When hooking an individual dog into it, one end of the rope is spliced into the main tow line, and the other end has a toggle on it that goes through a little loop at the end of the dog’s harness, behind the tail.
Nylon rope is useful for an anchor line, because it stretches quite a bit. When your boat is out at anchor, there are always waves. The rope is working all the time against the anchor, and it’s better to have a little give in it.
Depending on the anchor, I may have a length of chain between the end of the rope and the anchor. A short piece of heavy chain right at the anchor will increase safety by flattening the angle of pull on the anchor. The chain will hold the rope down against the bottom. When the boat surges, the rope will lift the chain, and then the heavy chain will drop back down again. The chain acts as a kind of buffer. It’s a much coarser chain than someone would need to hold the boat, because it has a different purpose.
I like to use blackened hemp rope for a lot of outdoor applications. It’s treated with tar that prevents it from rotting and makes it stand up to the sunlight better. It was originally used for sail rigging.
I have a number of salvaged ropes, as well. You can often salvage ropes from old boats and docks.
Rope size
I buy 1/4-inch rope in a big spool and probably use more of that than any other size for ordinary homestead work. It’s plenty strong for guying out antenna poles or tents, and for most any other use.
I also keep some 3/8- and 1/2- inch handy. When I’m tying a raft of logs in preparation for towing, I like a fairly bulky rope, like 1/2-inch. Sometimes it’s not a matter of strength, but convenience in handling it and getting a better hold on it in cold or slippery conditions.
Traditional ropes
Before cotton or nylon rope was readily available, the Alaska native people had to use local resources for rope and twine.
Strips of leather called babiche were used in sewing and other applications.
For wrapping or tying things together, you can use strips of bark, or spruce root. You can make a rope out of grass, too, if you know how to twist it.
The Inupiaqs mined all kinds of materials to get fibers for rope or twine.
Maude Cleveland, a village elder, had an old hawser [a heavy mooring rope for a boat] that had been discarded. She unraveled it and used it to make some smaller diameter rope. She also took a gunny sack apart by pulling all the strands out independently. I think she braided those into a rope, but she could have laid [twisted] them as well.
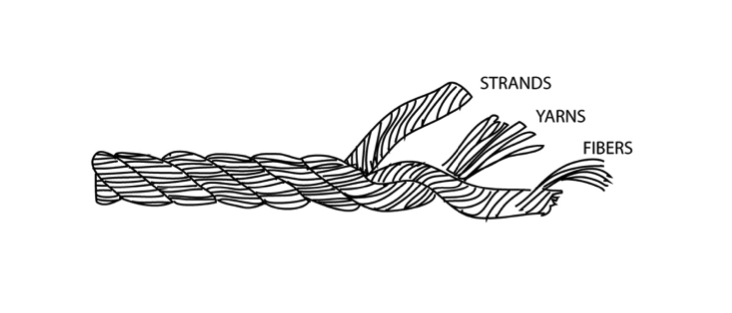
To lay a rope, the fibers, yarns, and strands are all twisted as the rope is made.
Drawing by Brady Wedman
One of the early explorers of the Kobuk Valley gave a canvas tent to the Inupiaqs. They immediately took it apart to get twine, and they used it instead of willow bark to make fish nets.
Inupiaq fish nets were once made from willows. There used to be huge amounts of willow bast available—the inner part of the bark that can be pulled apart to make strings. Inupiaqs would strip the bark as soon as the sap came up, store it, and soak it. They would then lay or braid those fibers together.
Robert Cleveland, an Alaska native, once mentioned that his grandfather, as a child, had seen an actual willow bark net being set. He said that they handled it very carefully when it was dry.
TYING KNOTS
The knots I use most often are these simple knots listed here, and they will ordinarily get the work done. Other works cover more complicated knots.
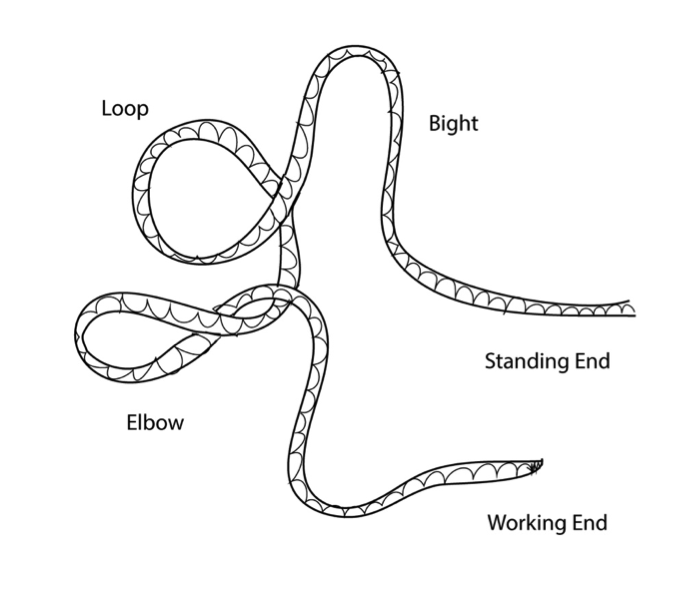
Terminology: Parts of a rope. Drawing by Brady Wedman
Overhand knot
The basis for a lot of knots is just a simple overhand knot.
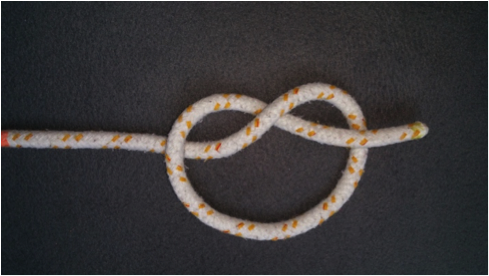
Overhand Knot. (Image credit 76)
Slippery Half Hitch
If you double the end of your rope and tie an overhand knot by pulling that loop up and through, you get a slippery half hitch. If used as a stopper knot, it will be easy to untie, like a shoelace. [A stopper knot is tied at the end of a rope to prevent the end from unraveling, slipping through another knot, or passing back through a hole, block, cleat, or belay/rappel device.]
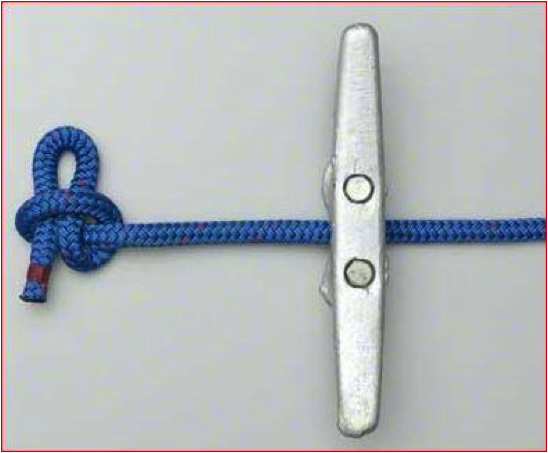
“Slippery” half hitch used as a stopper knot with a boat cleat.
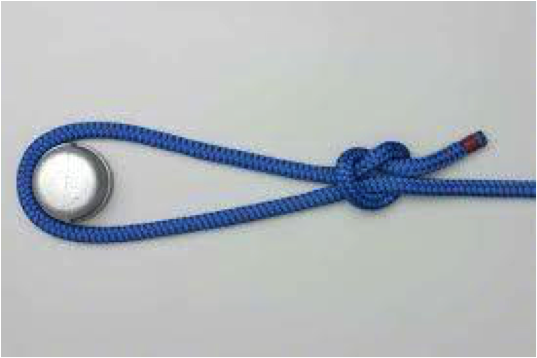
With the end and standing part reversed, the slip knot becomes a running noose. (Both images credit 77)
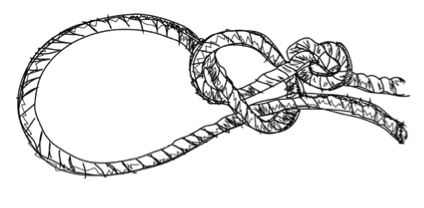
Addition of another overhand knot gives you a secure running noose. Drawing by Brady Wedman
Slippery Hitch
There’s a hitching tie that I use all the time called a slippery hitch. You pass the end of a rope around a tree or a post and make an overhand knot around the standing line. As with the slippery half hitch, instead of passing the end of the rope through the knot, you pass a loop.
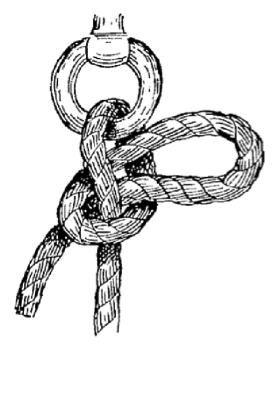
Slippery hitch. Drawing by Brady Wedman
Again you get a slippery slip knot, and the slip part easily makes the whole knot come undone. The hitch itself is very secure.
Figure of Eight Knot
Then there’s the figure of eight knot, which is used mostly as a stopper knot.
Figure of eight knot. Drawing by Brady Wedman
Figure of Eight Hitch (Siberian Hitch)
My hand will automatically form a hitching tie if I’ve got a length of rope in my hand. Instead of the overhand knot, I end up making a figure of eight knot.
Suppose you’ve passed a rope around the left side of a tree, keeping the free end in your right hand on the right side of the tree. With your left hand, you reach under the standing line, get a bight of the free end, pull some slack from the free end under the standing line, and give it two clockwise half twists. With your right hand, you pass abight of the free end down through that loop and pull it tight.
End with that loop running through one half of a Figure 8 and the standing part running through the other half, like a slip knot. It will hold better in plastic rope. At the same time, it doesn’t jam tight and is easy to get loose.
Siberian Hitch Knot. (image credit 78)
Slippery sheet bend
I use this knot very often, tied in such a way that it is also a slip knot, so I can pull an end and untie it. If I’m working and I’m up on a cache and want to pull something up, this is the knot I use to wrap and lift it.
Slippery Sheet Bend. (image credit 79)
Bowline (capsize method)
You can use any of these knots to tie a rope around a stake, but it’s something else to tie a rope around a dog’s neck so it won’t pull and choke it. I use a bowline around the dog.
It’s not easy to tie a bowline in the ordinary way, adjusting it snugly enough so the dog won’t get it off over his head. I’ve never seen my way used by others unless I have taught them. Here’s how:
“Capsize” method of tying a bowline around an object. Drawing by Brady Wedman
• Make a slip knot in the standing line. Pass the free end around the dog’s neck.
• Pass the free end back through the slip knot. You must go through the bight in the correct direction. Push the part of the knot in the standing line up against the dog’s neck, leaving a little room for breathing.
• Now pull the free end back toward the dog’s neck until the bight draws through the knot. Once the whole thing capsizes, you’ll have a bowline there (if it doesn’t look like a bowline, turn it over and look at it from the other side).
Square Knot
Finally, there’s a square knot, which is a package knot.
▪ Hold an end of the rope in each hand.
▪ Pass the right end over and under the rope in your left hand.
▪ Pass the rope end now in your left hand over and under the one now in your right.
▪ Tighten the knot by pulling both running ends at the same time.
“The square knot or reef knot should only be used as a binding knot where it lies tightly against the surface of that which it binds and cannot move. Unfortunately, if it is wrongly used as a bend, joining two ropes, it can unexpectedly spill.” [http://notableknotindex.webs.com/reefknot.html]
Reef or Square Knot. (image credit 80)
Overhand Loop Knot
There is another very simple knot that is based on overhand knots but depends on melted plastic for its grip.
Oliver’s melted plastic stopper knot. Image from the collection of Dorene Cameron Schiro
The more tension on the knot, the more it will tend to hold.
Lariats
With an ordinary lariat (lasso for capturing animals), most people just throw the loop. You’ll have the rope coiled loosely in your left hand and the loop hanging open in your right. The standing line follows around the edge about a third of the diameter of the loop. That’s what pulls the coils you are holding in your left hand.
The Sami people, or Laplanders, have an entirely different system. They hang onto the end of the rope, but when they throw the loop around the animal, they throw the whole rope out. They’re working with reindeer that have extensive antlers, not cattle with short horns, so they must have a much bigger loop. They also work at a longer range, so they need a longer rope. Having it uncoil in the air is probably helpful. For the lasso loop, they use a lassoring, a specialized tool. They may have a lining for the eye of the ring through which the rope feeds to make the noose of the lasso. The traditional Sami lassorings are made of antler or bone.
Sami Lassoring. (Image credit 81)
Other noose and lasso traditions call these rings or tools “hondas.” They are shaped like a pear, and may be carved out of horn or ivory or wood.
If you don’t have a honda, you can use a honda knot in the lasso. You can tie a honda knot by first placing an overhand knot in the end of the rope. Then tie a second overhand knot, passing the running end of the rope through it and tightening. A lariat loop is similar but will not slip from the running end.
Lariat Loop/honda knot with stopper knot. (image credit 82)