Part I: Building a Homesite
Caches and Outbuildings
The challenge all through the North is to protect one’s food and possessions from damage. Water, birds, mice, weasels, squirrels, martens, wolverines, porcupines, lynx, foxes, wolves, and bears, all are plenty capable of creating havoc.
I have always felt that it’s best to have a small house to heat with plenty of outbuildings for storage. That way you only heat what you need. Outbuildings can be built out of logs or poles, and covered with thatch, a tent, a tarp, sod with a plastic layer under, or by metal sheeting.

Around 1985, when I was living near Manley Hot Springs, Gary[Oliver’s younger son] sent me some information from the Bureau of Land Management [BLM] about places that were open for settlement. The homesite law was still in effect at that time.
I studied some of the material and a map and decided to look at the area between Fairbanks and Mount McKinley. I got a friend in Fairbanks to fly me over an area that interested me.
Several people had staked out land when the BLM first opened up that area. Quite a few of them had set up tents or shelters, but only three had actually fulfilled all of the requirements to get title to the land.
From the air I only saw one place that was occupied at that time, back from the lake. I was pleased to know I would have at least one neighbor if I decided to homestead there.
Soon after that flight I had to go into the hospital for a week, and I wasn’t sure that I could make it to the prospective homesite. If I didn’t get going by the middle of August, I wouldn’t have a lot of time for stockpiling food, meat, and resources for winter, not to mention constructing a home. I needed to have a house up within a year in order to secure my land claim.
Once released from the hospital I got really busy. Sy Hetherington, an acquaintance in Manley, had a single engine “flying boat” or seaplane, so I chartered him to take me out to the lake. Two loads were enough to bring everything I needed to spend the winter there without resupply.
From the air I chose what looked like the best place to land and get my stuff away from the shore.
The couple living near the lake heard the plane land. They came down to see what was going on. We got acquainted as they helped me unload and carry my stuff to high ground.
It was raining—not heavily, but enough to wet everything. I wouldn’t have chosen to get started in that kind of weather, but I set up my tent, covered everything and had the wood stove going by dark, thanks to the help of my neighbors.
The husband walked around with me as I picked out the place where I wanted to live, staking the corners and blazing the boundaries. Along the way I found a jar and lid nailed to a witness tree [trees that rest at the corners and angles of parcels to mark the boundaries]. There was a note inside written by people who had staked out a trade and manufacturing site. They’d clearly given up on the site because their time to hold the ground was long past.
There was a berm a couple hundred yards back from the end of the lake. It was dryer back there which would keep the mosquito population down. A forest fire had burned through leaving numerous dry, dead trees which I could make use of for building purposes and firewood. I decided to build my house there in a clearing.
I moved all my stuff and set up two tents, one for a storehouse and a smaller one to dwell in. I knew it was going to be a challenge to build a place to live in before the ground froze hard. I wasn’t in the best of health, and winter was quickly approaching.
A TEMPORARY CACHE
I needed a temporary cache where I could put my stuff up out of reach of animals right away. I designed one that was supported by a single tree. I wanted something I could build on the ground, push into position, and then fasten to the tree.
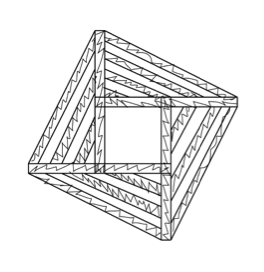
First, I cut the lower limbs off a standing tree to a height of 14 feet. Then I arranged four poles of equal length in a square on the ground around the trunk. I built the platform on the ground with the tree in the center to be lifted into place later. Each pole extended beyond the central square in the direction opposite from the pole across from it, like a pinwheel with the open square in the center. This created a basic frame for the cache platform. The cache platform was about 4 feet square overall. This provided for a fair amount of space even with the tree trunk taking up space in the middle.

I filled in the platform frame by nailing smaller 2 inch poles back and forth across that frame, spaced about 6 to 8 inches apart. I was short of nails, so I didn’t fasten both ends of every pole in place.
I kept the apparatus lightweight, because by that time in my life, my back gave me trouble. I needed to be able to get it into position on my own.
When the platform was ready, I propped it up 4 feet off the ground. It was like a table, with the supporting tree going through its center square-shaped hole. Since the supporting tree trunk was narrower in diameter at 4 feet up than on the ground, there was plenty of room to nail four more small poles, running vertically up the tree trunk, to the inside of the platform’s square opening to add some stability. The drawing below does not show these verticals.
Then I nailed braces at a 45-degree angle from the bottom ends of those verticals to the bottoms of the original four platform poles, about two-thirds or three quarters of the way out. This made the platform more like a hollow tube, rather than a big, wobbly washer sitting around the tree trunk.
To get the thing into position, I put a pole under it on one side, pushed the platform up as far as I could reach, and then propped it there by sticking the pole into the ground at an angle. Then I got a longer pole and did the same thing on the other side, pushing the platform up a little higher.
By working the two poles repeatedly on opposite sides, I raised the platform in small increments. In that way I inched the platform up until it was about 10 feet off the ground.
Then I climbed up and secured a heavy wire around the tree above the platform, with the lower end of the wire attached near the center of the platform. That was enough to take the entire weight of the structure. If you had several wires, you could attach several such “hang wires” to points on the outer edges of the platform for a very stable cache.

I found that wire at an abandoned homesite a couple of miles from mine. The homesteaders had left two or three long snares for wolves. Those big snare wires can hold a lot of weight, so they were perfect for my cache.
Once the platform was in place, I set up the ladder to get stuff on and off it, and that was all there was to it. By putting that cache up in a fairly clear place where the air moved, I had a dry place for storage. The supporting tree’s branches helped protect my items from the elements. I sacrificed some of my stovepipe and tacked metal around the trunk of the tree and around the tops of the vertical support poles so that squirrels couldn’t climb up them. I quickly discovered the squirrels were able to access the platform by jumping through the treetops. Everything on that cache had to be stored in metal or plastic buckets. Eventually I had a couple of buckets hanging underneath the cache, too.
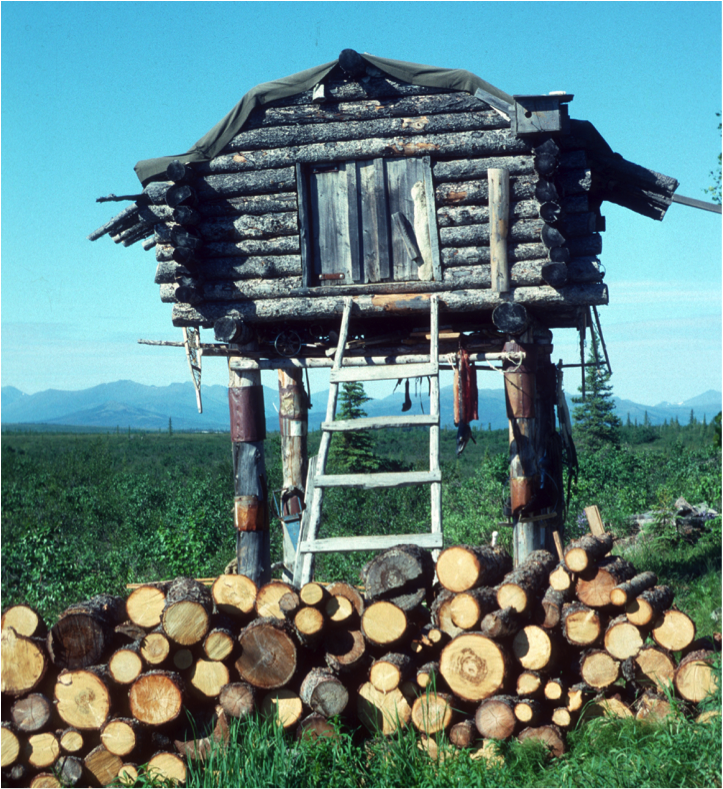
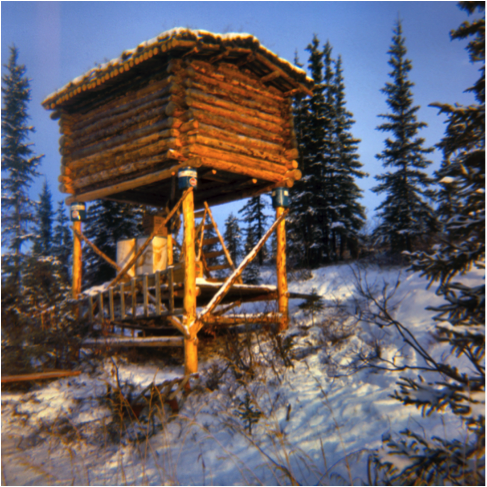
A PLATFORM CACHE
The temporary cache stored my supplies while I could build a more permanent platform cache for my gear and supplies.
I began my cache by topping two trees [likely poplar or birch] that were well positioned to become two of the four posts I needed. The other two posts were tamarack because its wood lasts a long time. I didn’t hew the sapwood off because that would take too much of my scarce time. The sapwood is not the most structurally sound part of the wood, but there isn’t a lot of it on a large, slow-growing tamarack anyway.
Next, I dug into the earth to set the tamarack posts. The depth was almost the full length of my round-nosed shovel, about 4-1/2 feet deep. At the bottom the holes were roughly the width of the shovel blade, and wider at the top.
I built a fire and charred the entire length of the wood that was going to be in the ground. Charring wood preserves wood against rot. I also painted it with stove enamel to help preserve the wood. That seemed to work. Those legs lasted a long time.
I set the tamarack posts in the holes, large end down, eyeballing them to line them up. Then I tamped the soil with a small pole as I backfilled the post holes. I rocked the post back and forth while filling the first half of the hole to compress the dirt. While filling the second half of the posthole I usually mix rocks with the dirt. Here I didn’t have rocks, so I used chunks of tamarack. The purpose is to stabilize the posts using rigid materials to fill the upper part of the holes around the posts. Finally, I piled more soil around the base of each post to shed water.
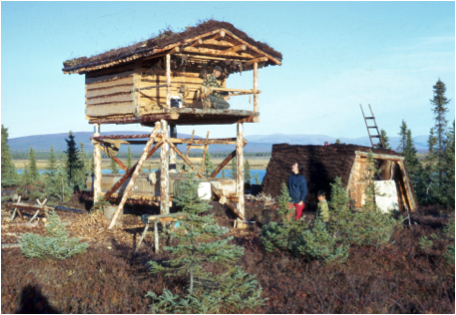
Across the top of the four support posts I built a platform out of poles on which I could store my supplies. I also set my pup tent up on the platform so that I could safely sleep away from roaming bears until my house could be built. [A pup tent is a small triangular tent, especially one with an upright support pole at either end and room for one or two people.] The bears had been using a trail along the edge of the lake, so I went out and peed along it here and there just to warn critters I was there. Of course, I had to renew the scent markings regularly.
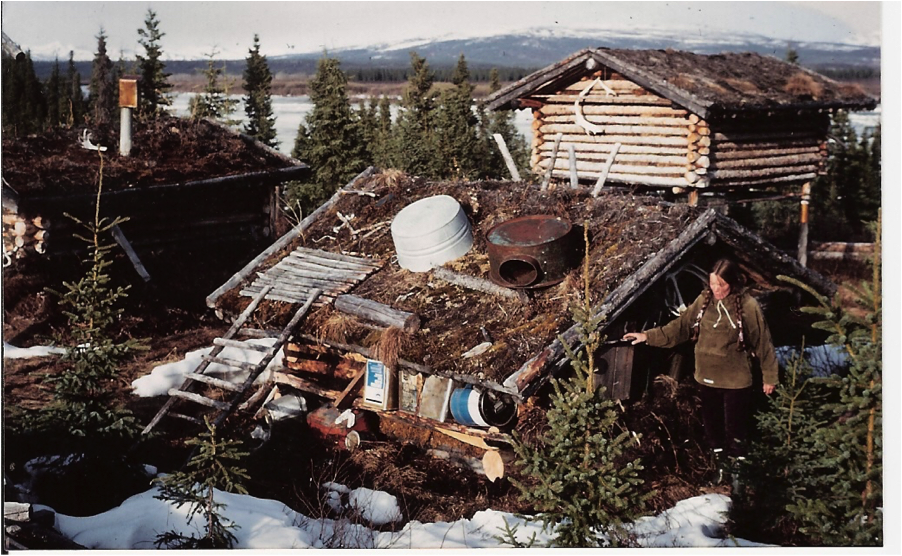
Once I had a secure cache platform in place, I needed to build a house that would satisfy the Bureau of Land Management. I would be given ownership of this 5 acre property if I “proved up” on it by building a house and living there.I built a 10 by 12-foot sod iglu [Iglu is an Inupiaq word referring to a sod home] to live in for that first winter. [See more in Oliver’s essay on “How to Build a Sod House.”]
I got through the first winter, but my cache wasn’t entirely secure. The two dead trees I’d use for supports weren’t deeply rooted. I needed to set a supporting sister post next to each dead tree to provide additional support. I also wrapped flattened out metal cans around each post to prevent mice from climbing up into the cache.
A few years later my daughter, Dorene, came for a visit. I insisted she sleep on the cache platform. There wasn’t room in my tiny iglu and the cache provided protection from the black bear I had seen recently in the neighborhood.
Dorene and I decided to build a cabin atop the platform. I had been collecting and stacking small poles that had been killed by a forest fire not far from my property. We peeled and trimmed them. With some of the larger poles we built the frame for a cache building. Each side of the frame at the top was larger than the floor of the cache. We wanted the walls to slope inward from top to bottom to be protected from the worst of the rain. Even in driving grain, that slight slant kept water out.
We then nailed many of these small poles to that cache frame, standing them upright and close together, alternating thick ends up and down to keep the vertical poles from angling off at a slant as they would if all of the big ends were placed together.
We covered the roof with a plastic tarp knowing this would not last, but protected the storage for now. Later on I flew in some crimped aluminum sheeting and made a sturdier covering.
I thought the cache was high enough, but it took some experience for me to realize how far a big grizzly bear can reach. To be safe, the floor of a cache needs to be 10 ½ feet above the ground.
Once while I was away from my place, a bear climbed on a low brace that was nailed to a support post close to the ground. The brace broke and released a wire that ran up inside the cache to keep the outward-sloping door from swinging open. The bear could step on the brace’s stub end and reach up high enough to get his claws inside the door and so get on up into the cache. As far as that bear was concerned, the cache was his, and he made himself at home, eating a lot and leaving a huge mess.
The system I have now relies on a large turnbuckle to hold the door shut—and it’s well above the reach of a bear.
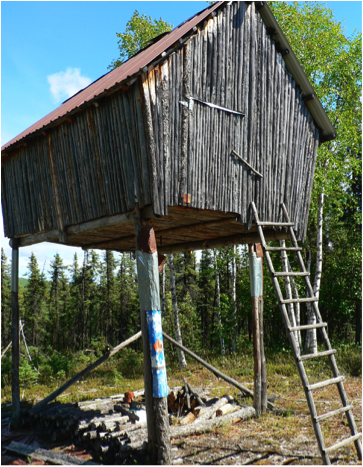
When I want to go into the cache, I use a stick to push up the end of the turnbuckle so that it’s vertical. The door swings open by itself, and I put the ladder in place at the doorway. When I’m done and have climbed back down, I lean the ladder back, swing it around to catch the edge of the door and use the ladder to push the door shut. Then I climb back up and close the turnbuckle. Finally I remove the ladder to prevent it’s use by any interested animals.
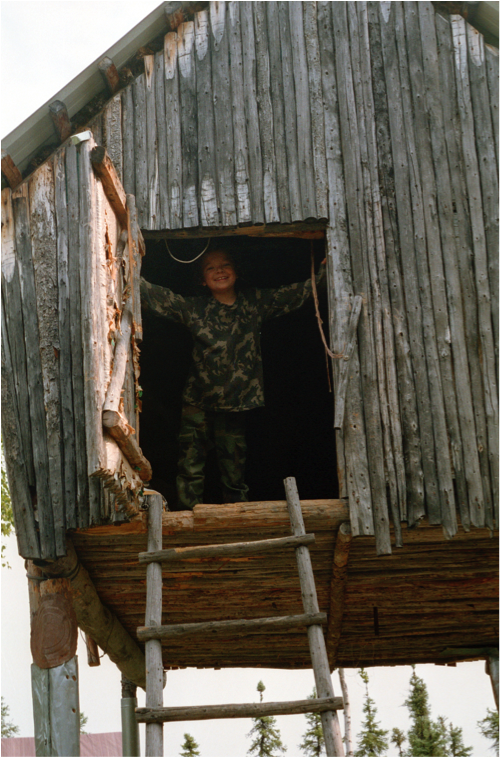
I’ve also made caches with a door in the bottom. That kind of door slides under cleats along both sides of the opening. The cleats prevent the door from being pushed up by bears. With the door opening out of the way I have more wall space and more floor space around the cache’s edges. I can climb into the cache, slide the door closed, and stand on it.
In many ways I prefer the door in the floor setup. It’s sometimes hard to seal around a door in a side wall. There have been times when I was working inside a cache with the wall door open for light, only to have wind catch the door and flap it around violently. The door in the floor prevents that.
My Double Cache
My double cache building has a woodshed on one side, where I store wood and large packages of nails—items that need to be kept dry.
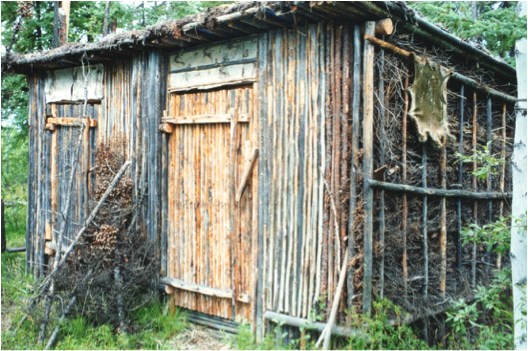
Image courtesy of Dorene Cameron Schiro
On the other side there’s a pantry and refrigerated area. I’ve set three barrels and a six-gallon plastic container into the ground, into the frost. Each container has its own lid. They are all covered by a couple of big doors. You open one door to get into the two barrels and the other to access the plastic container and the third barrel.
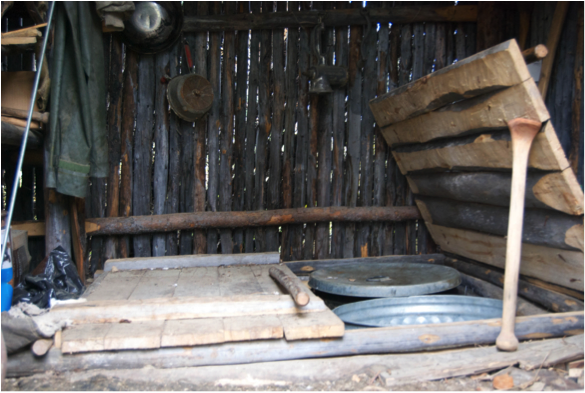
Image from the Dammann Collection
Anything I want to keep cool, like butter and moose fat, goes into these underground containers. It’s cool in the summer, yet in the fall I can store things there that I don’t want to freeze.
To help keep away bears, I line the barrels with plastic bags. Then I put insulating material, like a big bag full of grass, on top of the stored food inside the barrels. With the plastic, the grass, the regular lids on top of the barrels, and then the double doors, I’ve never had bears get into the barrels, although they’ve certainly taken interest in the building.
For additional protection against bears, I cut small trees, 2-1/2 to 3 inches in diameter, and stand them up all around the building, branches and all. I fasten them to the eaves of the building with wire.
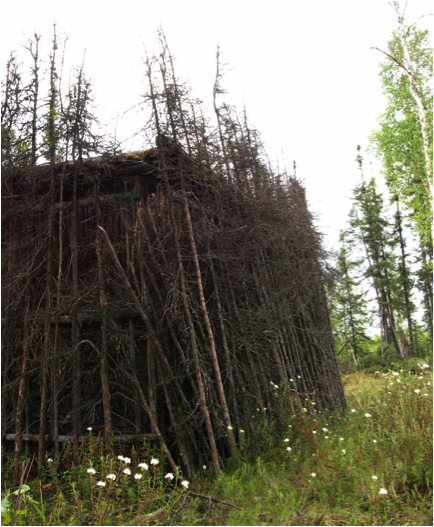
Image from the Dammann collection
The bears seem to think the tree-covered building is a thick stand of spruce, and that it would be difficult for them to climb over it.
Before I added the trees, they climbed on that building, ripped the sod off, and tore the roof. Since I started lashing on the trees, I haven’t had a bear get up there. They don’t even try. This underground cache is probably the most secure storage I have from predators.
Workshop cache
I have another outbuilding that’s one-and-a-half stories tall. In the lower part is my blacksmith shop, with tools and miscellaneous items.
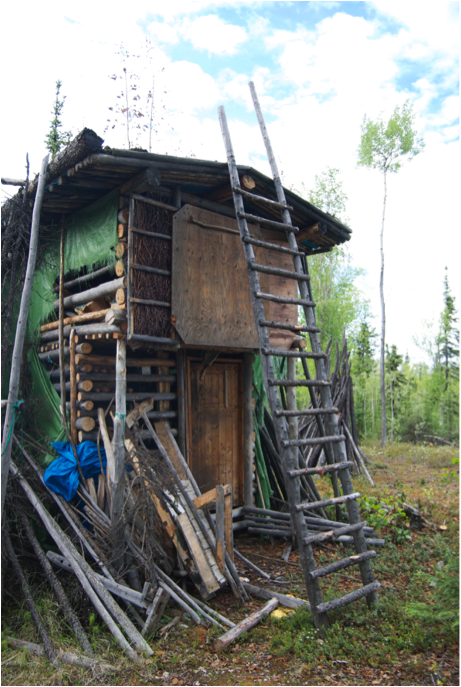
Image from the Dammann collection
The upper story is larger than the lower one, overhanging it in front and back. A bear can reach to the upper story, but it can’t get in there with no purchase for its feet.
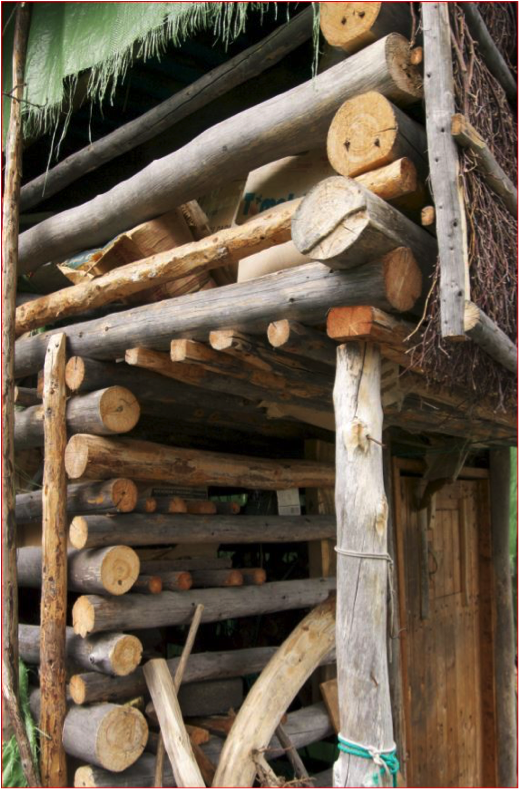
Image from the Dammann collection
Quonset structure
I use a Quonset hut for seasoning the split birch wood that I save for blacksmithing. That’s what I burn when I’m using my stove as a forge.
In the summertime I keep my honey bucket [portable toilet] in the Quonset, too. When I empty it, I rinse it out and then put a layer of grass in the bottom. That makes the dumping easier, and the chlorophyll in the grass neutralizes the odor.
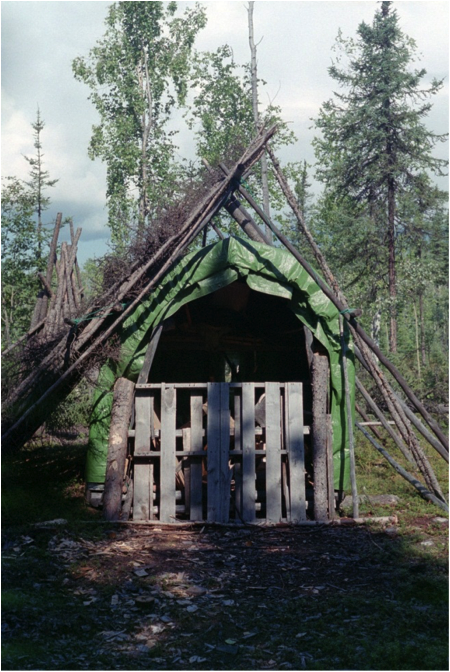
Image by Devta Khalsa
DOGHOUSES
“A person’s got no purpose being out if he hasn’t got a dog.”
–Oliver Cameron
I had some large dogs over the years. I built their houses out of logs. I’d lay large logs on the ground for a foundation. A second layer of logs stacked on top of the first which raised the log house just enough to allow for a cool, mosquito-free area underneath it for the dog to burrow into. With this two-story doghouse, the dog could be cool on the ground during summer, or comfortably housed in full shelter inside the log house.
Dogs don’t like to be inside all of the time. They like to also spend time on the roof of their houses. I started adding a platform on top of the flat roof. It was just big enough for a resting dog. After it rained and the dog yard was muddy, the dogs had a place outside yet away from the mud.
Later on, I started building a second story to my doghouses by building a simple A-frame on top of the log house. The upper roof was thatched. This attic was a dry place to store extra grass for the dog’s bed. That way it was always handy when I needed to freshen their bedding. When my dog would see me raking out the old hay and putting in new hay, he couldn’t wait. He’d try to wiggle in even before I got it all in place.
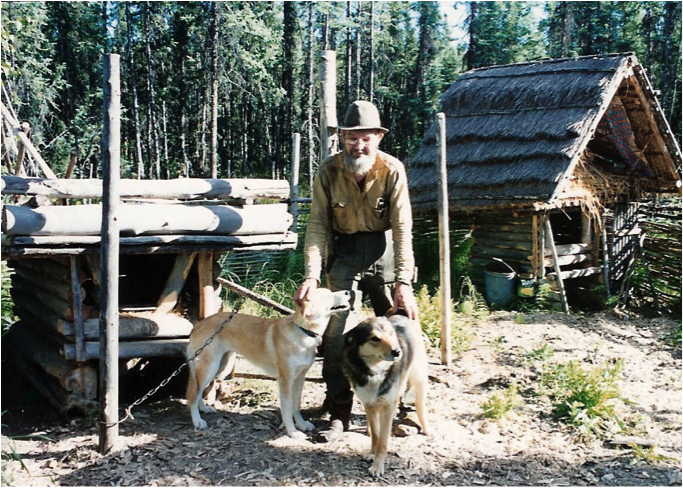
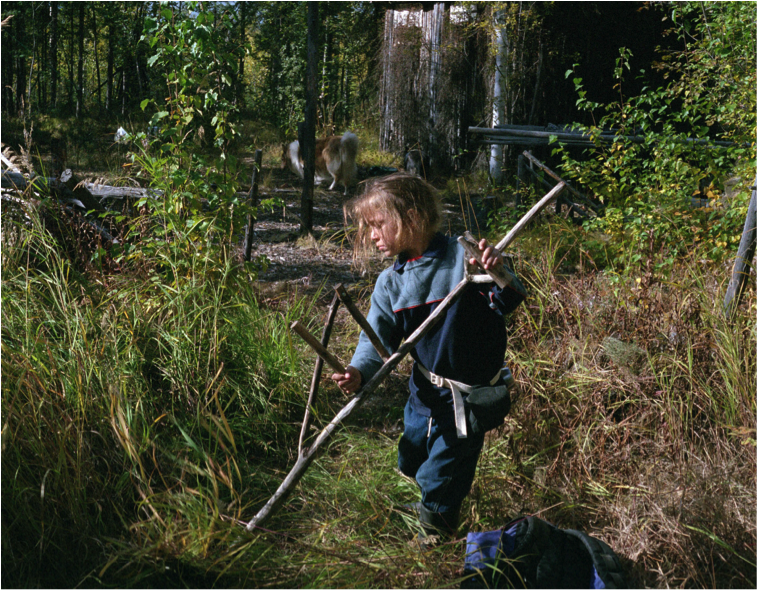
Image by Dorene Cameron Schiro
When I had several dogs, I didn’t let them run loose, especially before I fenced my garden. By the time I built the fence, I usually had only one dog at a time. My single dog almost always ran loose. Porcupines can be hazardous for loose dogs, but for some reason they didn’t give my dogs many problems. Some dogs learned to bark at porcupines, but otherwise left them alone. Some dogs never learned and ended up with quills in their nose.
I staked my dogs using a chain attached to a large pole driven into the ground. To protect the pole from wearing thin by the constantly moving ring on the end of the chain, I cut a couple of slots in the top of a five-gallon can and slid it over the base of the stake. The ring rode on the outside of that.
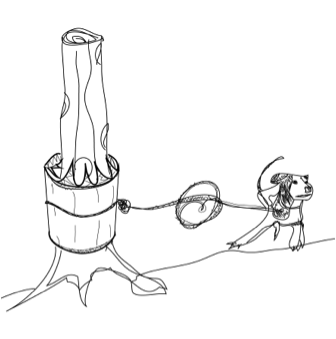
If you have a doghouse with a flat roof where your dog can sit, you have to fasten your chain and set your stake in such a way that the chain doesn’t choke him if he jumps off the far side of the roof.
MAKING AND USING THATCH
Thatched roofs are made from straw, reeds, sedge, heather, rushes, or other vegetation. The thatch is bundled and trimmed to help rainwater run off instead of soaking into the roof.
I experimented with thatch at my lake homesite on two of my outbuildings—a doghouse and a privy. I also used it to make prefabricated panels to use as cladding.
For my thatch, I used tall, ordinary grass that only grows where there is adequate water. I found it in a semi-swampy area by a beaver dam. The stems were quite stiff and close together, so I cut them off close to the ground with a small, sharp single-bit axe. I used a fork that I made to rake most of the leaves off the stalks, one handful at a time. Then I bundled and trimmed the thatch. How I arranged and attached the thatch depended on what I was making.

One of the outbuildings where I used a thatched roof was a doghouse. For that I trimmed the thatch bundles straight across with a big knife.
I’d put on a row of bundles, fasten them down to a crosspiece, and then build up another row on top of that, a little higher up. This second layer overlapped the crosspiece that held the first layer, and so on up to the ridge pole of the doghouse. After the last course, I used some birch bark over the peak. That made a very good roof for the doghouse.
I also used thatch on the outhouse at my place on the lake.
That was a squat privy—there was no seat. There was a pit covered by a deck with a hole cut in the center of it. The deck was made of aspen saplings. The opening in the center was about 8 inches wide and 16 inches long—wide enough for ease of use, but not so wide that you have to spread your feet to squat over it. I flattened off some of the deck poles on each side of the hole so there was a level place for your feet. The hole had a cover made from hand-split boards. It fit between the two leveled-off foot pads.
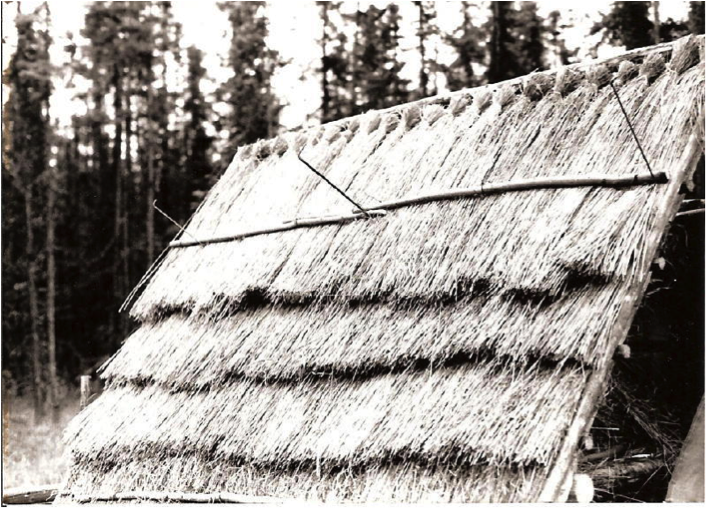
To the deck I attached uprights made of saplings, 18 inches apart. The uprights were dug 1 foot into the ground. The tops were long enough that I could bend them over and lash or twist them together, making a framework where I could attach the thatch.
I arranged the uprights in a semi-circle, with a wide gap left open on the lee side for the entrance. I tied slightly smaller saplings running horizontally around the uprights to form a curving basketwork. These horizontal saplings were where I would attach my thatch. I put the first horizontal sapling about 8 inches from the ground. Then I spaced the others so that each thatch course would overlap half of the previous layer.
Thatched Privy. Image from the collection of Dorene Cameron Schiro
To fasten the thatch to the sapling framework, I used thin twine wound onto a fairly long net needle. I tied one end of the twine to a horizontal sapling, wrapped it around a handful of grass, shoved the needle in and around the crosspiece, and pulled it back out. Then I ran the needle back under the twine to make a half-hitch and from thereput on the next handful of grass.
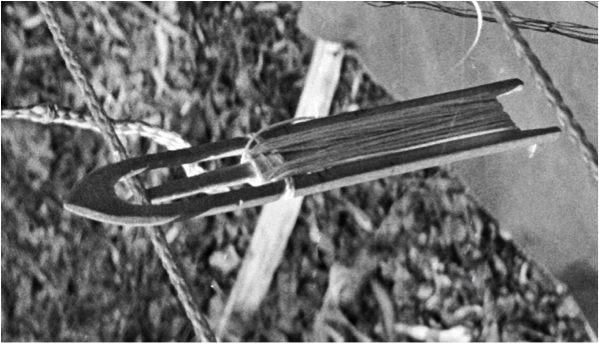
One of Oliver’s net needles with twine.
Image by Curt Madison
The bundles were round, 5 inches or so in diameter. After they were attached, I straightened them so that they were thick enough to break the wind. They shed the rain quite well except at the very top, where it was too flat. I put big pieces of birch bark up there to help shed water. The whole outhouse was only 6 feet wide. There was no door.
I was in a hurry when I did all this because it was already August by the time I got out to the lake and started from scratch. Under BLM [Bureau of Land Management, Department of the Interior] regulations for homesites, I only had a year to build both a habitable house and an outhouse. The most I was hoping for was to get by for the winter.
I didn’t think that either the house or the outhouse would pass inspection. I figured I’d have to improve things in order to satisfy them. But the man who came out was easy to please. He commented that he’d seen something similar to my privy in Japan.
I have also made prefabricated panels of thatching to use as cladding on the sides of buildings. I laid the ends of several bundles of grass onto a split willow pole. The other half of the split pole I then laid on top of the bundles, like a sandwich. I’d poke my net needle down through the grass, go around the lower pole, and bring it back up around the poles. I’d move my needle along a few inches and make another stitch through the grass and around the poles, so that the ends of the grass got pinched between those two split poles.
The panels might be 3 or 4 feet wide, a size I could handle easily. I’d drive a couple of nails in the side of the building and hang a panel over the nails. Then I’d make another panel and hang it up above that, overlapping the lower one.
Those are some of the uses I’ve made of thatch.