Part I: Building a Homesite
Heating with Wood
FIREWOOD
Getting Firewood
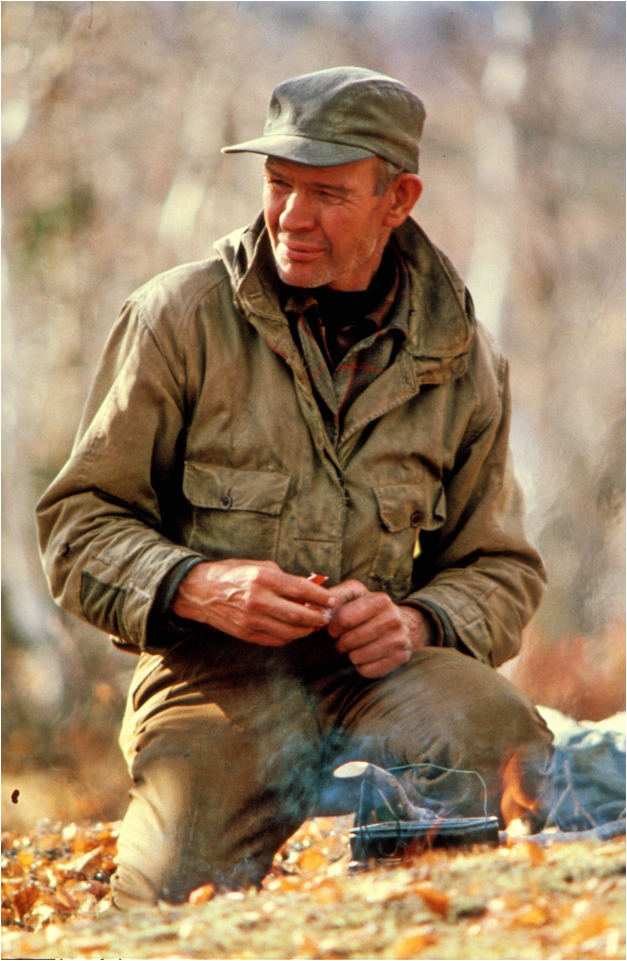
Whenever I’m getting firewood, I choose trees that are dead, or very nearly so. I’d rather not cut a thriving green tree, regardless of what type it is.
I think Nature has been wise and economical. Prime trees that are good for building usually aren’t as available and prevalent as trees that are less suitable for building but are suitable for use as firewood.
When we were threatened by a forest fire, the state sent out a building protection crew. The crew came and asked me what I thought they should do as far as protecting my place. I told them, “That’s your business. You’re more qualified to say. Do what you think is best.”
They proceeded to cut all the trees that were close to my buildings. Then they put a pump in the lake, strung a whole bunch of hose, and put tripods up with sprinklers on them around the buildings. They had another hose with a nozzle that they could use to squirt water onto anything.
They were very businesslike about it, but I was somewhat uncomfortable. I didn’t like to have all those trees cut, exposing my place to the wind, but that’s the way life goes. They were doing what was necessary. If they put it off until the fire actually got there, it would be too late. There wouldn’t be time.
As a result of their work, I had quite a bit of firewood lying around. They had roughly limbed it but were in a hurry. I trimmed and stacked those poles onto tripods, sorting them into categories: definitely firewood, definitely building material, and marginal material. I figured that I’d probably make most of the marginal stuff into firewood, because I didn’t have any major building planned right away.
By the next year, those stacks of wood were well dried. The marginal wood made for very good firewood. Ordinarily, I wouldn’t have had that kind of an opportunity.
A couple of other people who lived around the lake made it a point to cut and stack their firewood in the summertime, but it seemed like I always had too much do at that time of year. I preferred to cut mine as I needed it, in the wintertime.
I enjoyed going out to get wood in the wintertime. I’d take a dog and a sled, get a load or two of wood, and have enough firewood for several days. For me, that worked out better than trying to cut firewood and have it stacked in a pile.
I often used a dog to skid larger logs out of the woods. I’d peel the log on the bottom so it would slip along the ground easier, and then attach a fairly heavy wire to the smaller end. The wire had a small loop on one end and the other end was wrapped around the middle of a birch stick. The wire was stiff enough that I could push the loop through the snow under the log and then run the stick through it to make a toggle.
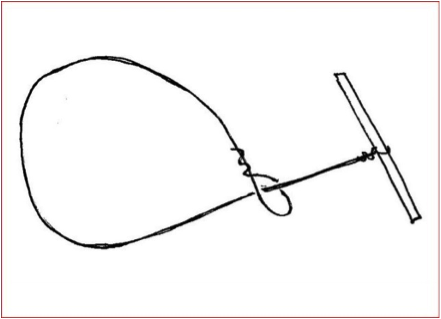
I’d straddle the log with the toggle about even with my crotch and lift the small end of the log. I’d lift with my legs, instead of using my back. I’d give a voice command, and the dog would lunge ahead as far as he could. Then I’d take a step and repeat. If the snow was soft, we might gain only a few feet at a time until we finally got out to the trail.
Types of wood
The main firewood around the lake was spruce. It makes a hot, quick fire and is well suited for burning in the stove to heat my house.
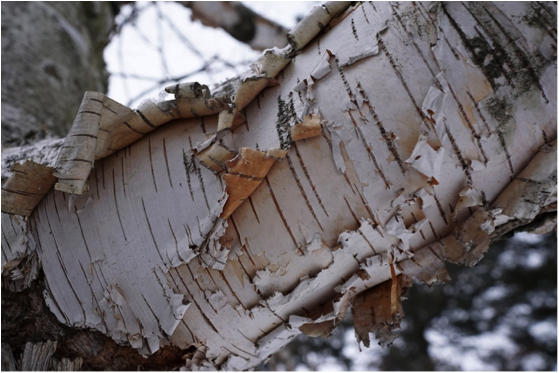
There were just a few birch trees around my place. I like to use the seasoned birch in my blacksmithing forge. Hardwoods burn down to coals which hold the heat well for blacksmithing. Softwoods, though much more available, burn down more quickly and then turn to ashes, which maintain the heat less well. Birch must be split soon after cutting, or it will decay in the waterproof envelope made by the bark. I keep some split birch drying and seasoning in a Quonset-like hut.
When the firefighters cleared my place, I told them to leave the birch standing. I liked seeing them. But whenever a birch tree goes down or I have occasion to cut one, I save it.
Poplar is another hardwood, but it isn’t as dense as birch.
Alder is good firewood, too. It makes pretty good coals, but it burns quite a bit faster and doesn’t hold the fire for as long as birch does. Alder soon rots when it dies. I usually use that conky [fungus-decayed] wood for smoking fish or meat—that and willow.
Where I grew up in Washington State there were lots of alders that we got firewood permits to cut. When I was about eight years old, my dad bought me a boy’s ax. It had a 2-1/4 pound head and a 27-inch handle. I used it to fell those alder trees, which I then cut into 4-foot lengths with a buck saw. I’d cut a couple of trees on the way home from school. My dad and my uncle would borrow a truck from a neighbor, load that wood up, and haul it home. That variety of alder is nice stuff to cut with an ax. It’s soft when it’s green, and the chips split out well. It’s fun to split that kind of alder into kindling.
Our alder here in Alaska is quite hard wood, very useful for making door handles, or tool handles. I could usually find just the curve, or the crotch shape I wanted by walking out through the alder bushes. I’ve also made alder salad forks, spoons, and a sourdough pot.
Another use for alder bark is as a red dye for hides. You can scrape the outside bark off the younger alder trees, then shave the red inner bark to soak or boil. You spread those soaked inner shavings thickly on the hide. Fold the hide over to absorb the dye for several hours. Then remove the shavings and spread it out to dry. You don’t really need a mordant [a dye fixer] with it.
Tamarack is an oily wood and burns well. It is the hardest, densest wood in my area. It ignites quickly and makes a fast, hot fire. I cut them mainly for kindling to get a fire going.
Most of the tamarack around my place is so twisted that it’s not much use for anything other than firewood. I do occasionally use the whole trunk piece for making posts. And if I come across a length of tree that isn’t too twisted, I save it to make sleds runners. It’s hard, and it slides better than any other wood we have, especially when the weather is really cold, and the ice crystals are like sand.
I have saved pieces of seasoned birch and poplar for one of my lifetime goals that I haven’t yet accomplished. I’ve wanted to try to live in a lavvu. [A lavvu is a temporary dwelling used by the Sami people of northern Scandinavia. It has a design similar to a Native American tipi but is less vertical and more stable in high winds.] I did make one, but I’ve never been really free to try living in it for any length of time.
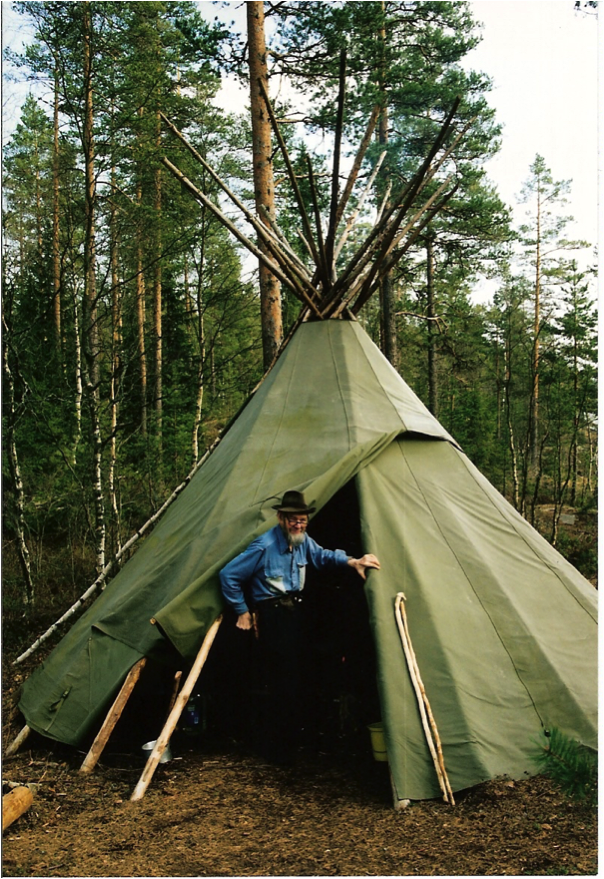
Those temporary shelters have been used by so many people throughout history that it’s one of the experiences I wanted to have, and I still do, but right now I’m not counting on much of anything. [Oliver was largely bedridden at the time of these interviews.]
Spruce tends to throw a lot of sparks, so I saved my birch and poplar which throw fewer sparks for the open fire in the middle of the lavvu. Also, the smoke is not as toxic as the spruce smoke. Willow doesn’t have a very toxic smoke either.
MAKING FIRE
Knowing the skills to build a fire under a variety of conditions is essential when one lives out. Wood available to burn can be wet, or unseasoned, fire-starter material can be scarce, temperatures can be freezingly cold, turning your fingers numb.
The essential ingredients for fire are fuel, heat, and oxygen. In my area the source of fuel is wood gathered from the surrounding trees, heat is initially provided by a match or lighter, and oxygen is made available by laying out the kindling sticks to allow air flow. The kindling is stacked closely enough together to prevent breeze from blowing through them too strongly and putting the fire out, but with enough space to allow air to feed the fire.
It is best to carry a lighter and a candle with you whenever you are out. I also carry birch bark for the fire starter.
Fuzz Sticks
Get plenty of kindling ready before you start to make fire. Fuzz sticks are useful if you can find wood appropriate for making them. A fuzz stick is a length of wood shaved or cut into a fringe of thin curls. It allows damp wood to be used to start a fire when dry tinder is not available. At home, I always keep several fuzz sticks tucked in the rafters of my house, though I don’t need to use them very often.
I do enjoy making a fuzz stick. It’s fun. I use a drawing motion. I know I shouldn’t be encouraging people to whittle towards themselves, but you have more control and power to pull that knife than you have when you push it away from you. I hold the end of the stick against my bent knee. My knee is solid, so I can hold the knife with the blade facing me and start making shavings. This can be dangerous if you didn’t grow up learning how to handle a knife.
One time I was traveling with my friend Shield Downey. He told me that once, when he was young, he was making a fuzz stick with his mother’s butcher knife. He had never practiced pulling his knife toward him, and he stabbed himself in the belly. It was a very serious wound, and they were afraid he was going to die. That experience impressed him so much that he never cut towards himself again.
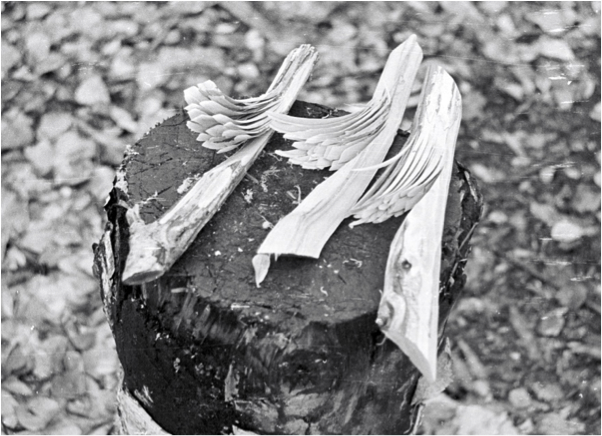
Standing the stick of kindling vertically on a stump while shaving downward is a safer way. Holding the top of the stick with one hand, cut a shaving maybe 1/16 of an inch thick leaving it attached at the bottom. By flicking your knife when you get to the bottom of the cut, the thin shaving flares out. Cut a series of shavings right next to each other, leaving all attached to the stick of kindling at the bottom of each cut.
You need to choose the right wood for a fuzz stick. Some woods are too brittle. You need wood that is flexible and straight grained. Then it’s easy enough to make those shavings.
Starting the Fire
To prepare your fire, gather dry firewood, some larger pieces to burn once the fire gets going and some smaller twigs or pieces that will burn more easily when the fire is first lit.
When it’s been raining, look for the driest wood you can find. Break off dead branches, look under trees or in any area that is protected from the rain or has the opportunity to dry out quickly after the rain.
Once your fire is burning hotly even damp pieces of wood will burn if they are placed near the edge of the fire to begin drying out and warming up in advance of the time they are needed as the fuel.
Find a place sheltered from wind to build your fire. However, be sure nothing near-by will be burned unintentionally. A ring of rocks around a fire, or a bare patch of dirt are ideal.
Shield your match or candle from the wind to light it. You can do this by stacking some of the firewood you have collected. Or with items from your camp, or even with your hand or your body if the breeze is light.
Place your match or candle under birch bark, fuzz sticks, or tiny dry twigs held closely together to light them. Then add kindling followed by larger pieces of wood until a fire is burning brightly. Control the size and heat of your fire by the amount of wood you add and the type of wood. Some wood burns more quickly than others. Allow adequate air flow through the pieces of wood when you want the fire to burn hotly. Stack the wood more compactly together once it’s burning nicely and you want to maintain a steady heat. Just be careful to not smother the fire completely.
Never leave your fire unattended and watch for flying sparks that could damage your tent or start a fire in dry tinder nearby.
When you are ready to put your fire out, be sure to not leave any hot embers that could start a new fire. Soaking any remaining embers with water or snow will ensure it is out.
Other Fire-starters
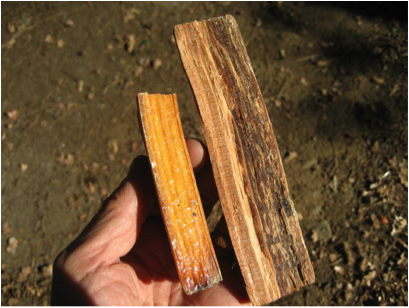
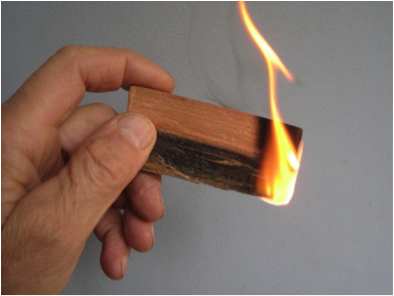
Other useful fire-starters can be found in the woods as well. When a tree bends enough, due to windstorms or heavy snow loads, it will stretch on one side, causing a small crack in the trunk. In that split there will sometimes be strips of pitch. That’s called “wind shake” in a tree. When I find that pitchy wood, I cut it into small sticks and use it to get the kindling burning. After birch bark, it’s the second-best thing to start a fire. The pitch ignites easily.
I’ve also used wood that has streaks in it and smells like turpentine. When I was 10 or 12 years old and was helping my father dig out stumps, we’d sometimes find areas that were just black with pitch. We always saved them for starting a fire in a cook stove. They’d light up like a candle when touched with a match.
The loggers used to call that “trading wood.” It’s a vulgar term. If a logger wanted the favors of the cook, he would collect that kind of wood and bring it to her, so she could start her fires easily.
It also has a lot of impregnation of oil, and won’t rot easily, either. [In the southeastern United States, they called it “lighard.” They’d use it for fence posts since it wouldn’t rot.]
Lighting Fire with A Bow Drill
There may be an occasion when one gets caught out without any matches. One of the basic skills that will give you confidence is how to make a bow drill for starting a fire.
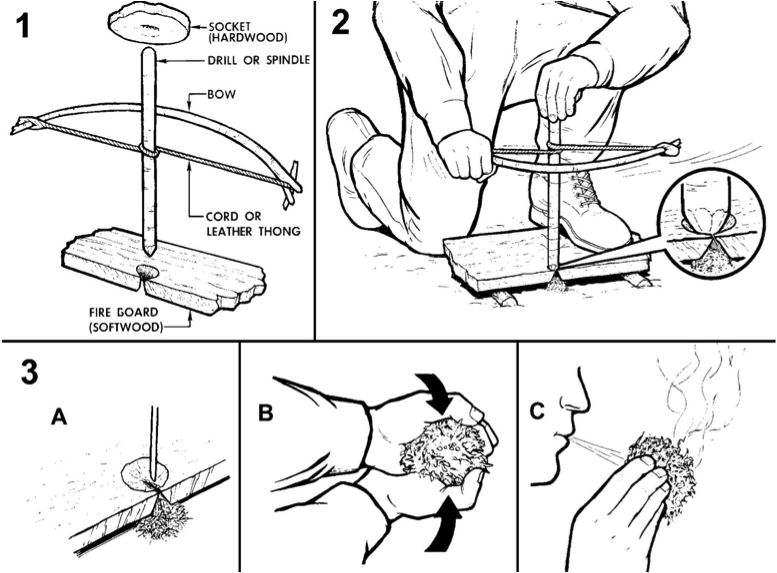
If you’re among some pretty good-sized trees and have a pocket saw, you can cut a dead branch close to the tree. The underneath side of that branch will have some hardwood in it that you can use as your socket or hand-holder.
Cut a block for your hand-holder and make a hole in it for the top of your spindle. The hardwood will support the wear of the spindle stick turning against it. You can likely get enough wood from the rest of the branch to make the spindle and the bow. Find a dry piece of softer wood to notch into with your bow drill. As you drill into the fire-board, that wood will become hot and start to smolder. The friction generates enough heat to light birch bark or dry grass, or wind shake into flame. Blow gently on the tiny fire until it is flaming brightly and continue to add small twigs or kindling.
You can even make a fire with wood that’s not completely dry. If you twirl your spindle in that notch on your fireboard, the heat from the friction will eventually dry it out in there.
Keeping Matches Dry
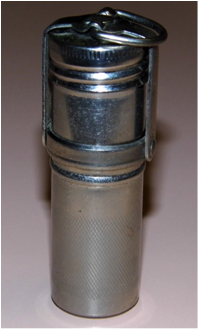
In the case of an emergency fire where you have matches but you’ve gotten caught out in cold and wet, the biggest danger is your hands becoming so numb that you can’t hold the match. I’ve been in that situation a few times. I store my matches in a [waterproof] container that I can open even when my fingers are numb, such as a Marble’s match safe.
Fires at Home
My house is heated by a wood burning stove. To light that fire, I’d put a coil of birch bark just inside the draft, stack some kindling on it, and above that lay some easy burning wood like tamarack or spruce. Then I’d open the stovepipe damper, light the birch bark, put the cover on the door, and pull the draft can out. Pretty soon the stove would be a-jumping or starting to roar. When I could see flames through a little hole alongside the damper, I knew it was time to shut things down a bit.
My house is not very cold in the morning; it stays warm all night, and I usually don’t worry about trying to keep a fire at night. [Oliver lived in a semi-subterranean dwelling. For more information and illustrations of this home, please see the essay on “How to Build a Sod Home.”]
I have an easy time collecting kindling and bark. A forest fire went through my area long ago, and there are a lot of birch staubs [a small protrusion of a tree root or stump] there just held up by the bark, with the inside all rotten. I can go out any time, break one of those staubs off, and cut it down the edge to strip the bark off. I leave that dead pulp and bring in the bark. The bark curls up, stacking nicely, one piece inside the other. When I run low, I just go get another coil of it from the staubs.